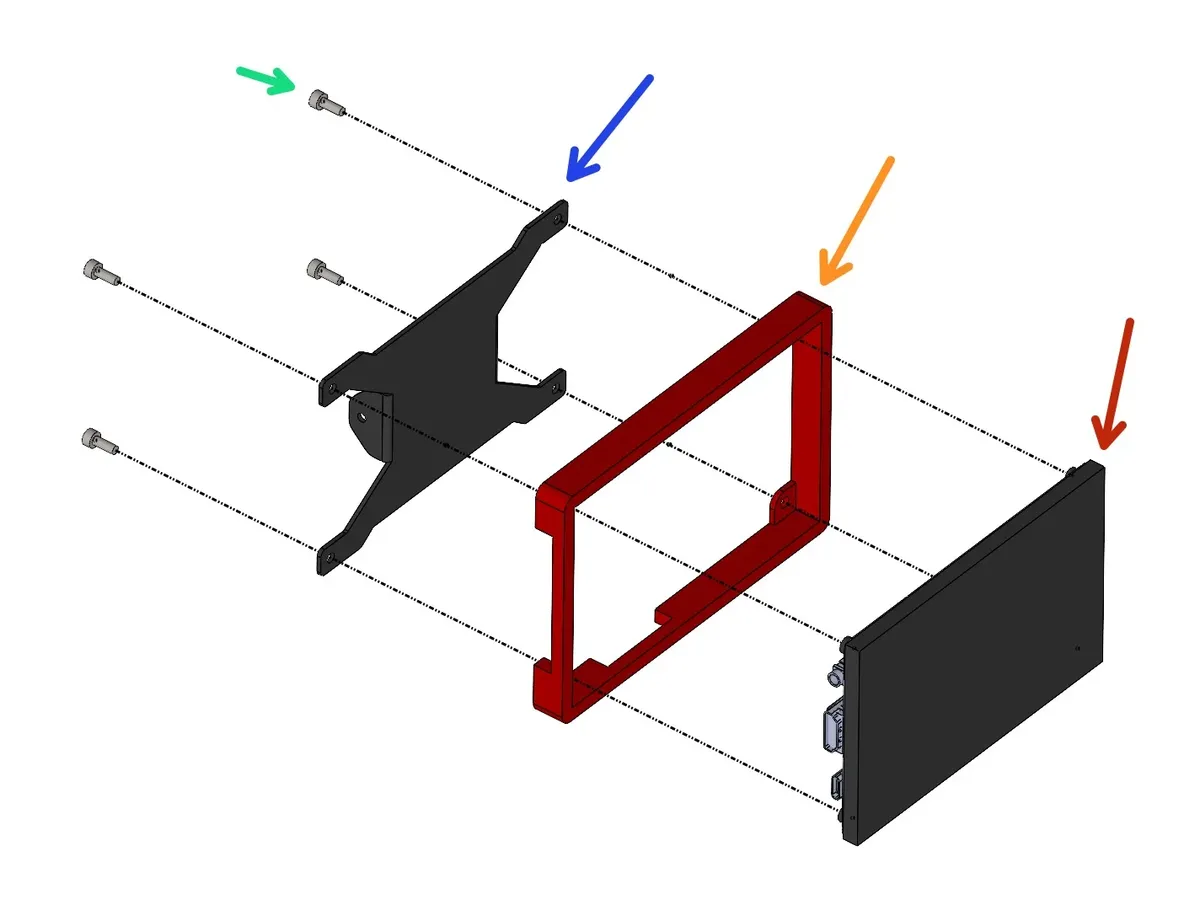
Note: Build the touch screen and case assembly as shown.
M3 x 8mm Bolt
Metal Mount
3D Printed Case
HDMI 5 Touch Screen Display
Loading comments…
Step 2 Swivel Mechanism
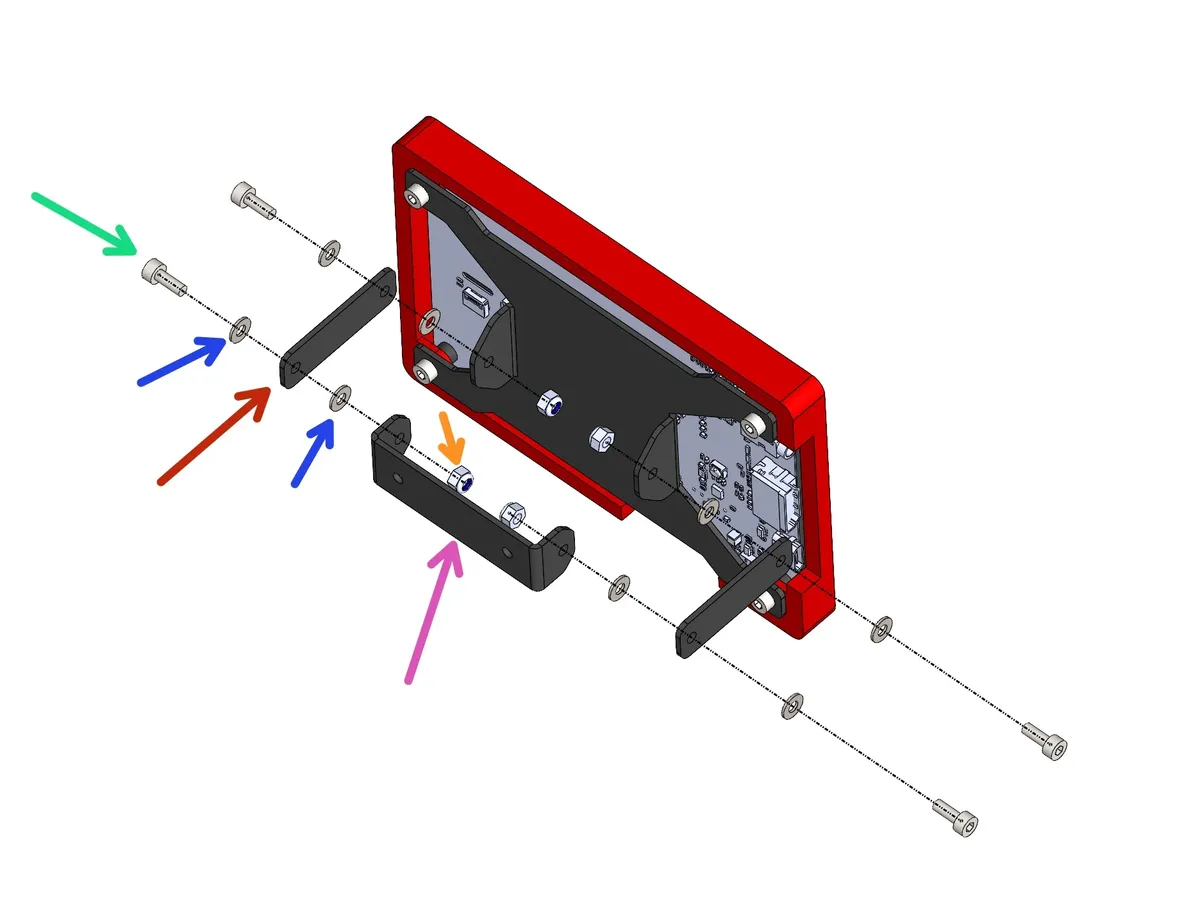
Note: Build the swivelling mechanism as shown:
M3 x 8mm Bolt
M3 Washer
Connecting Bracket
Mounting Bracket
M3 Nyloc Nut
Loading comments…
Step 3 Mounting The Display
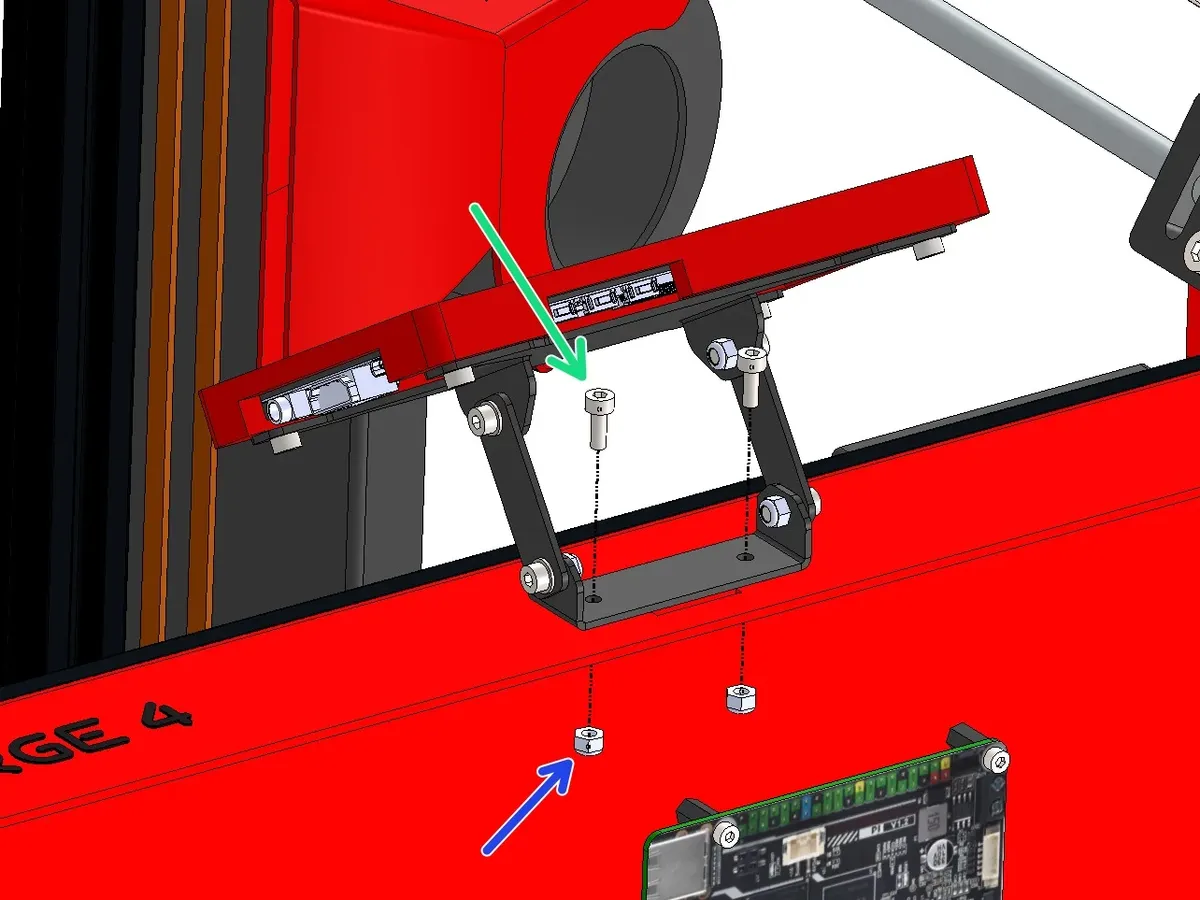
Note: Mount the display onto the base as shown:
M3 x 8mm Bolt
M3 Nyloc Nut
Loading comments…
Step 4 Display Wiring - HDMI
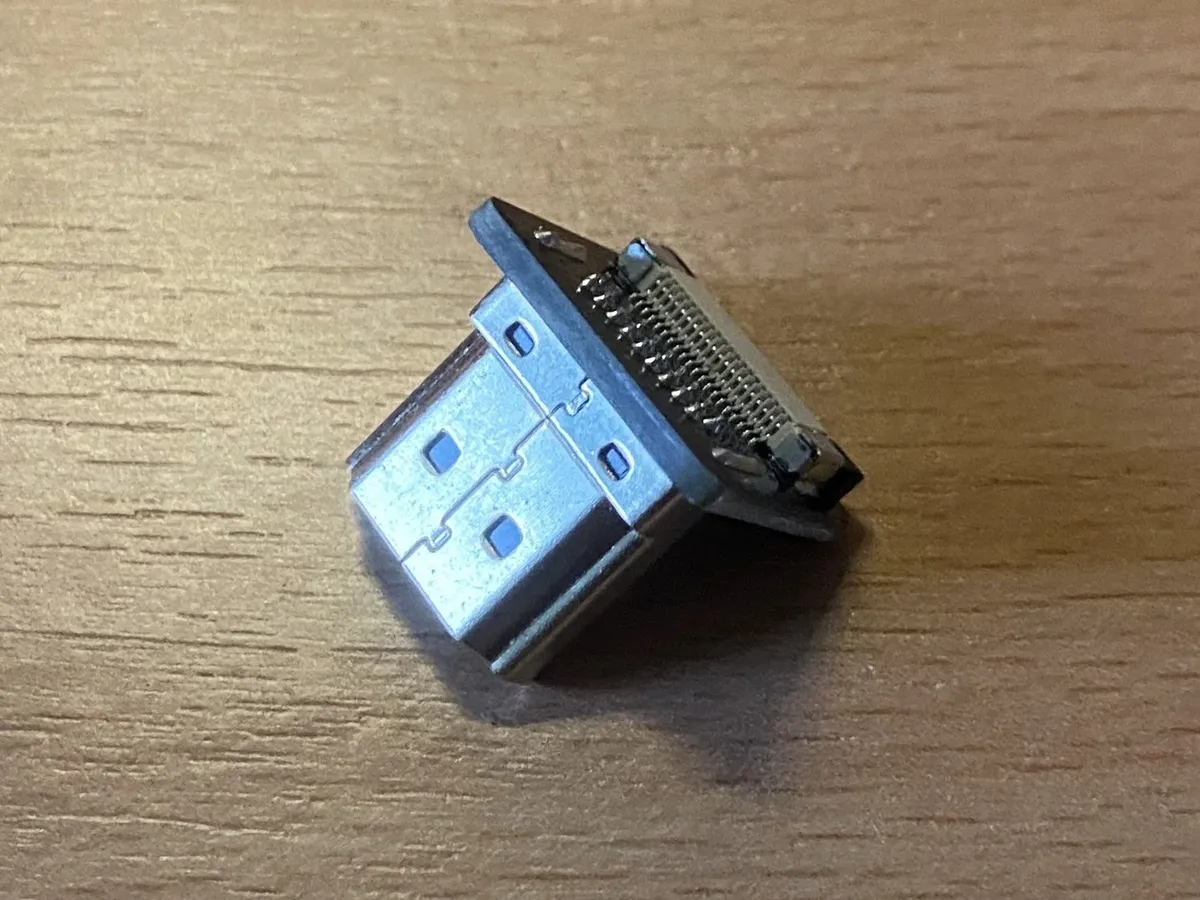
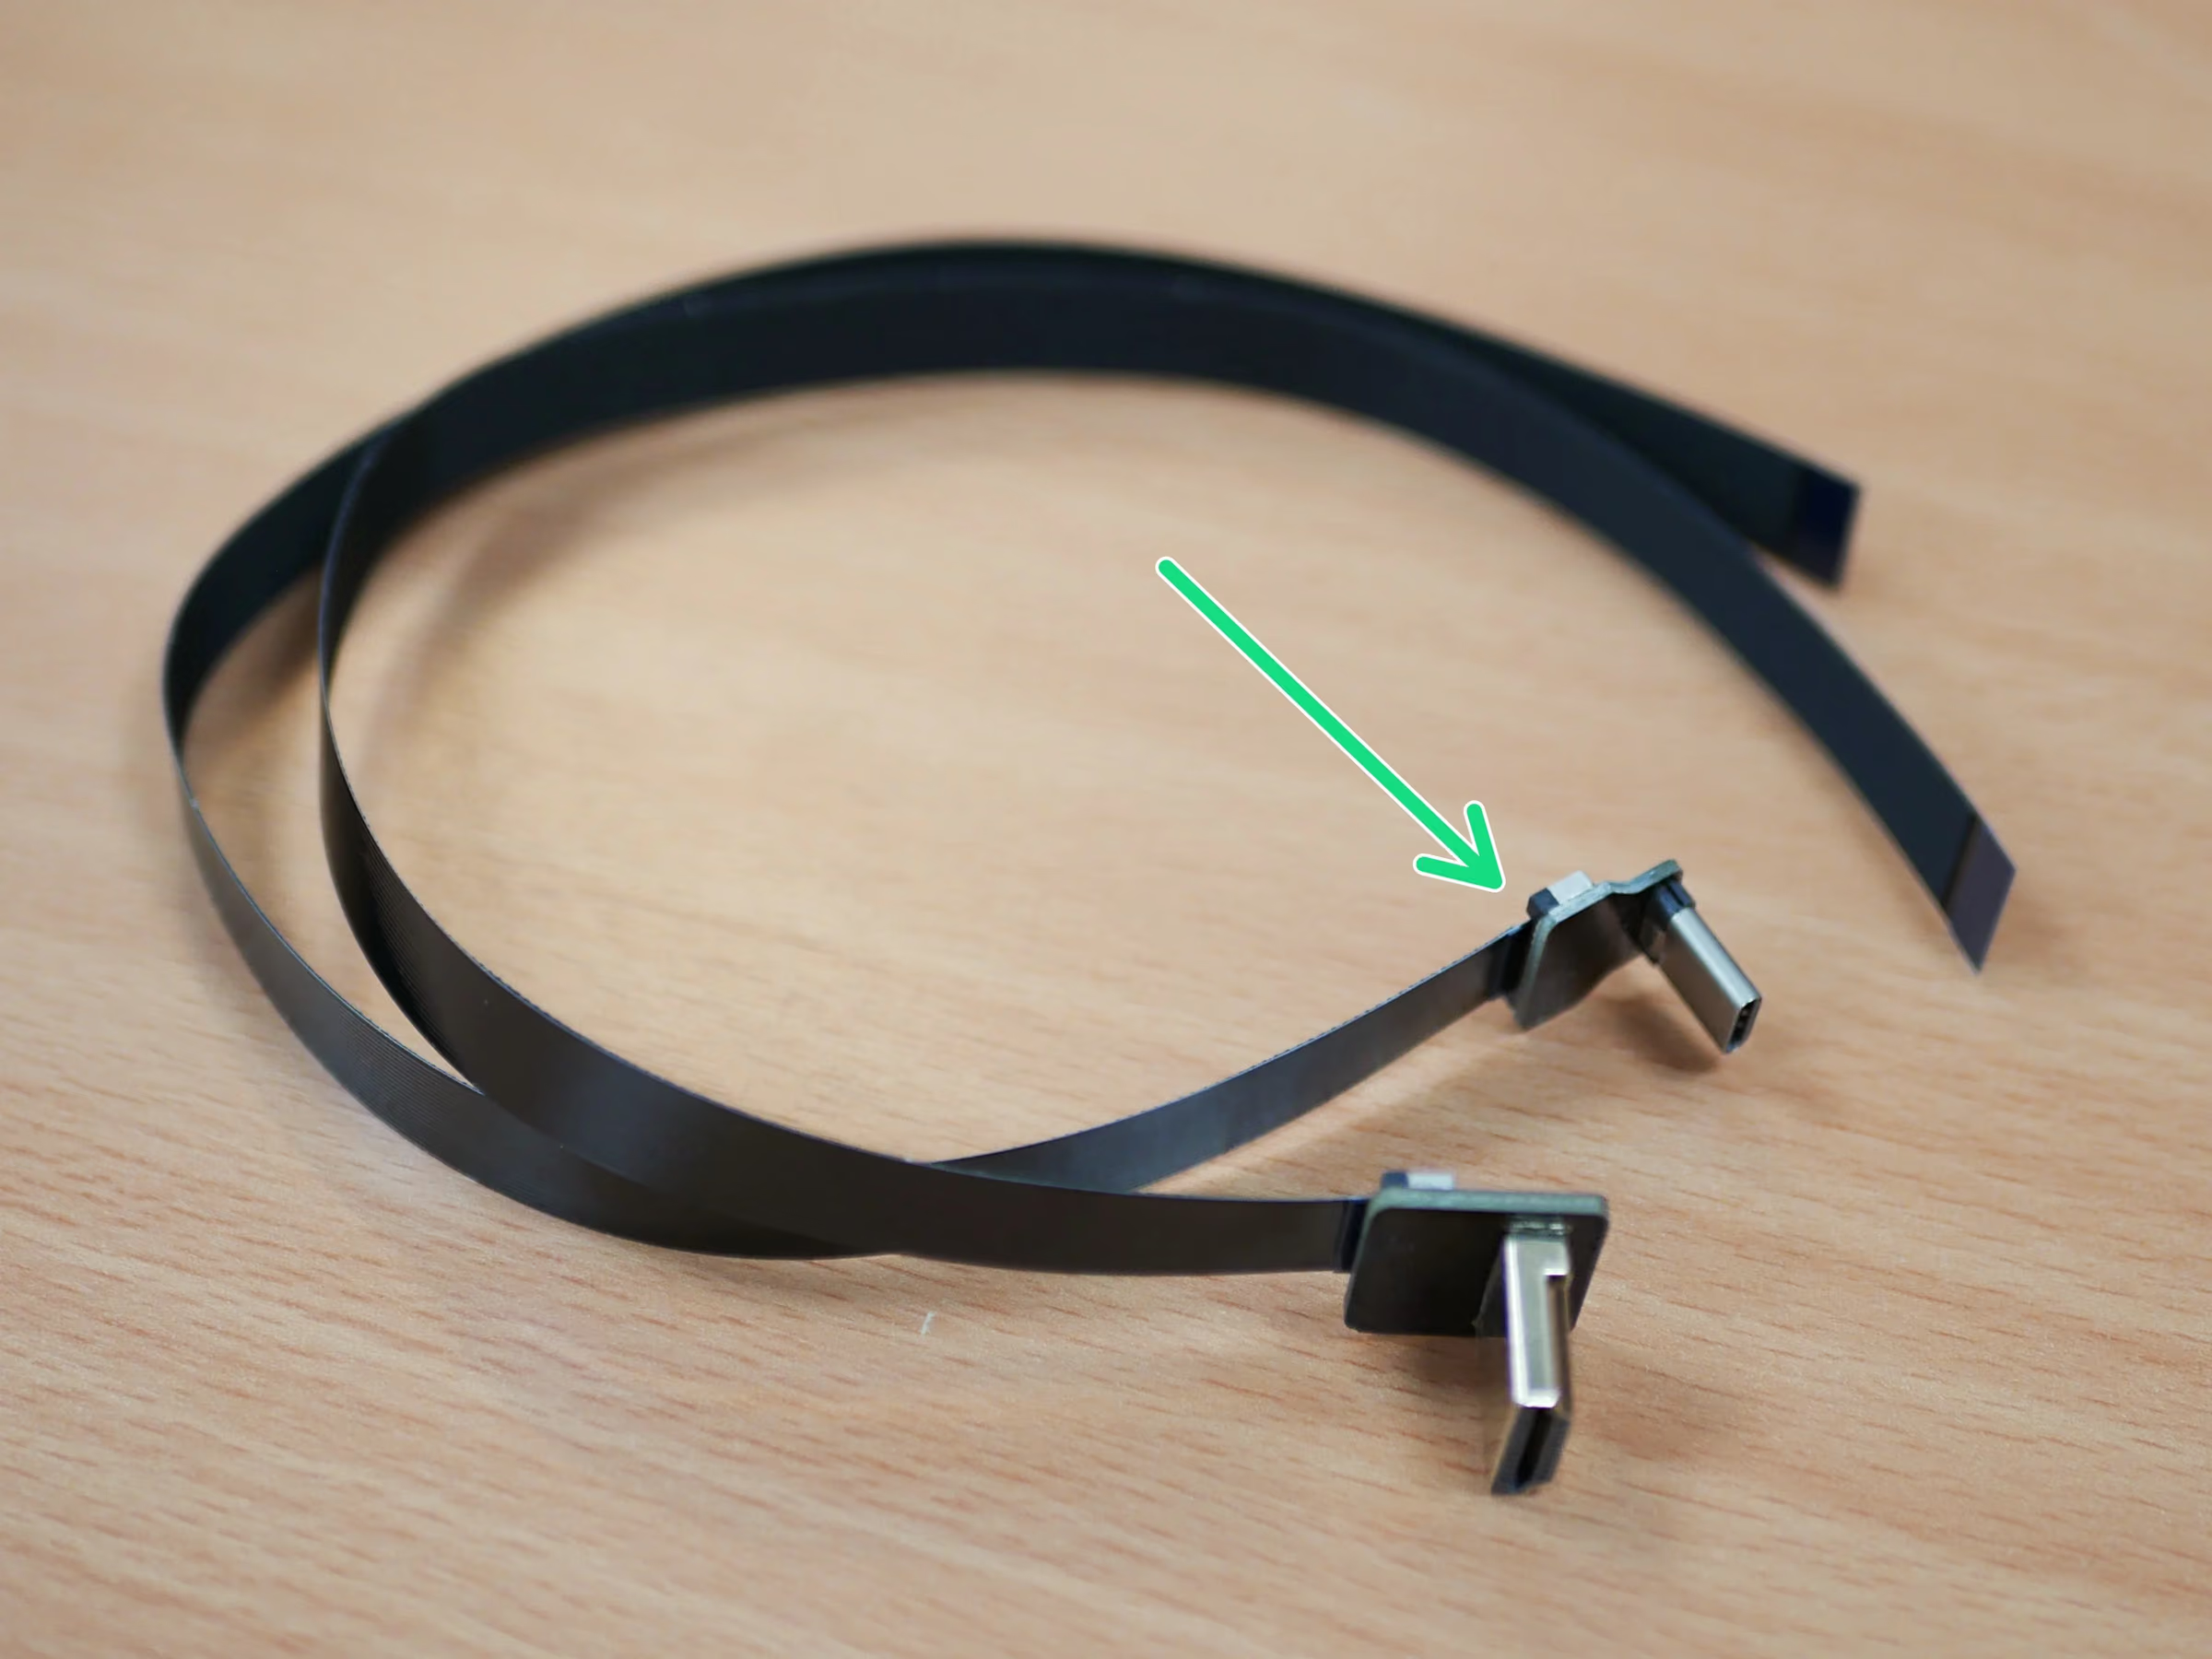
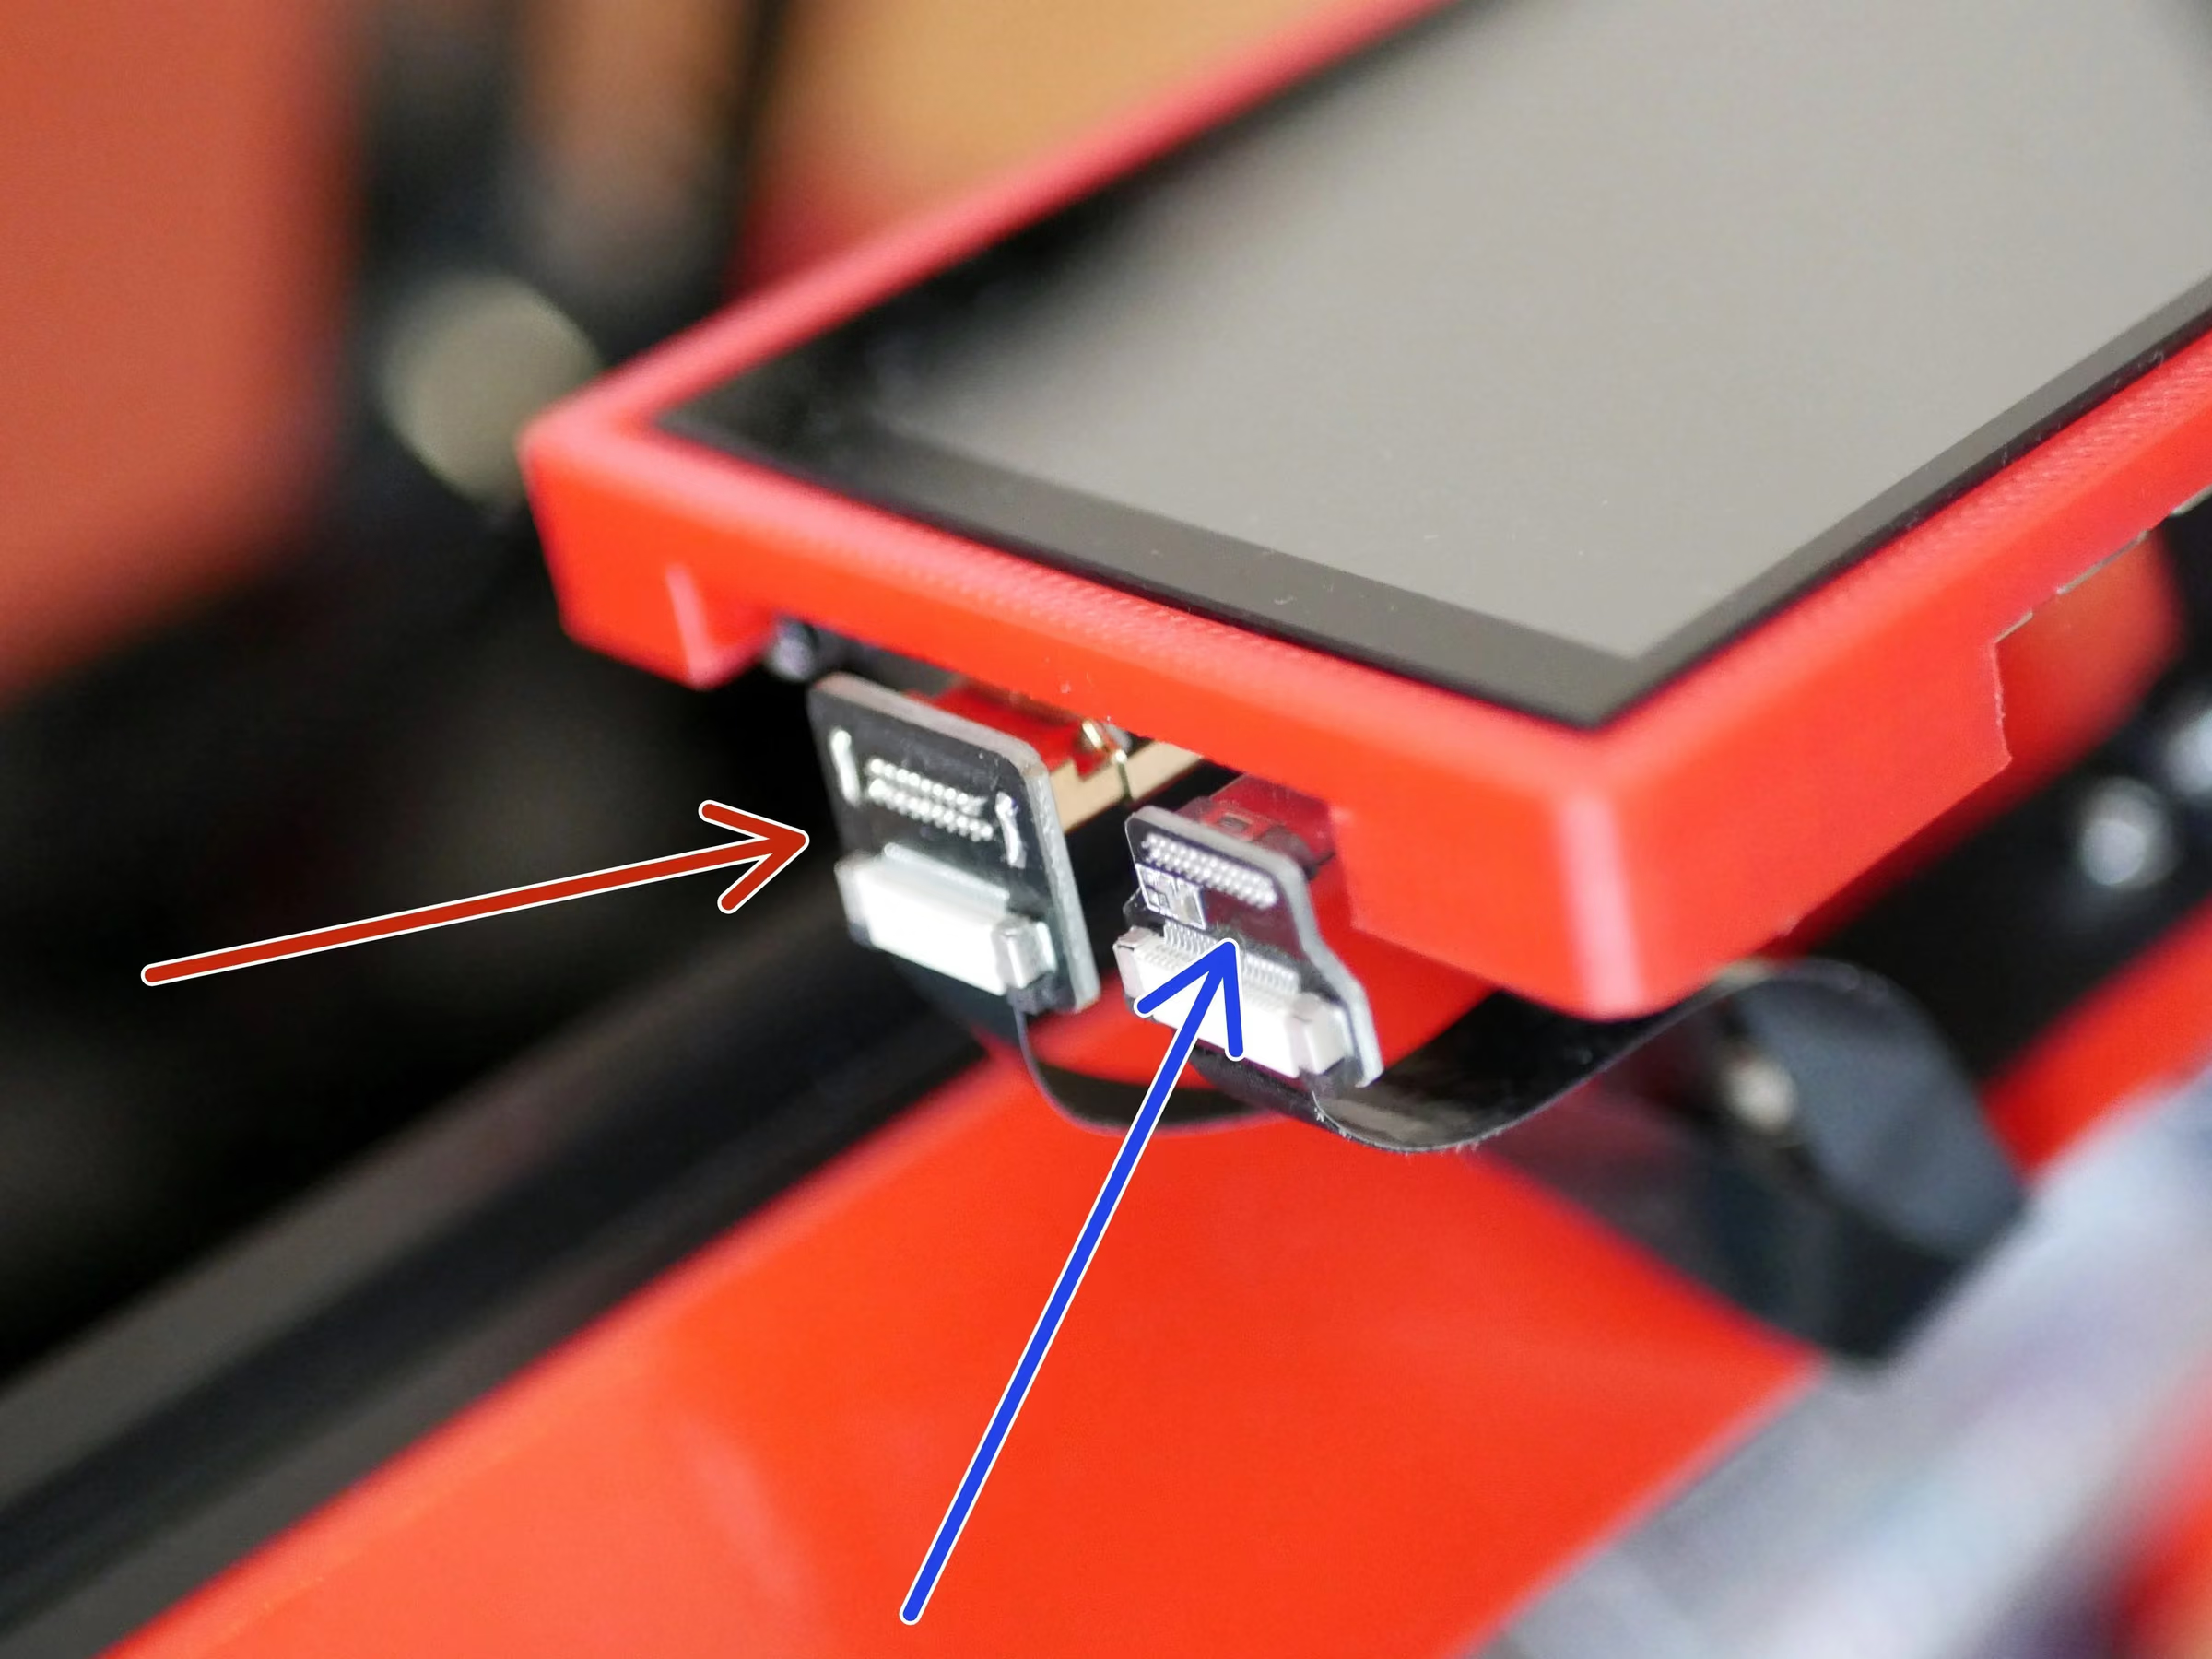
Note: Connect one of the ribbon cables to the HDMI connector.
Do this by carefully pulling the black tabs here out.
Next push the ribbon cable in, with the pin side facing up.
Push the black tabs back in to hold the ribbon cable in place. It's important to make sure the cable is seated straight and with none of the pins showing.
Loading comments…
Step 5 Display Wiring - USB C
Connect the other ribbon cable to the USB C connector in the same manner.
Loading comments…
Step 6 Display Wiring cont.
Note: Connect the cables to the display ports as shown.
HDMI
USB C
Feed the free ends of the ribbon cable in through the slit on the base.
Loading comments…
Step 7 Pi Side Cnnectors
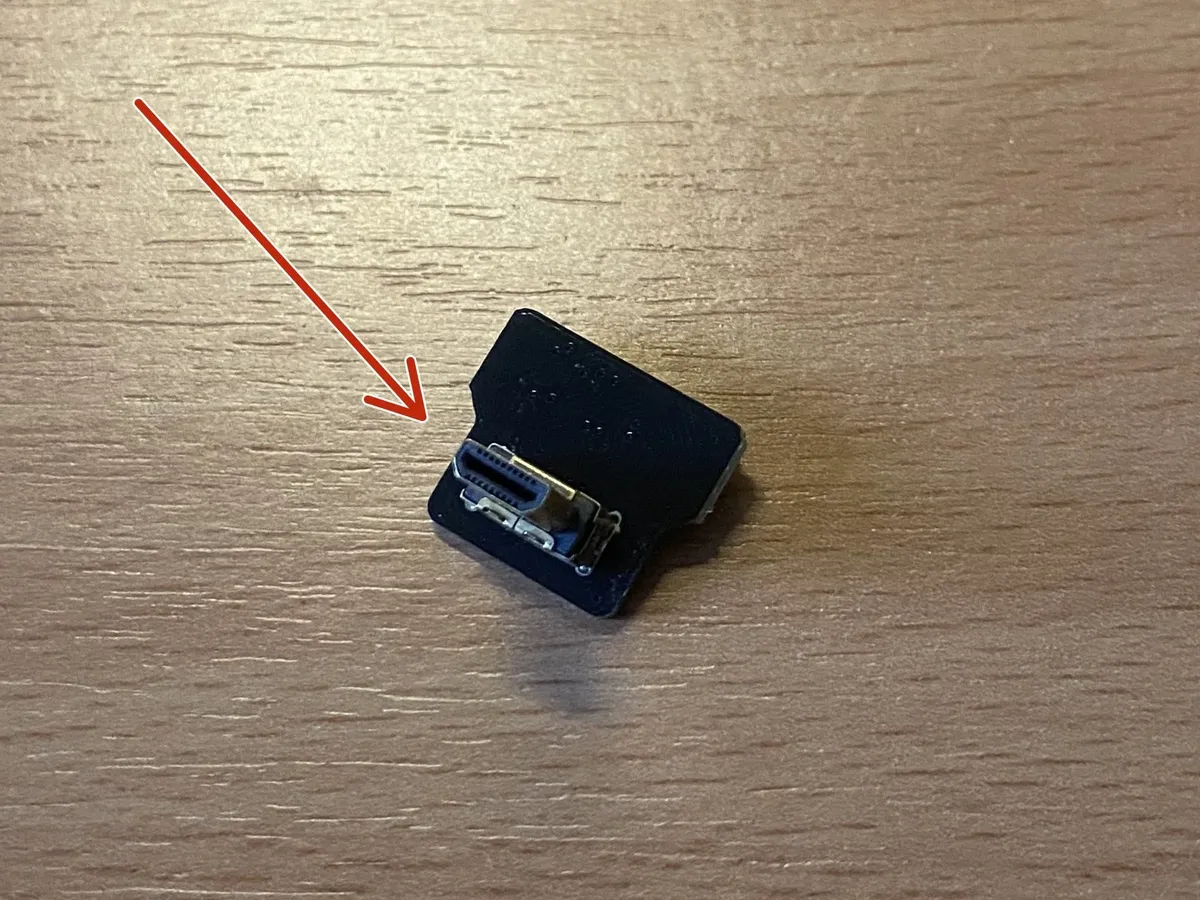
Fix to the other side of the HDMI connectors ribbon cable the Micro HDMI connector.
Fix to the other side of the USB C connectors ribbon cable the USB A connector.
Caution: Connecting these the wrong way round will result in damage to the display and/or Pi board.
Loading comments…
Step 8 Wiring to the BTT Pi
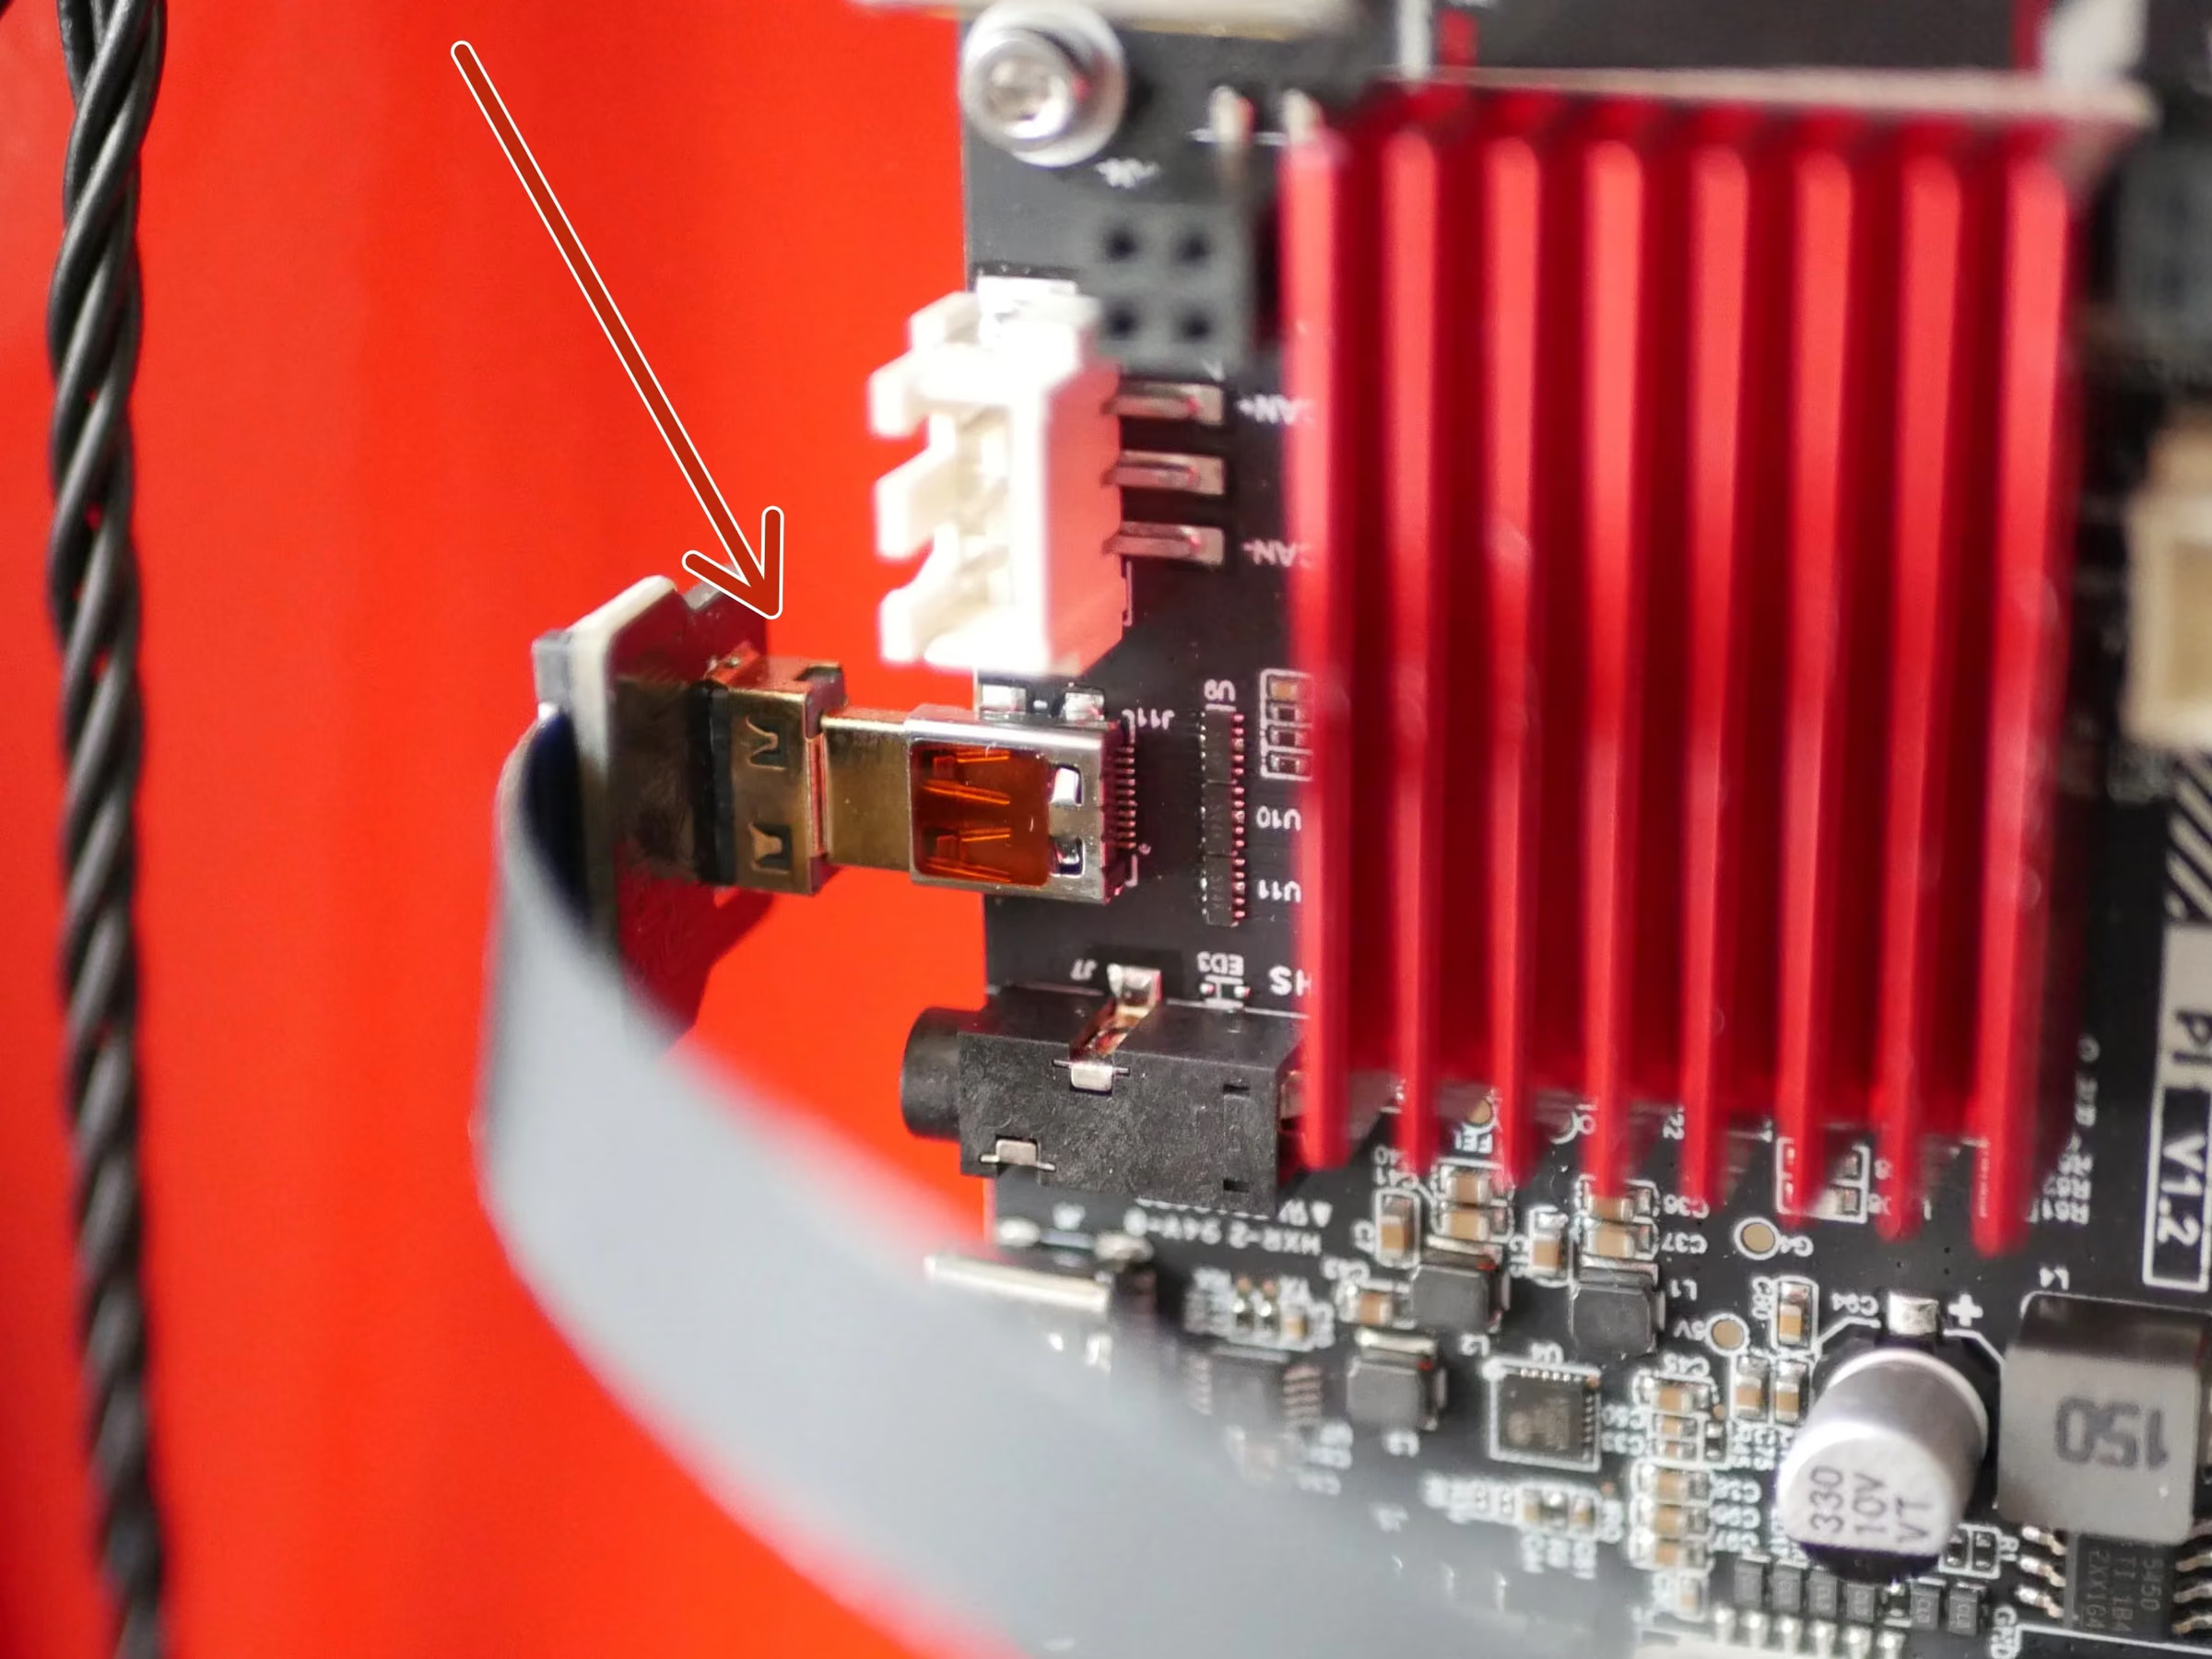
Plug the micro HDMI connector to the port on the side of the BTT Pi.
Plug the USB connector to a USB port on the BTT Pi (or USB hub if building the 4.2)
Loading comments…
Step 9 Using the Display
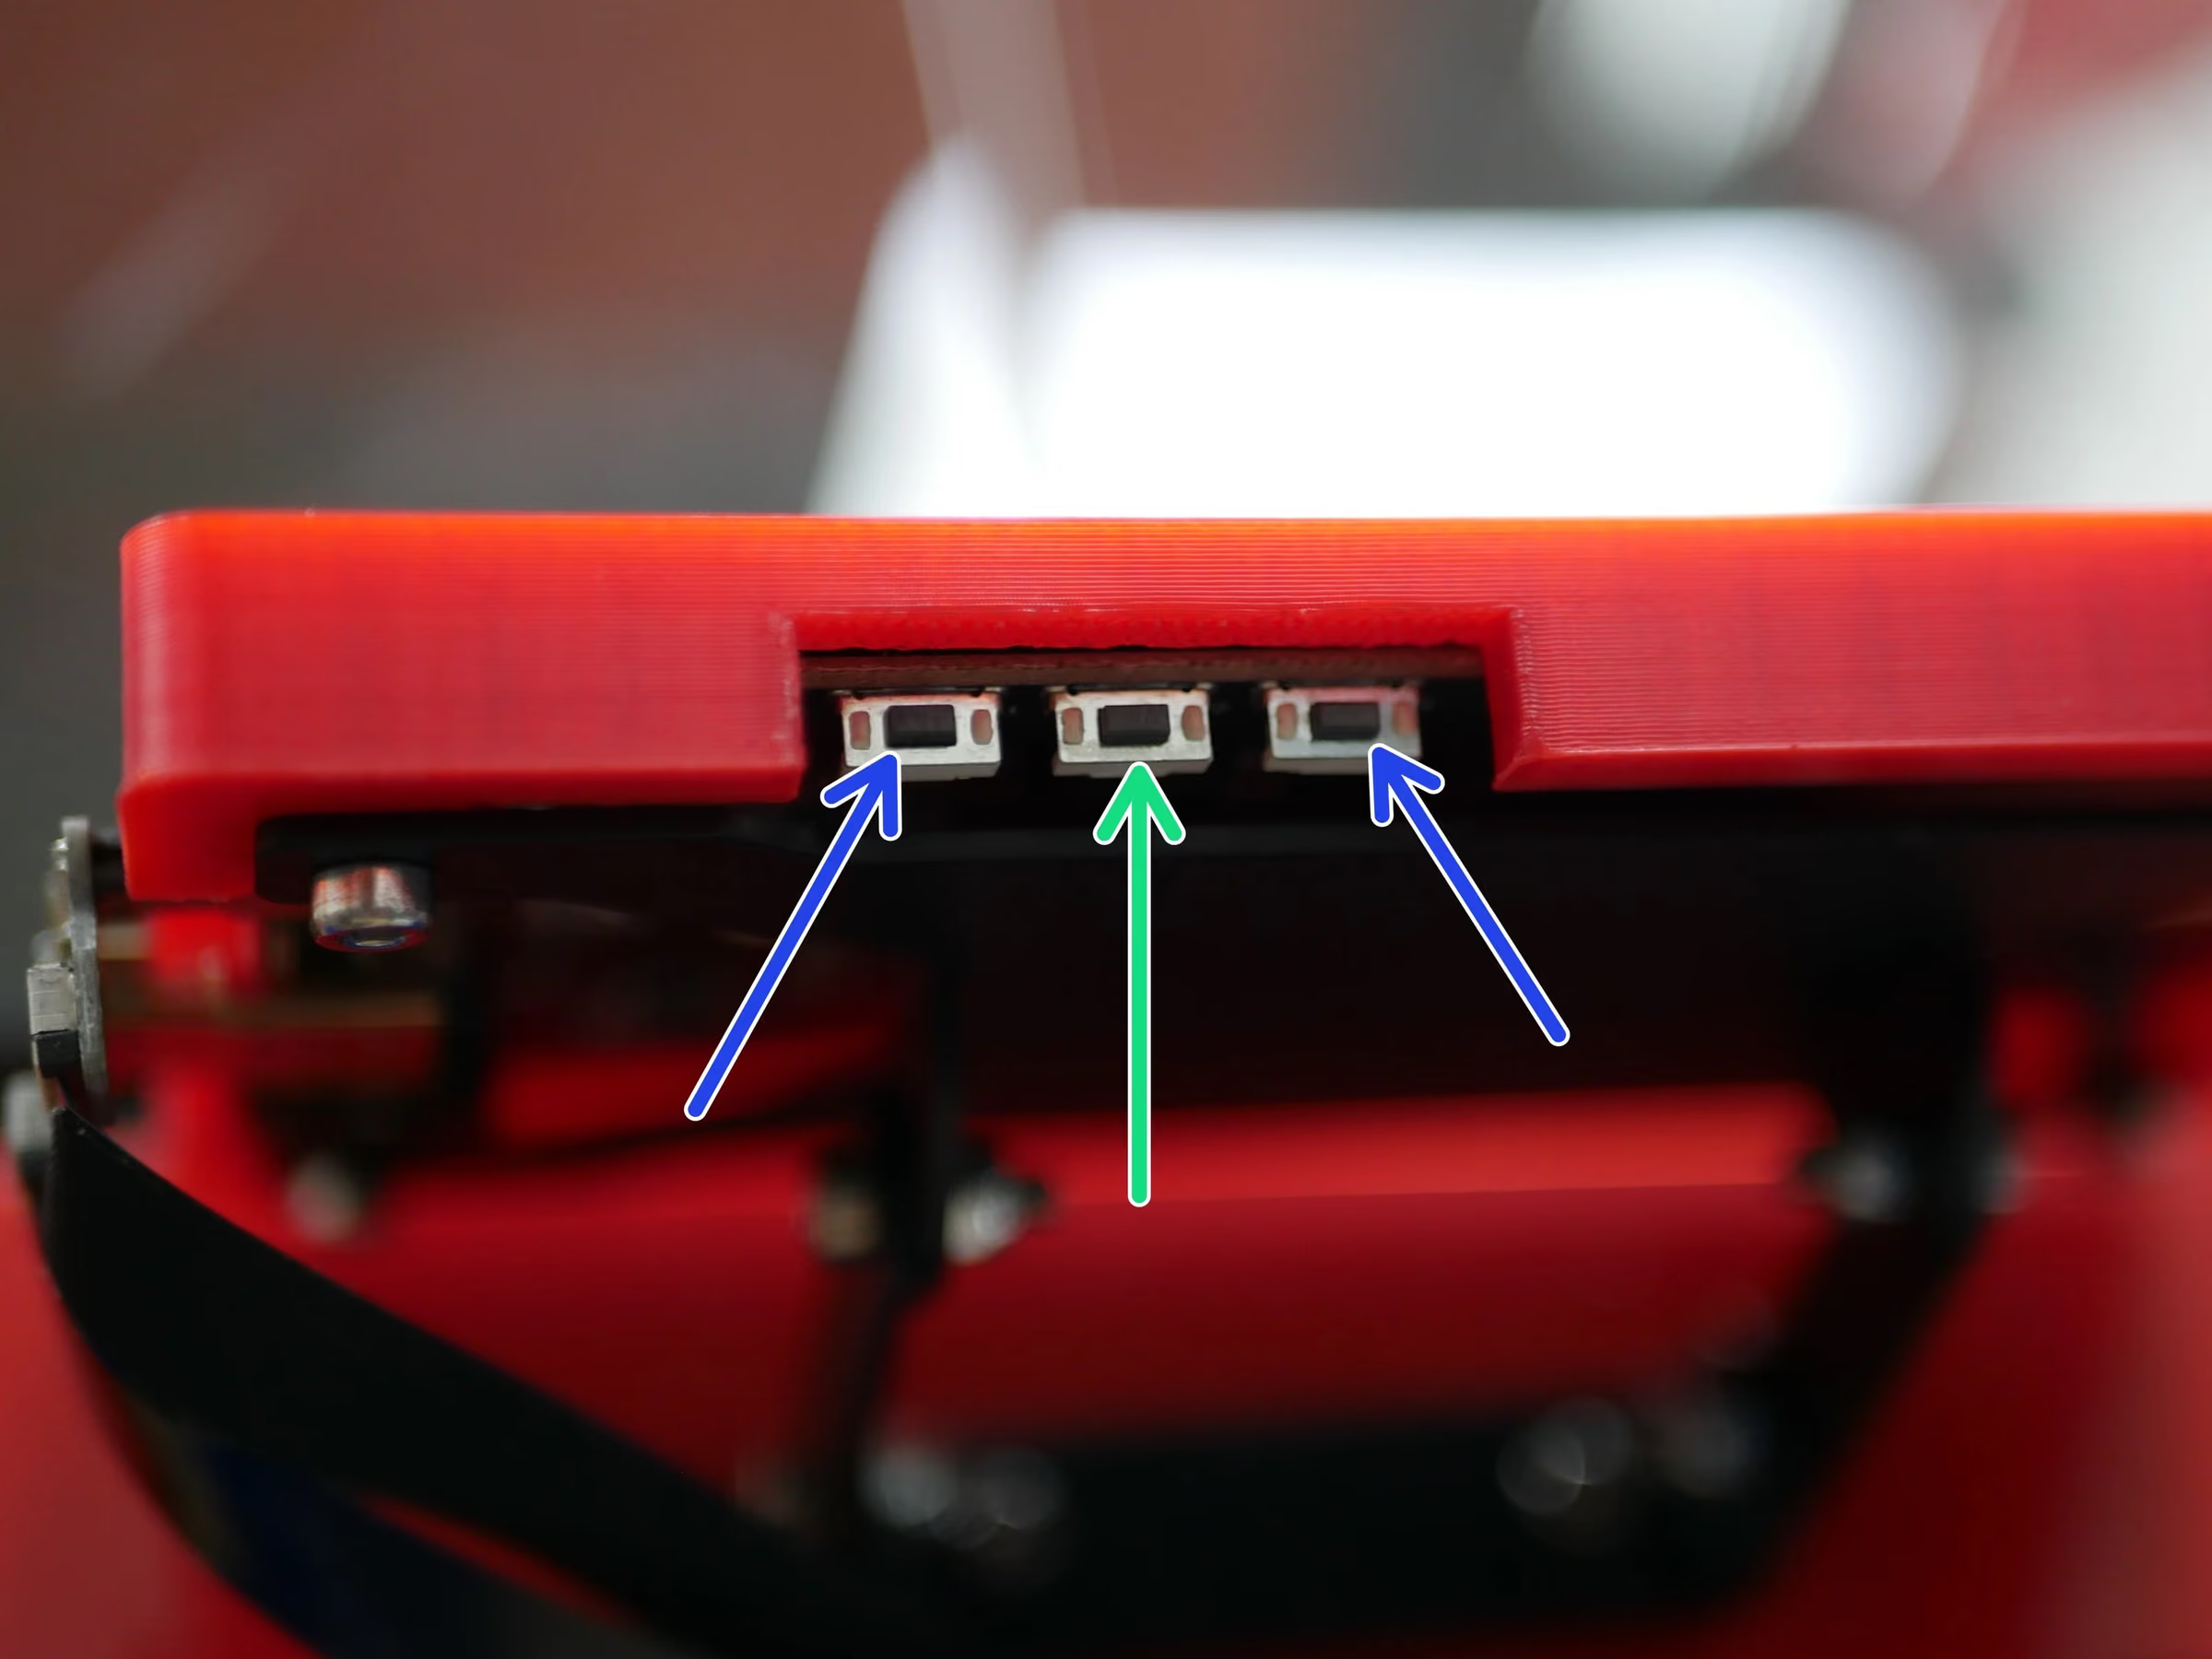
Note: There are three buttons underneath the display on the edge.
The centre one controls the orientation of the screen.
The two either side control the displays brightness. If your display is not lighting up it may be that the brightness is set all the way down.