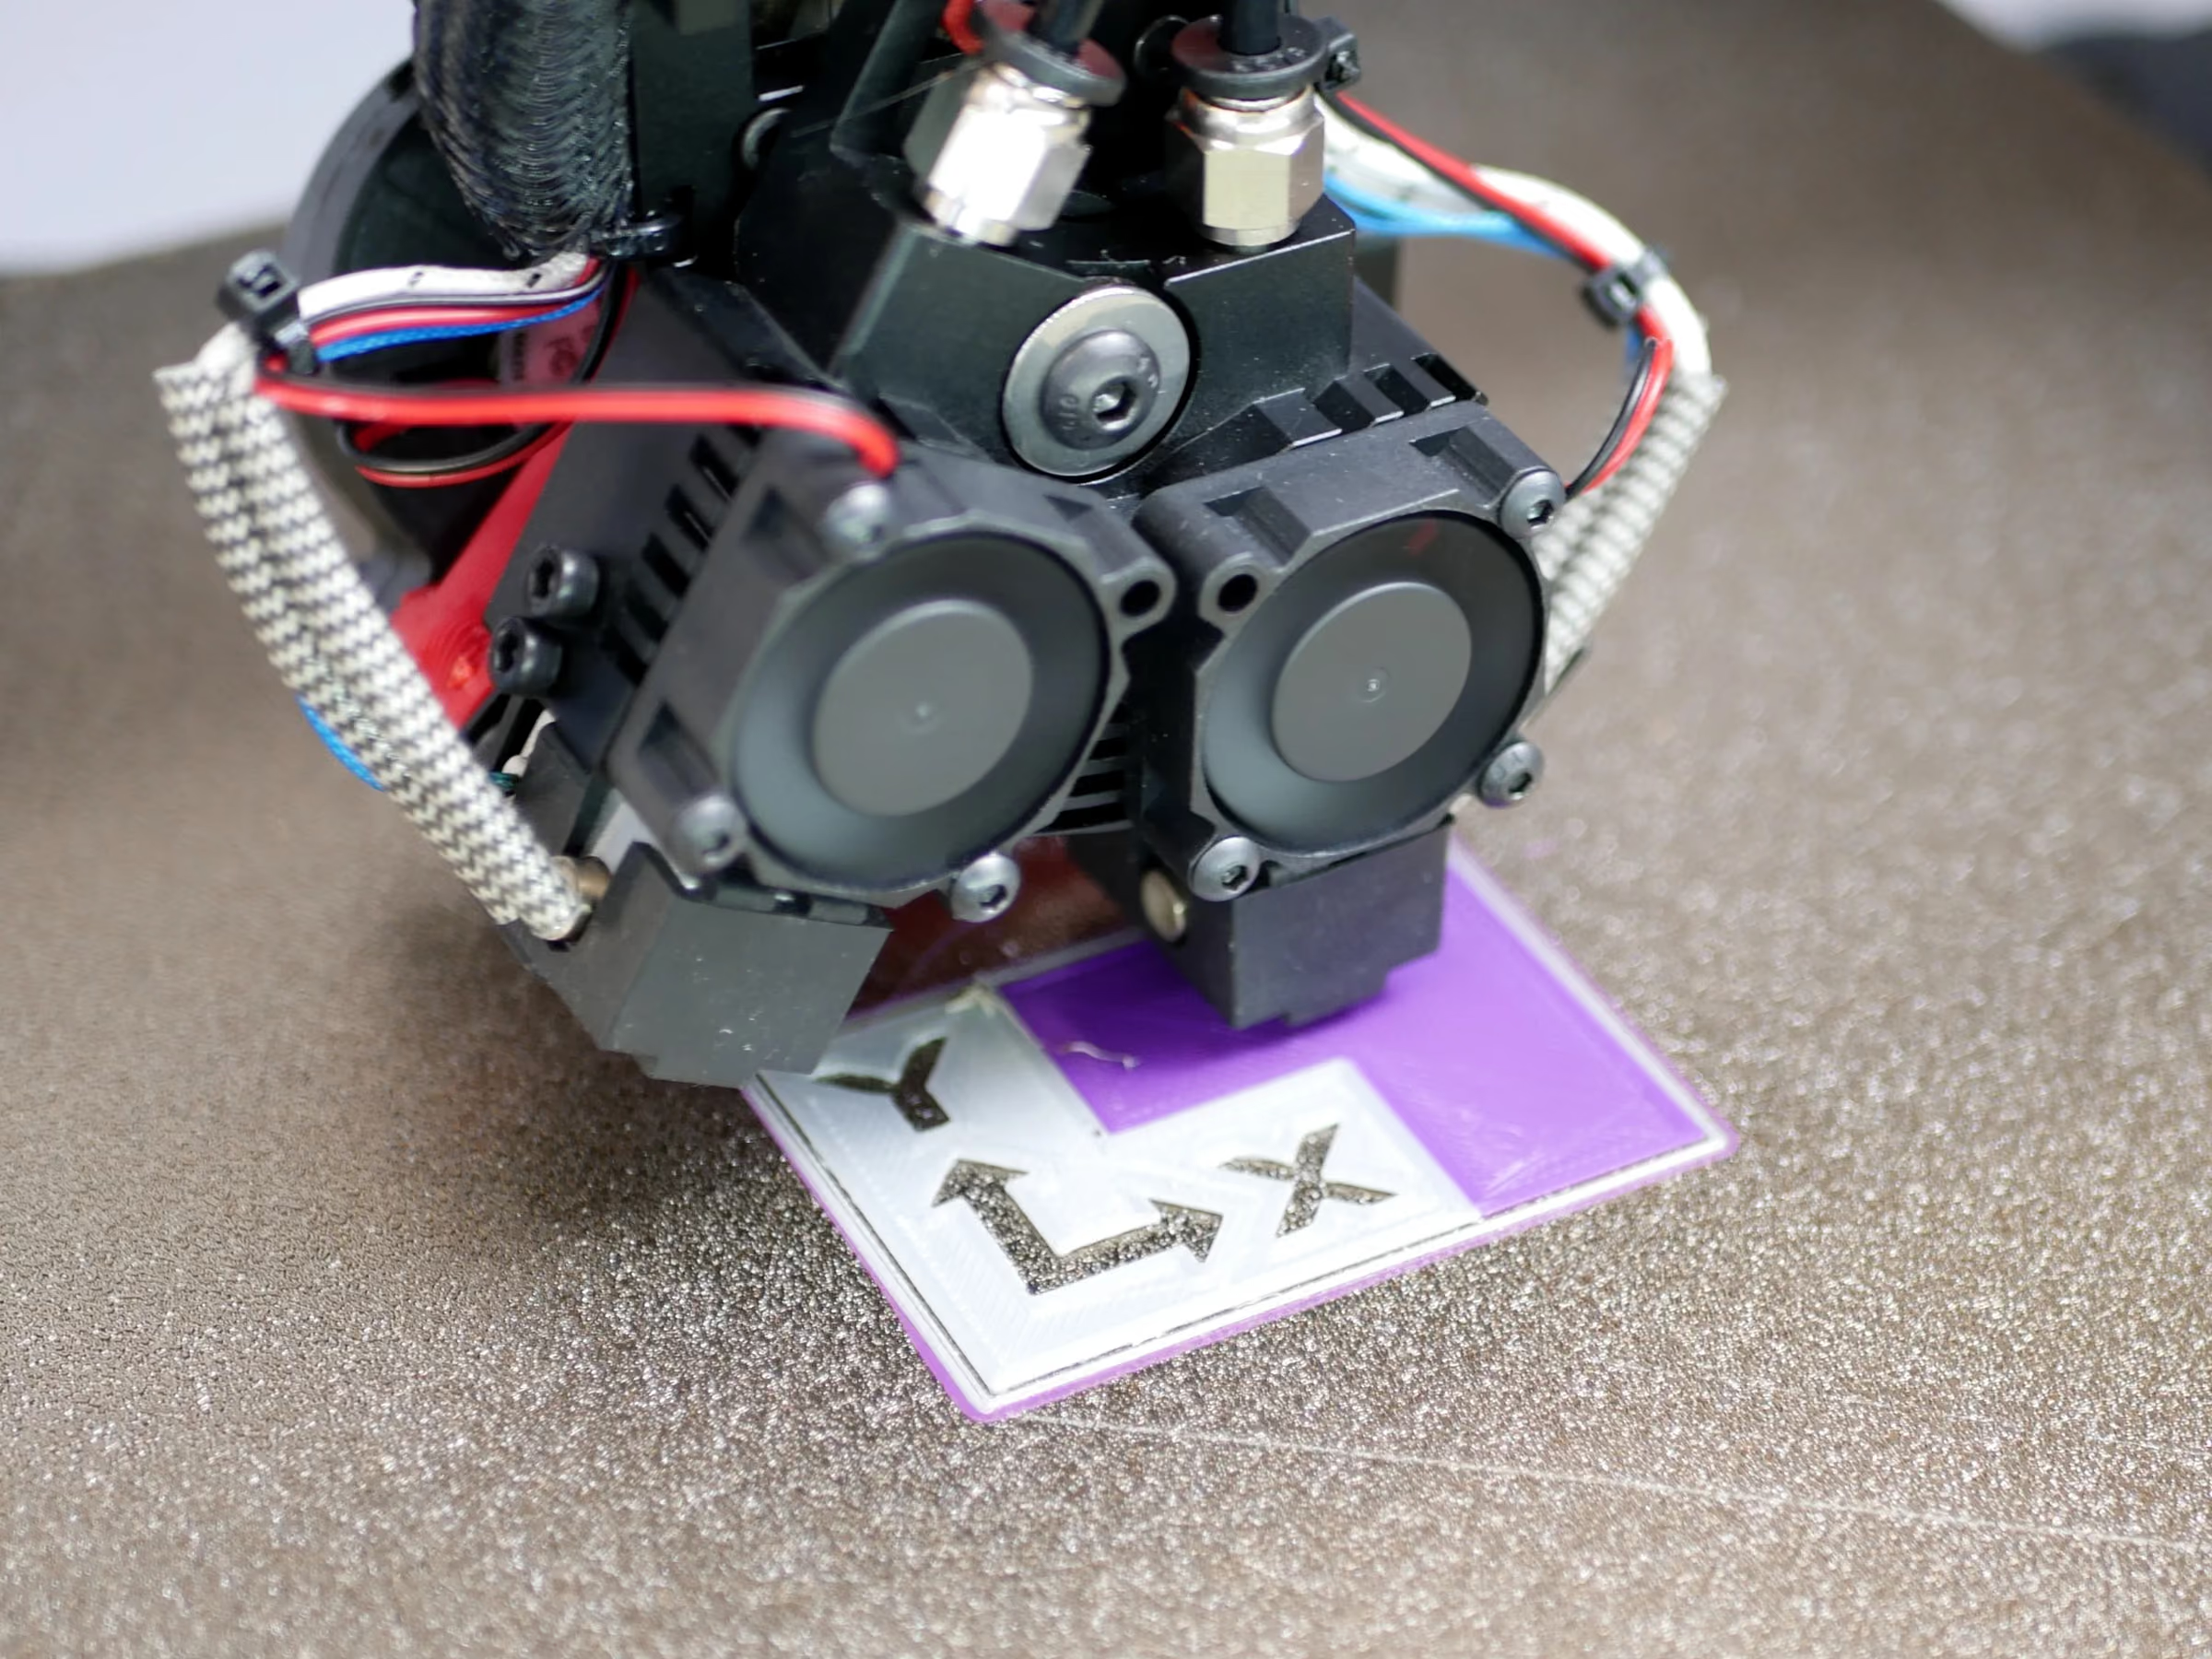
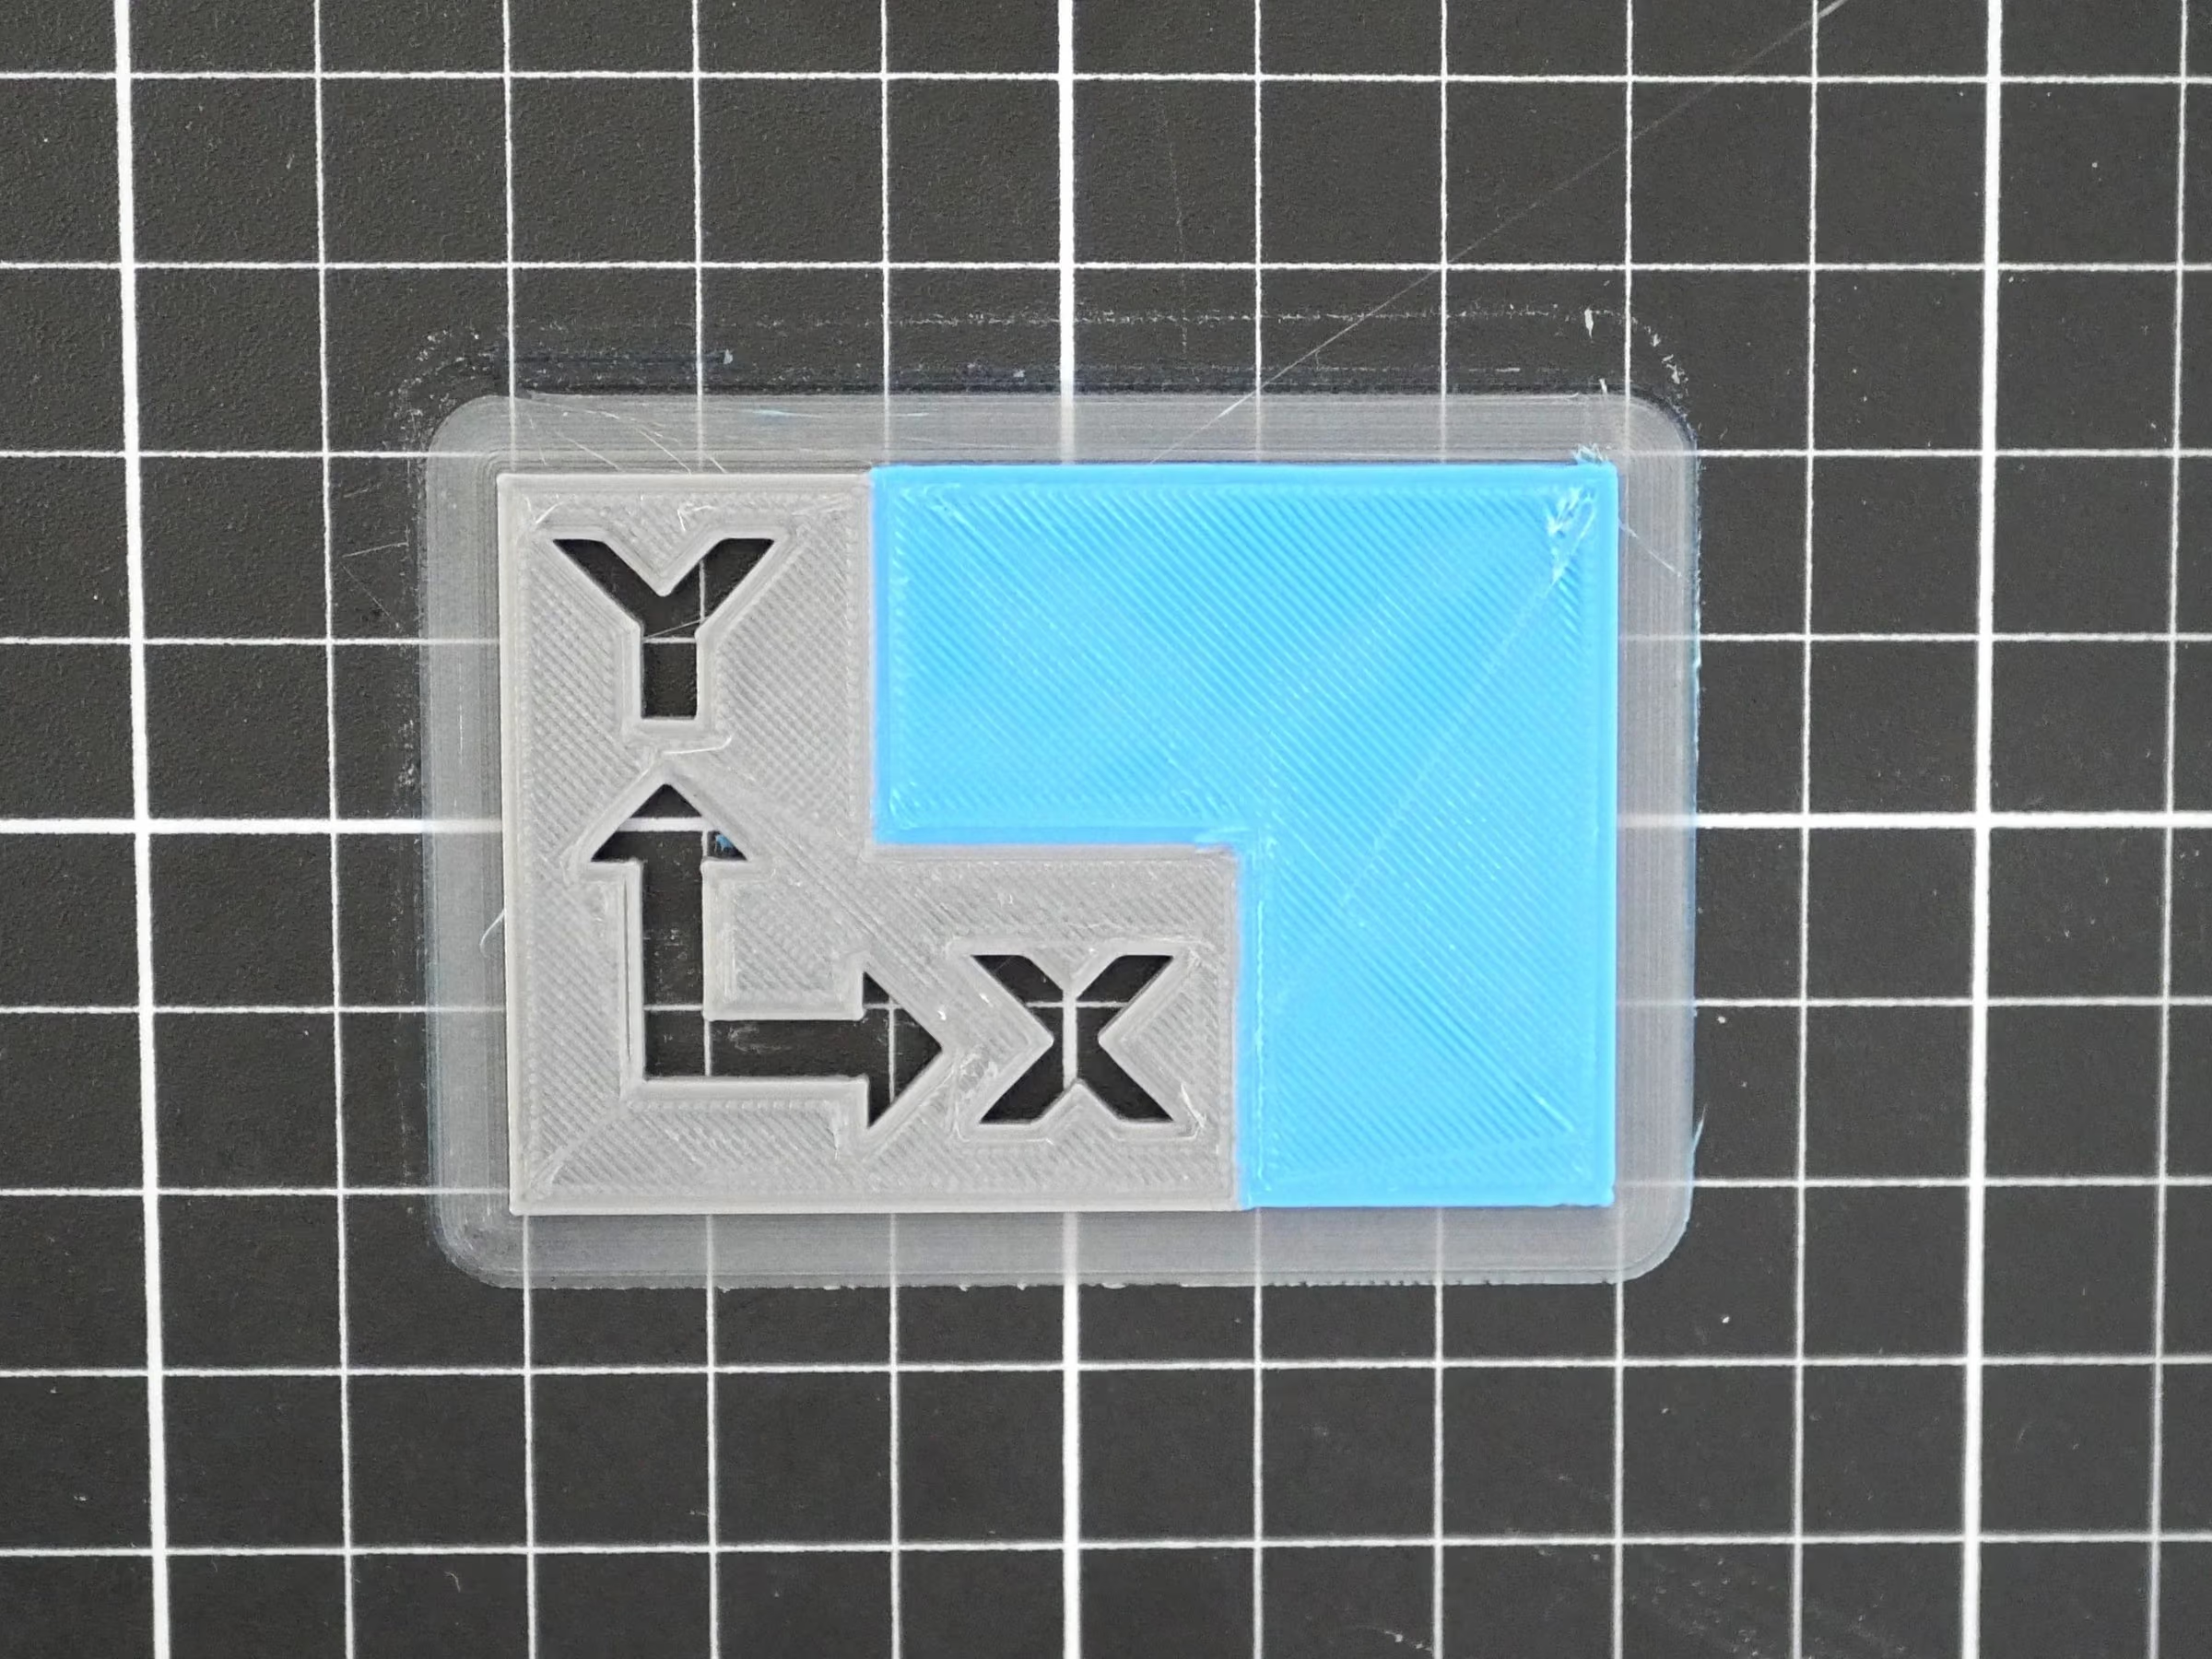
Stage 05: First Print/Callibration
Moderate1 hr25 steps
Step 1 CURA - Windows
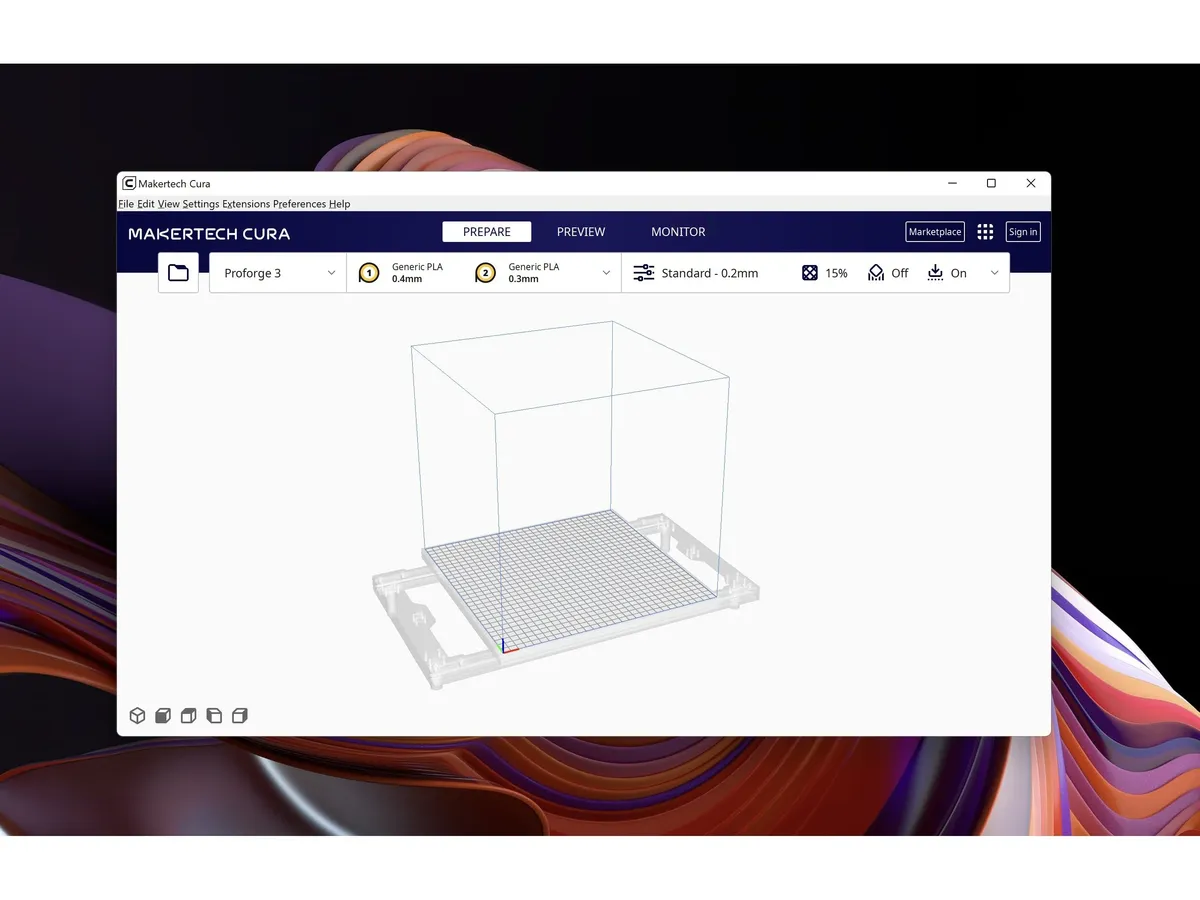
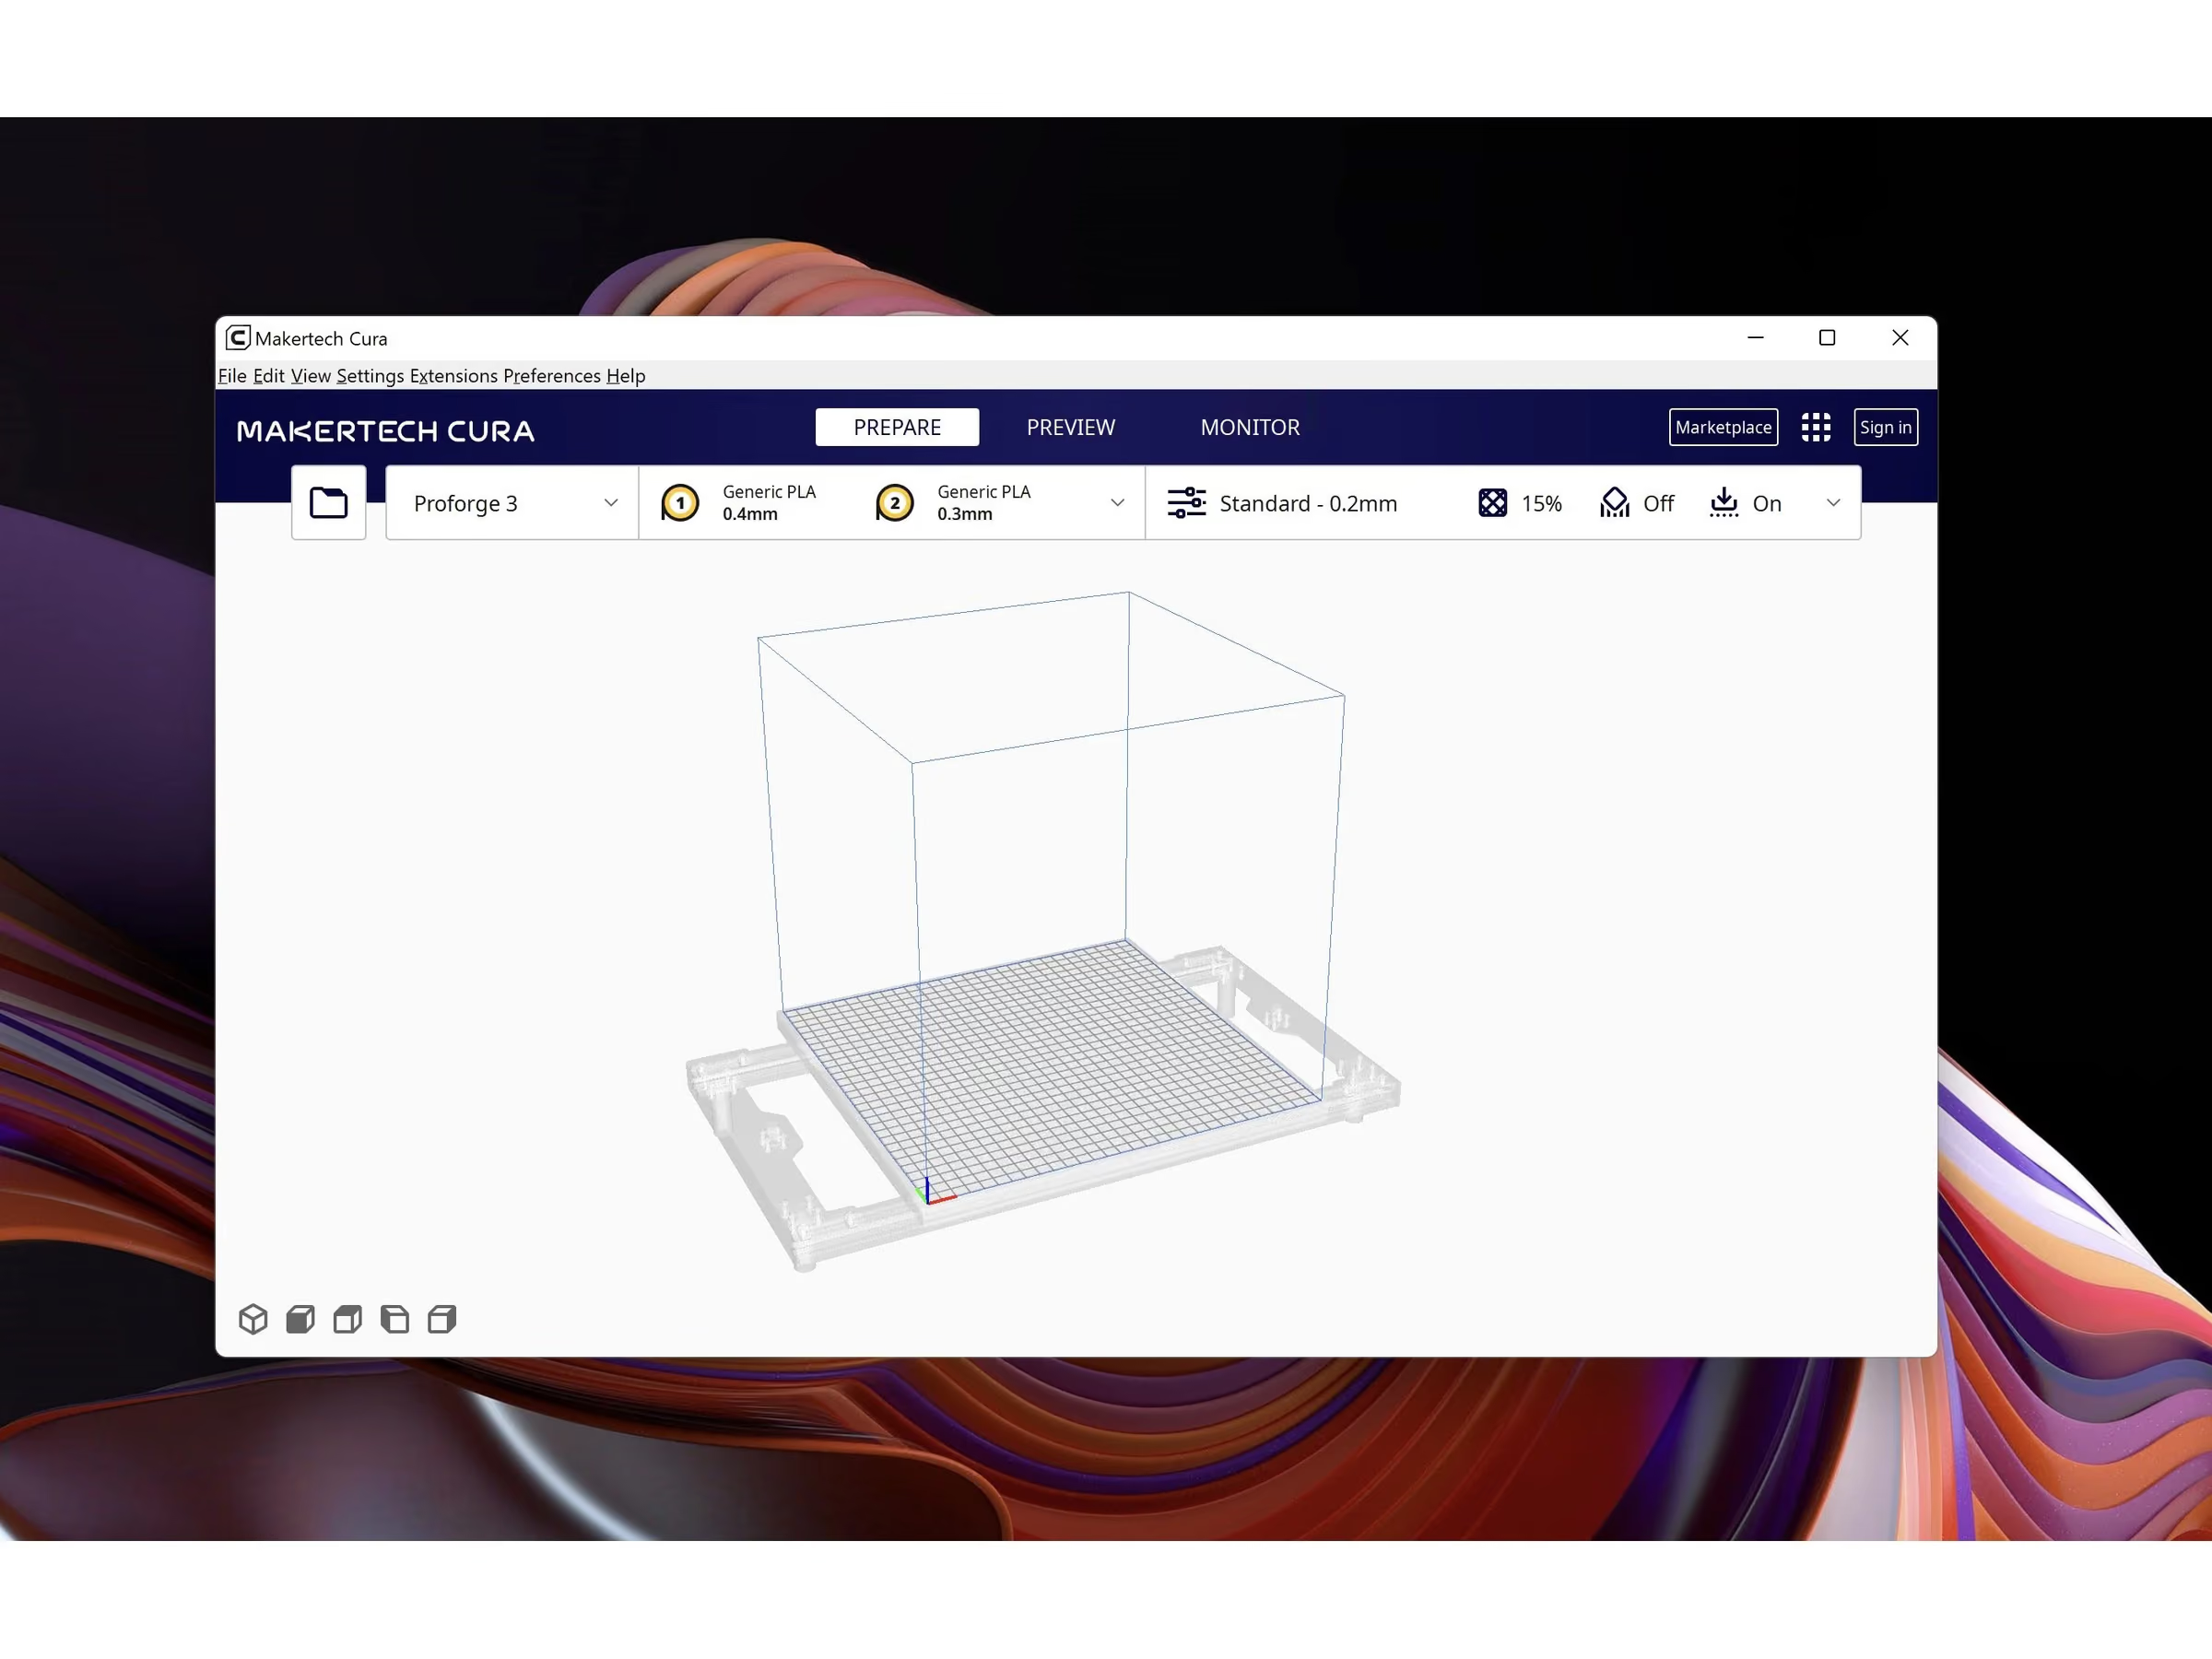
- Note: Download the new v5.2.1 of Makertech Cura for windows here.
- Note: Run through the install and setup wizards.
- Caution: If you have an earlier version of Makertech Cura installed, delete it from your programme folder before installing the new one.
Loading comments…
Step 2 CURA - MacOS/Linux
- Note: If you are running Mac OS or Linux the 3.5 profiles will be made available in the next release of the official Ultimaker Cura.
- Reminder: Follow the progress of this request here.
Loading comments…
Step 3 Calibration Model
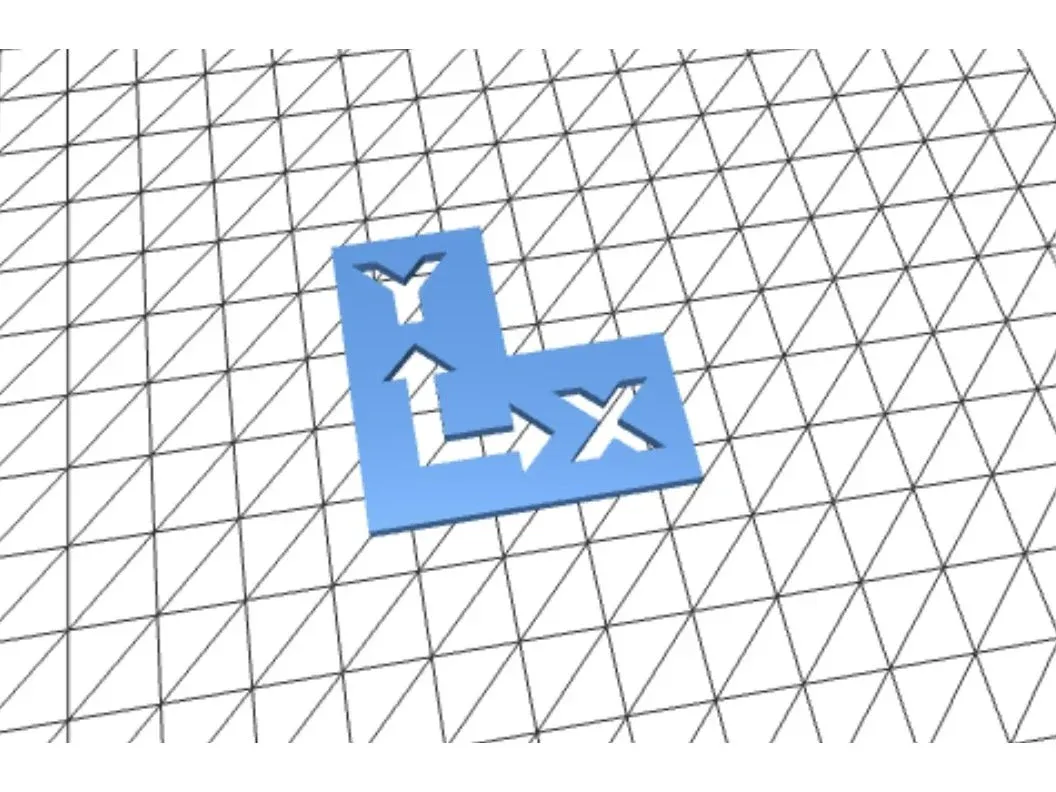
- Download the two part DSH calibration model here.
Loading comments…
Step 4 CURA Setup
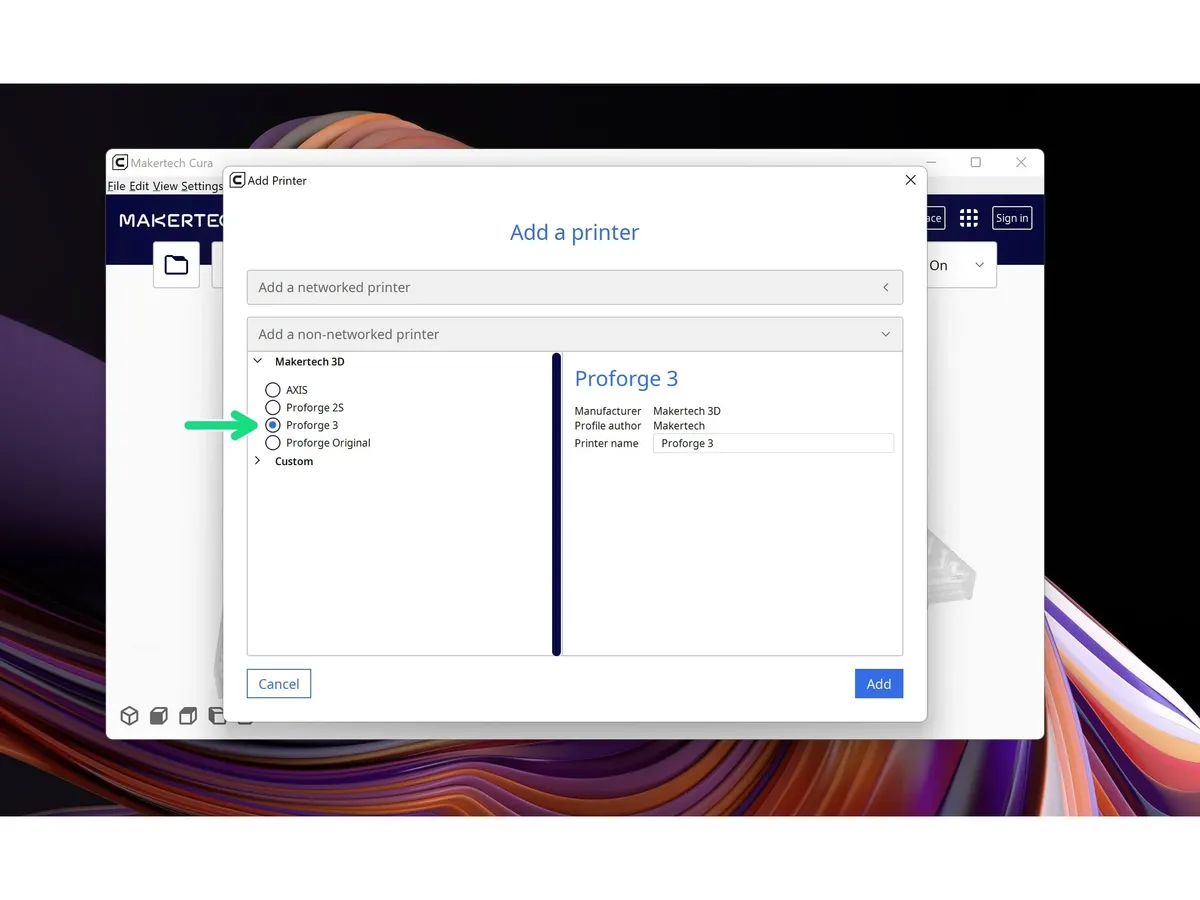
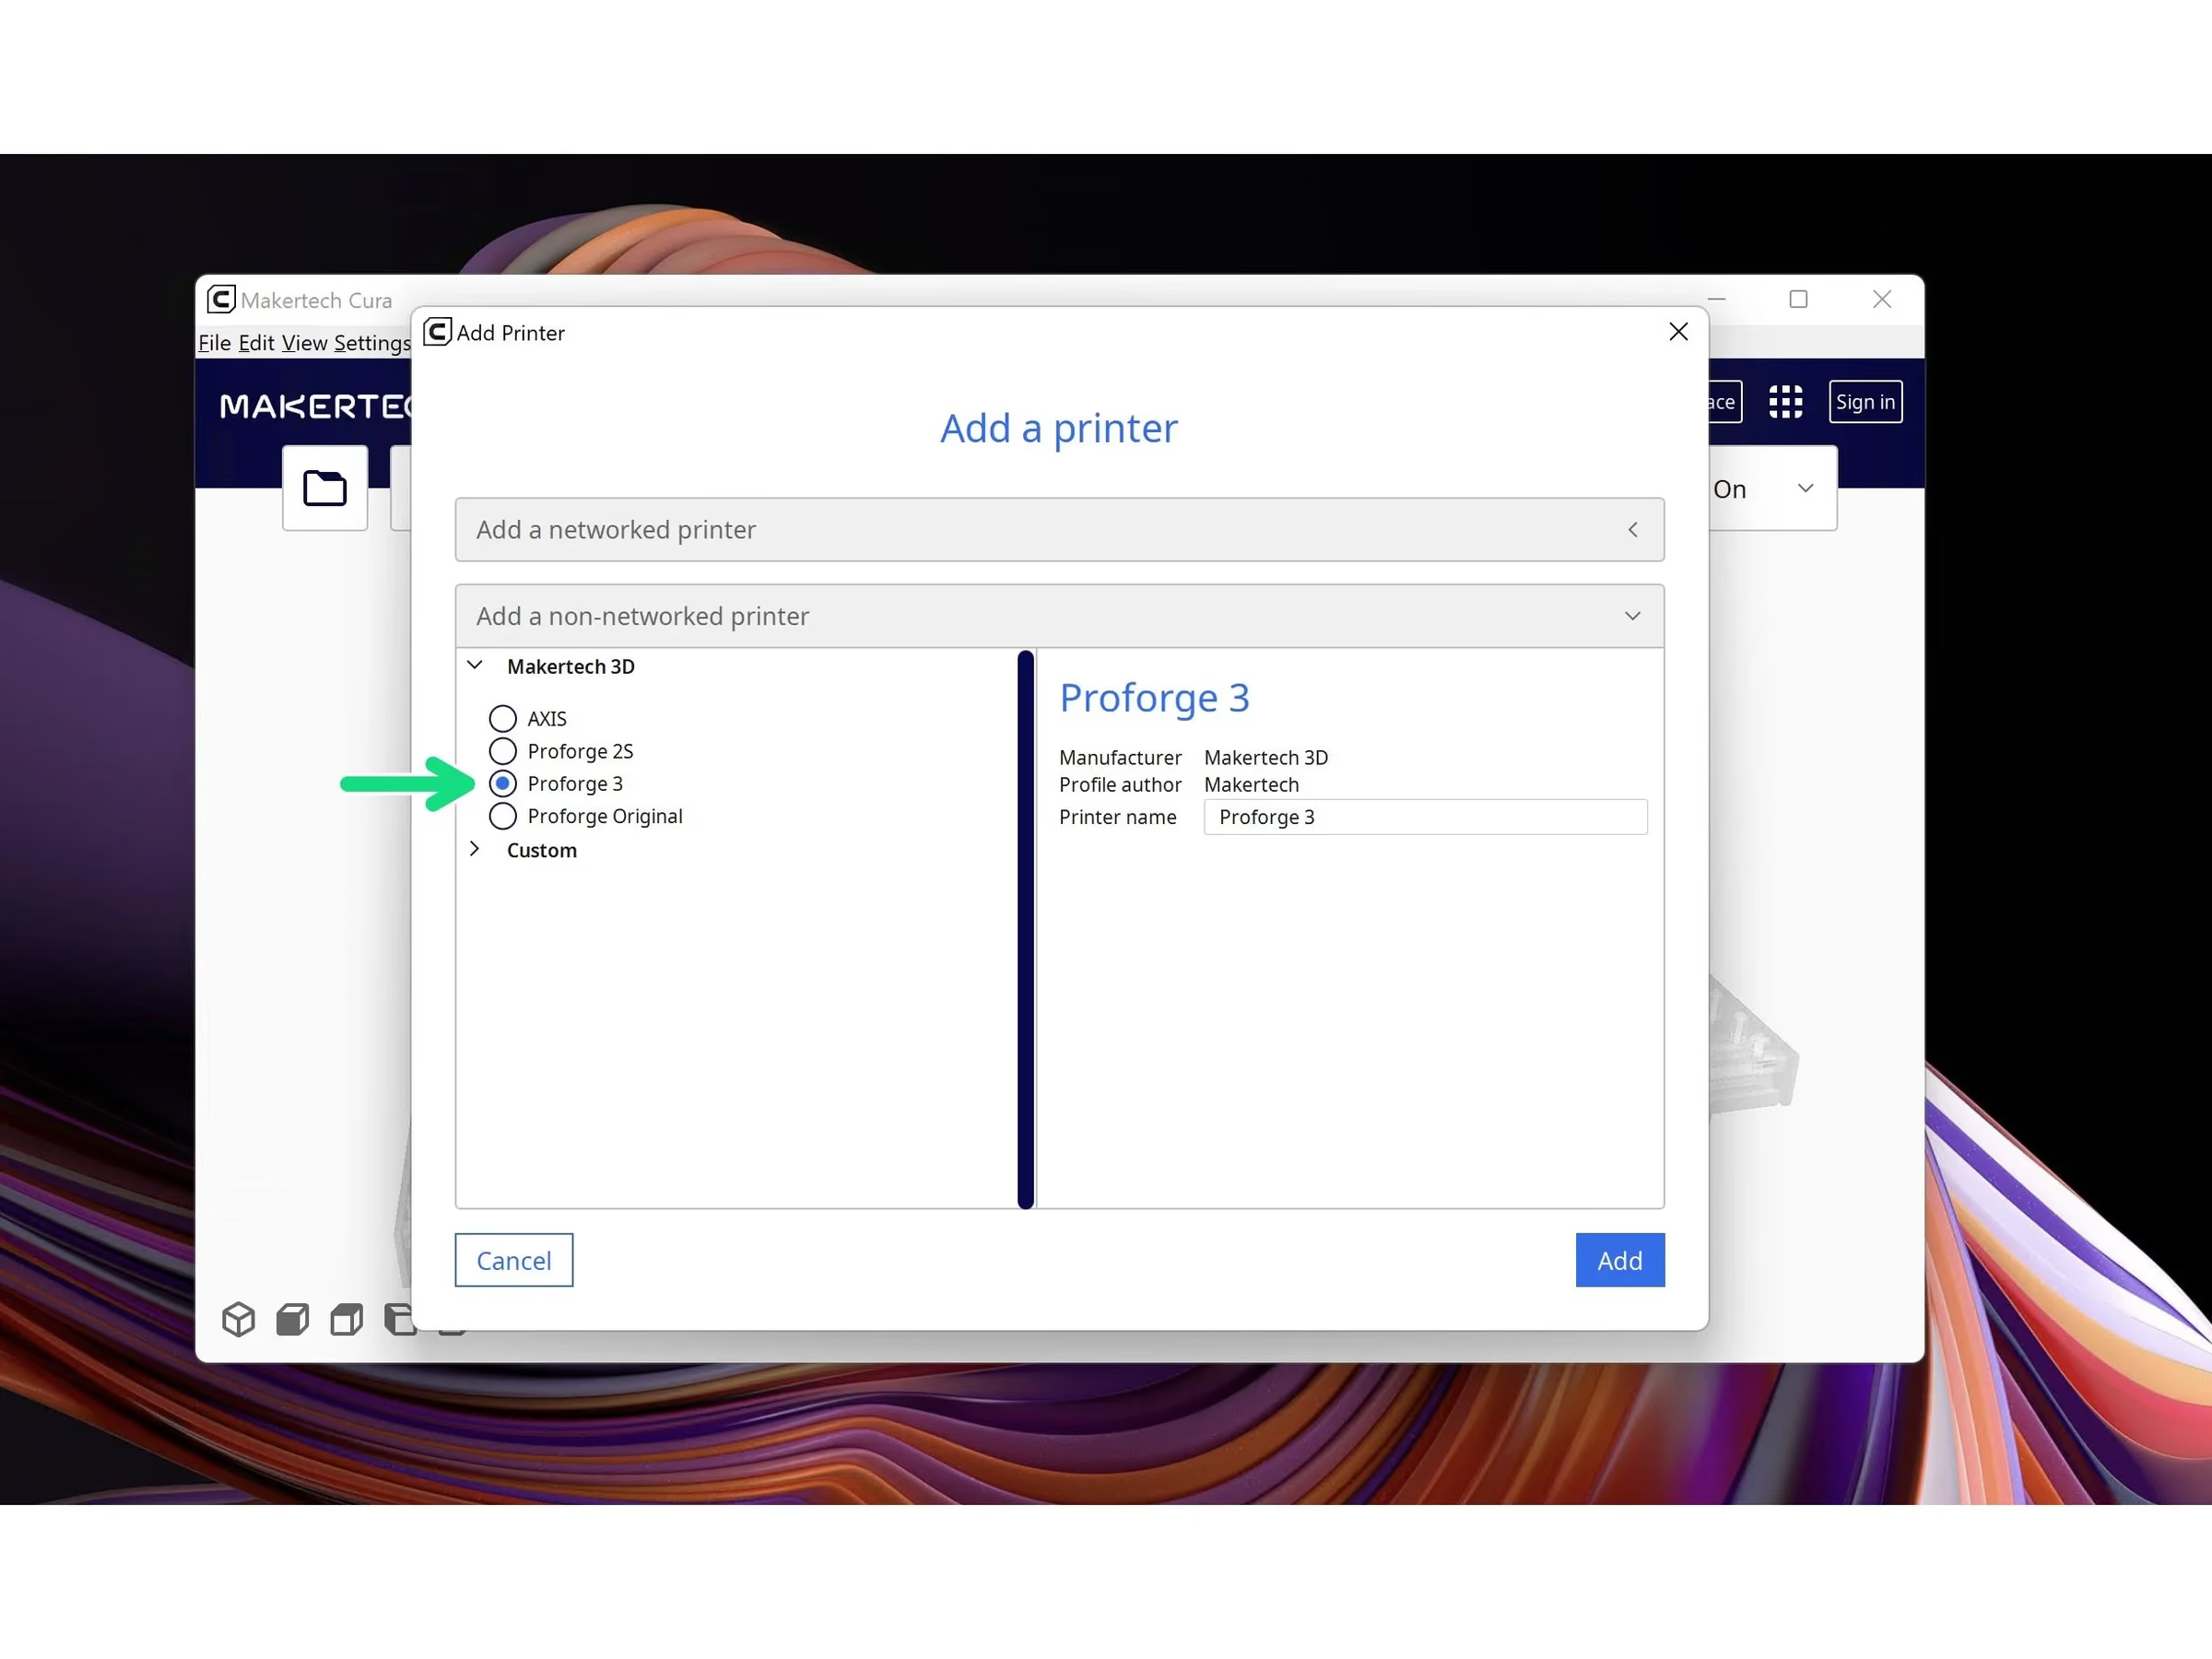
- In Cura add the Proforge 3 3D printer.
Loading comments…
Step 5 Loading STL's
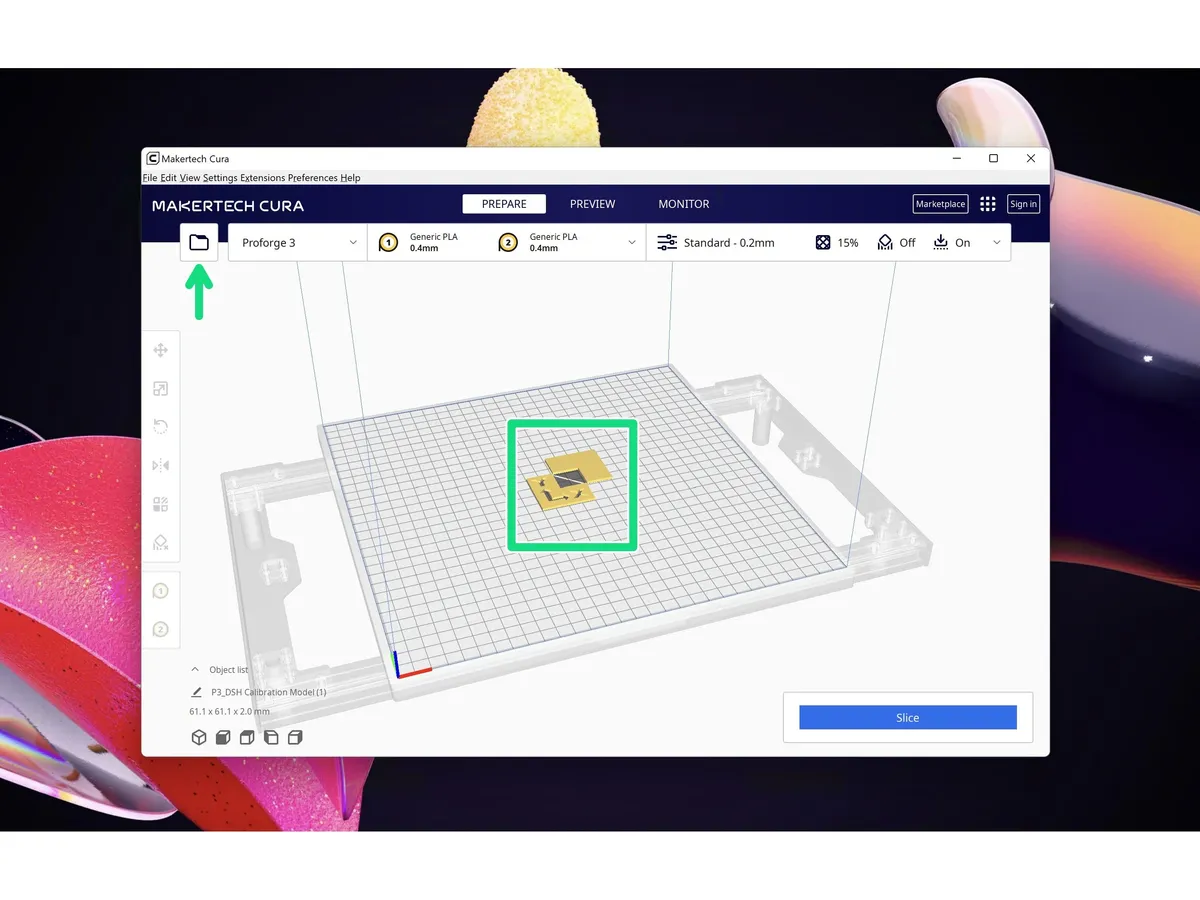
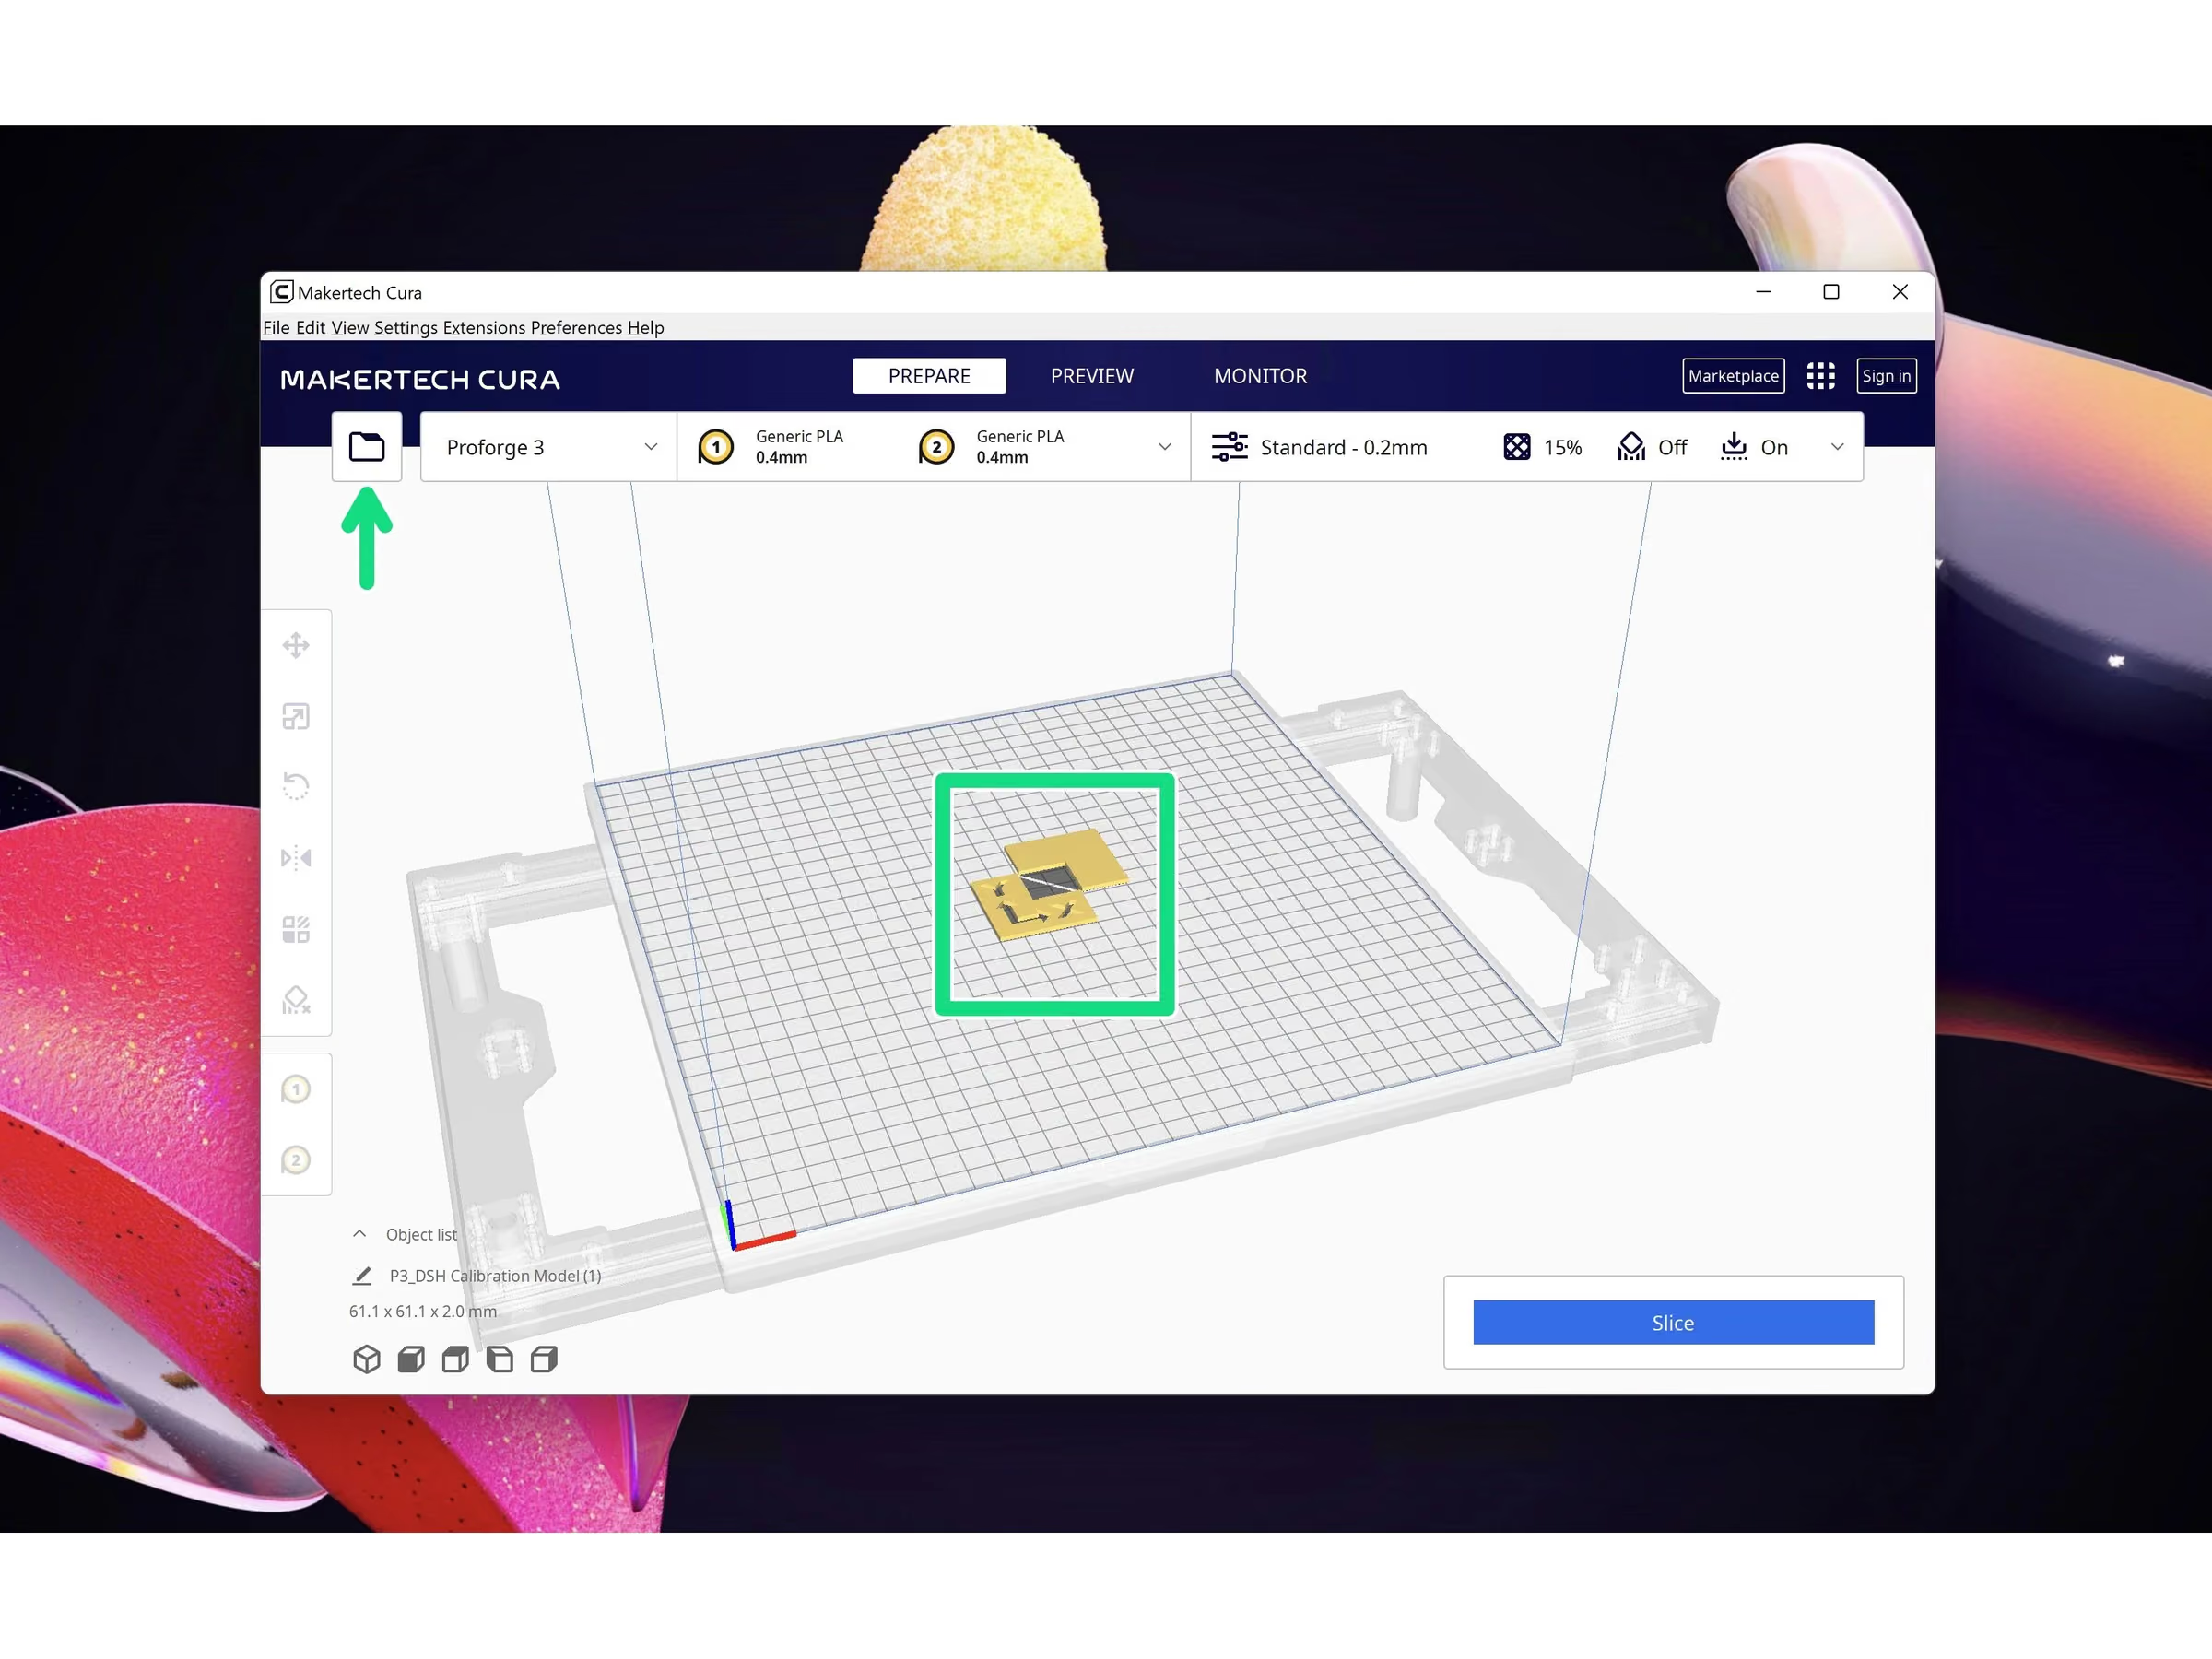
- Load both parts of the DSH calibration model.
Loading comments…
Step 6 Hotend Assignment
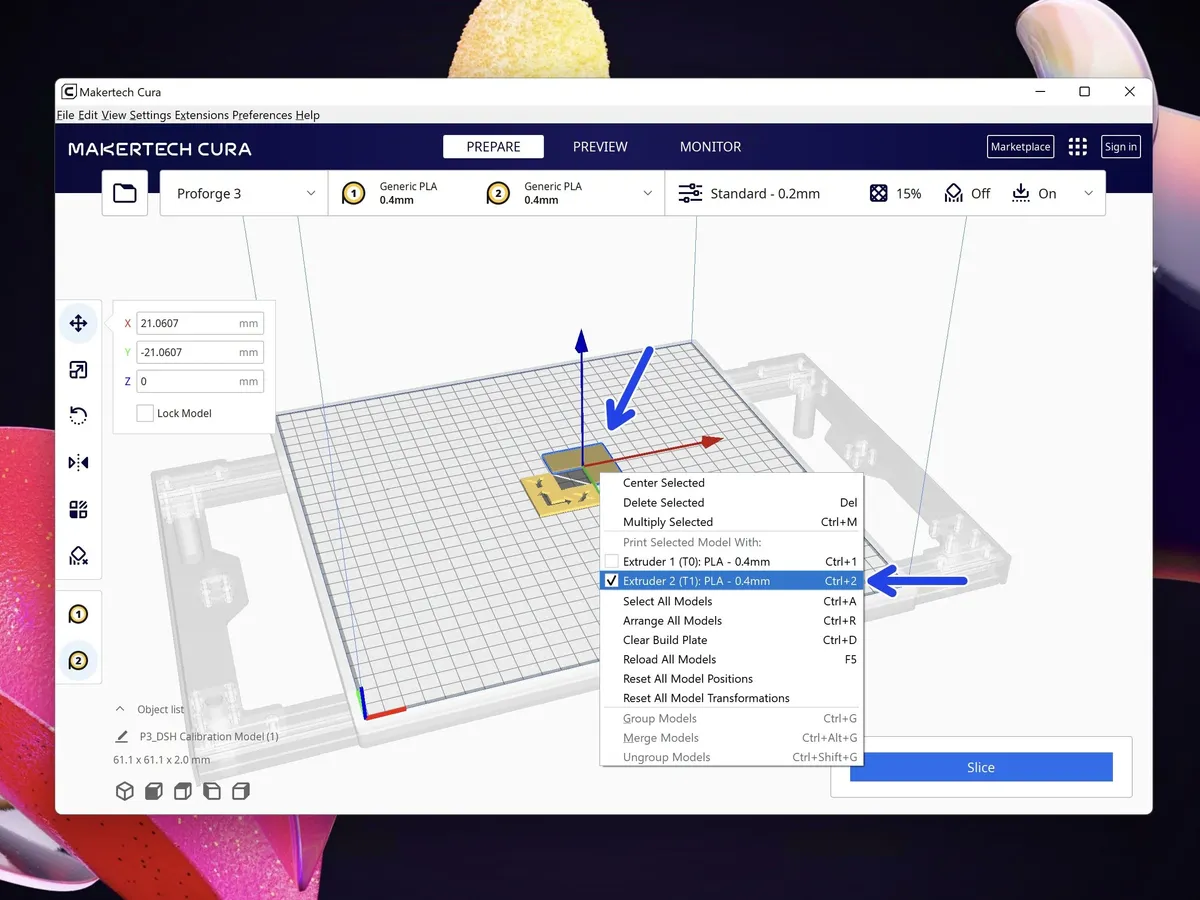
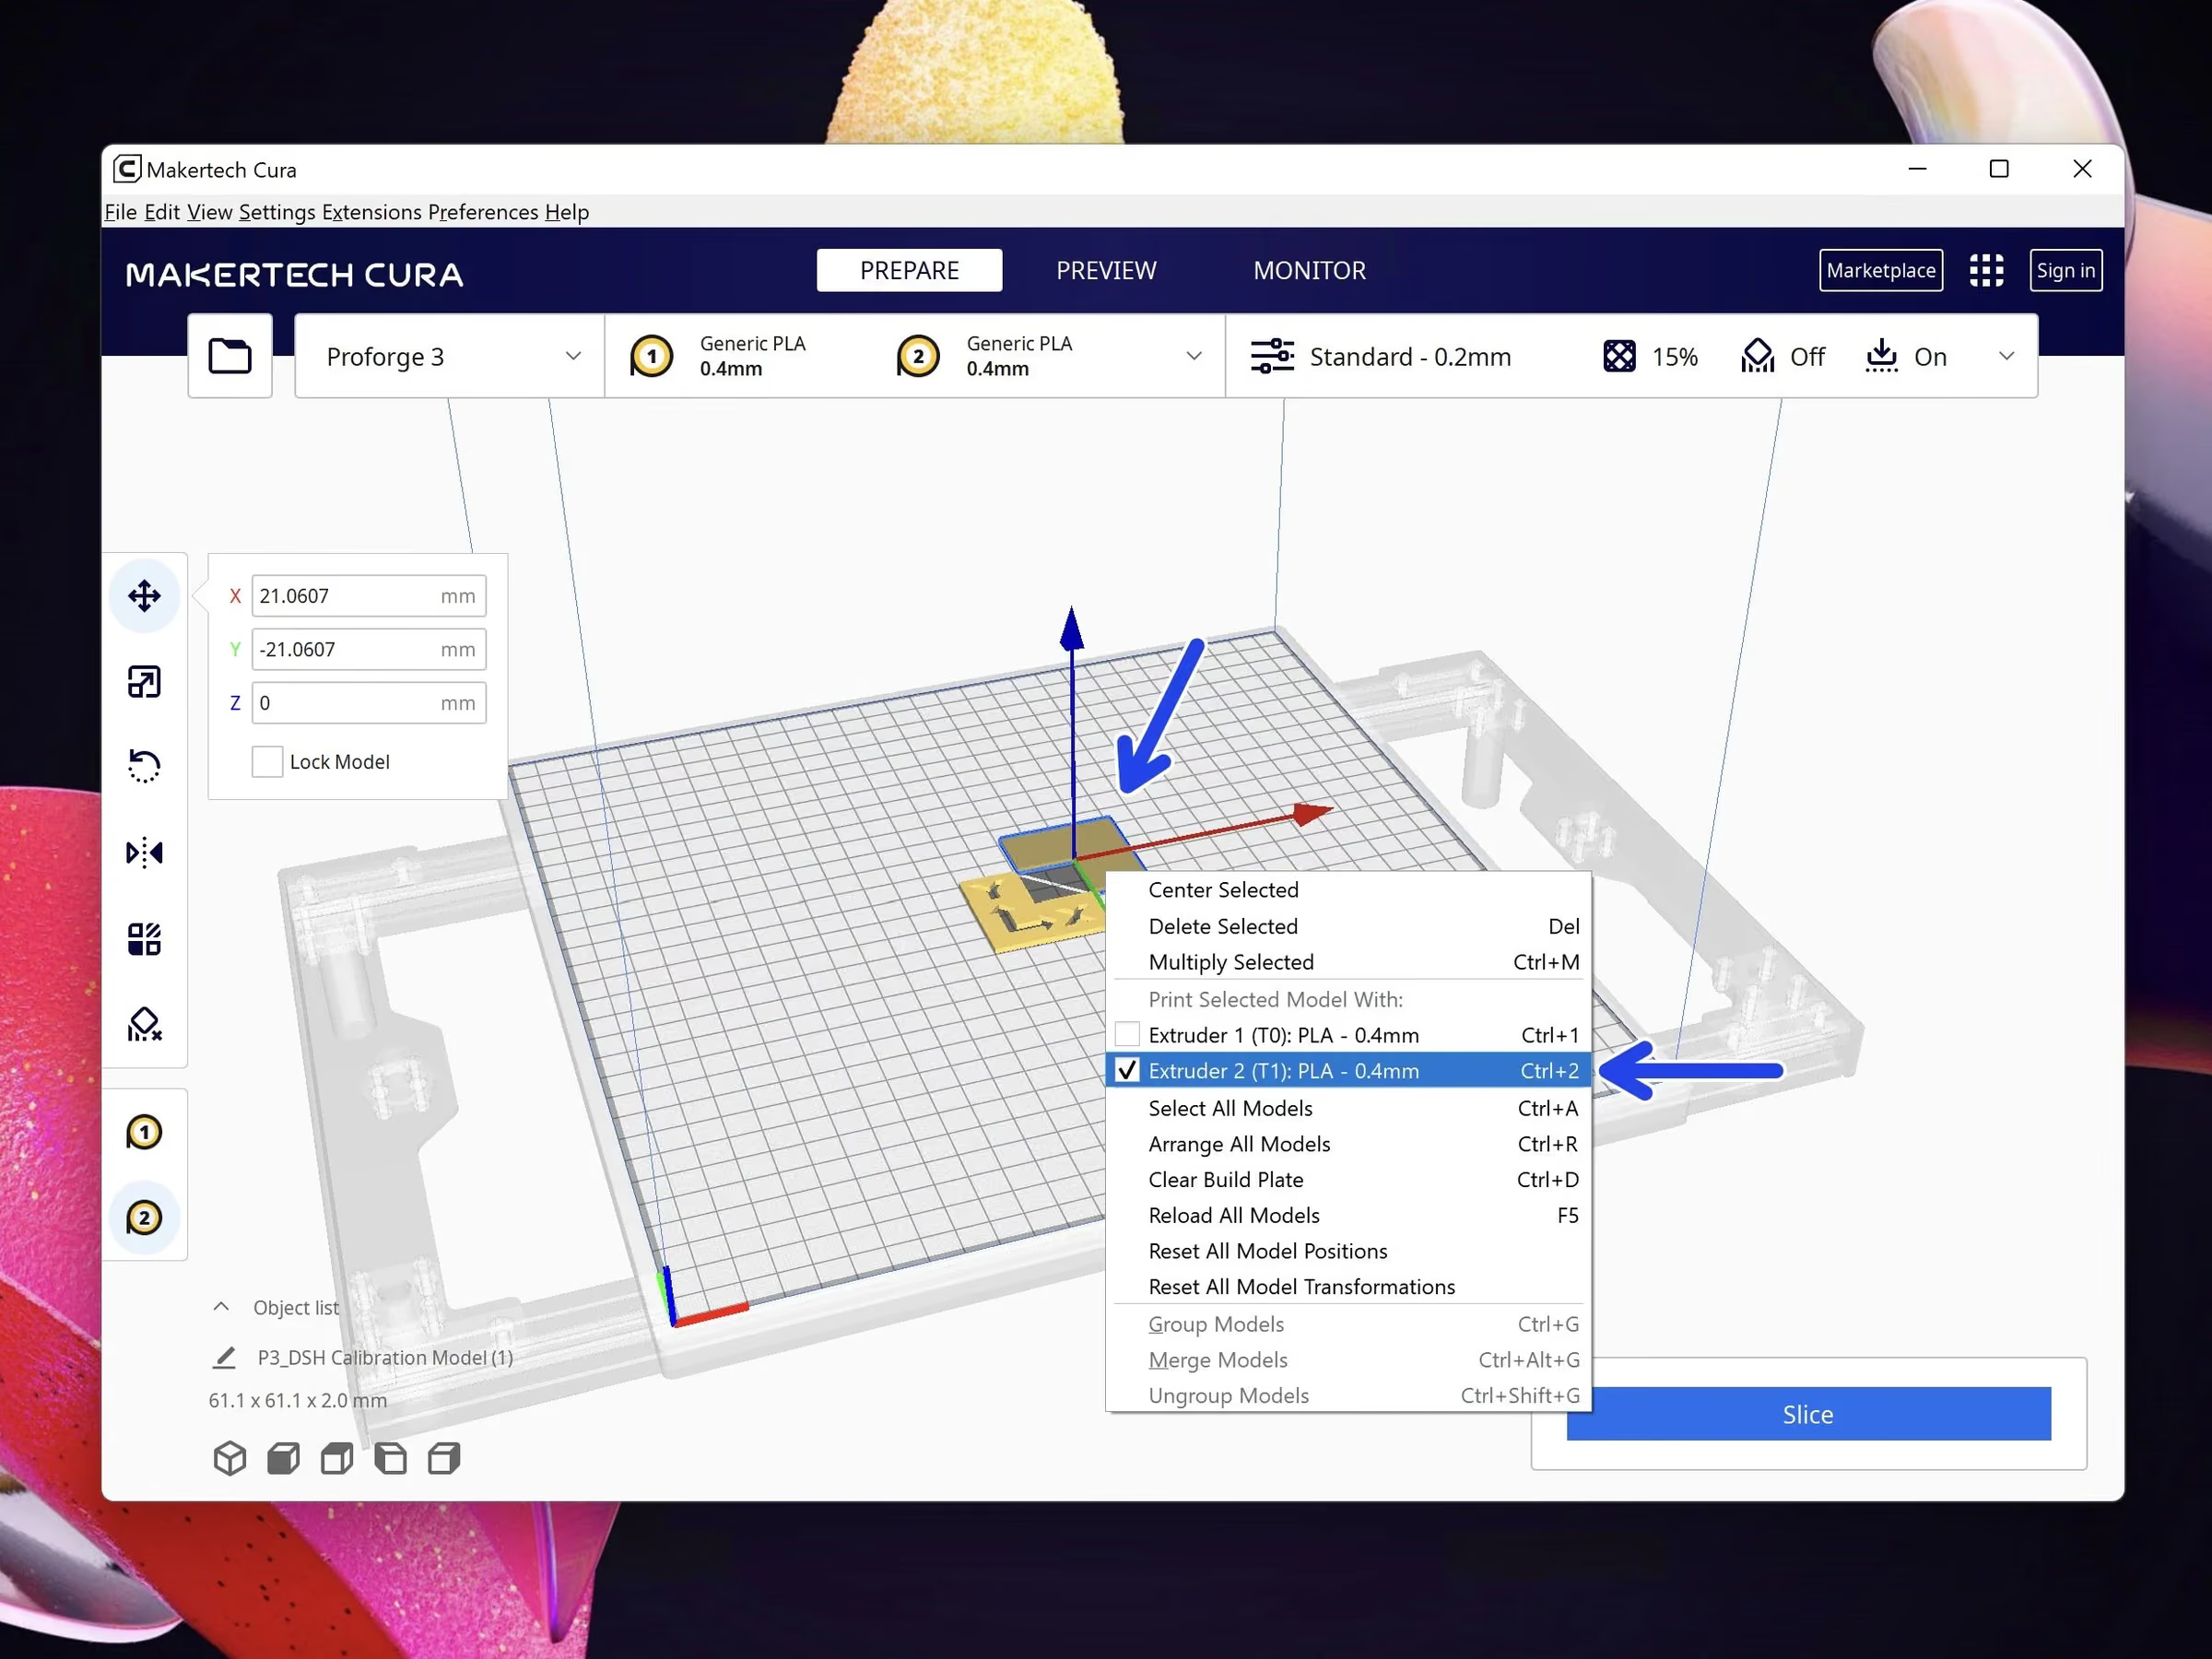
- Right click this part of the model and set it to print with Extruder 2 (T1).
Loading comments…
Step 7 Merging the Parts
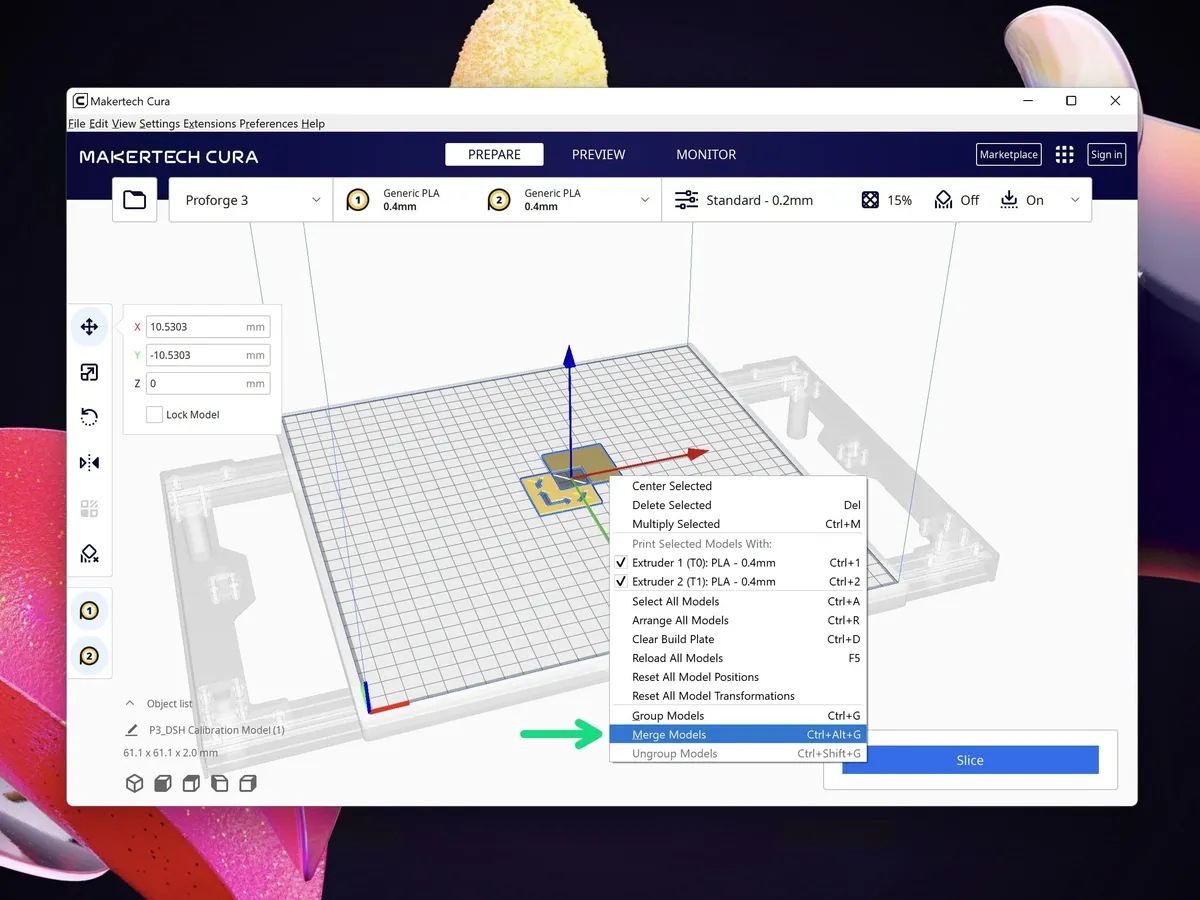
- Note: Use shift to select both parts of the model.
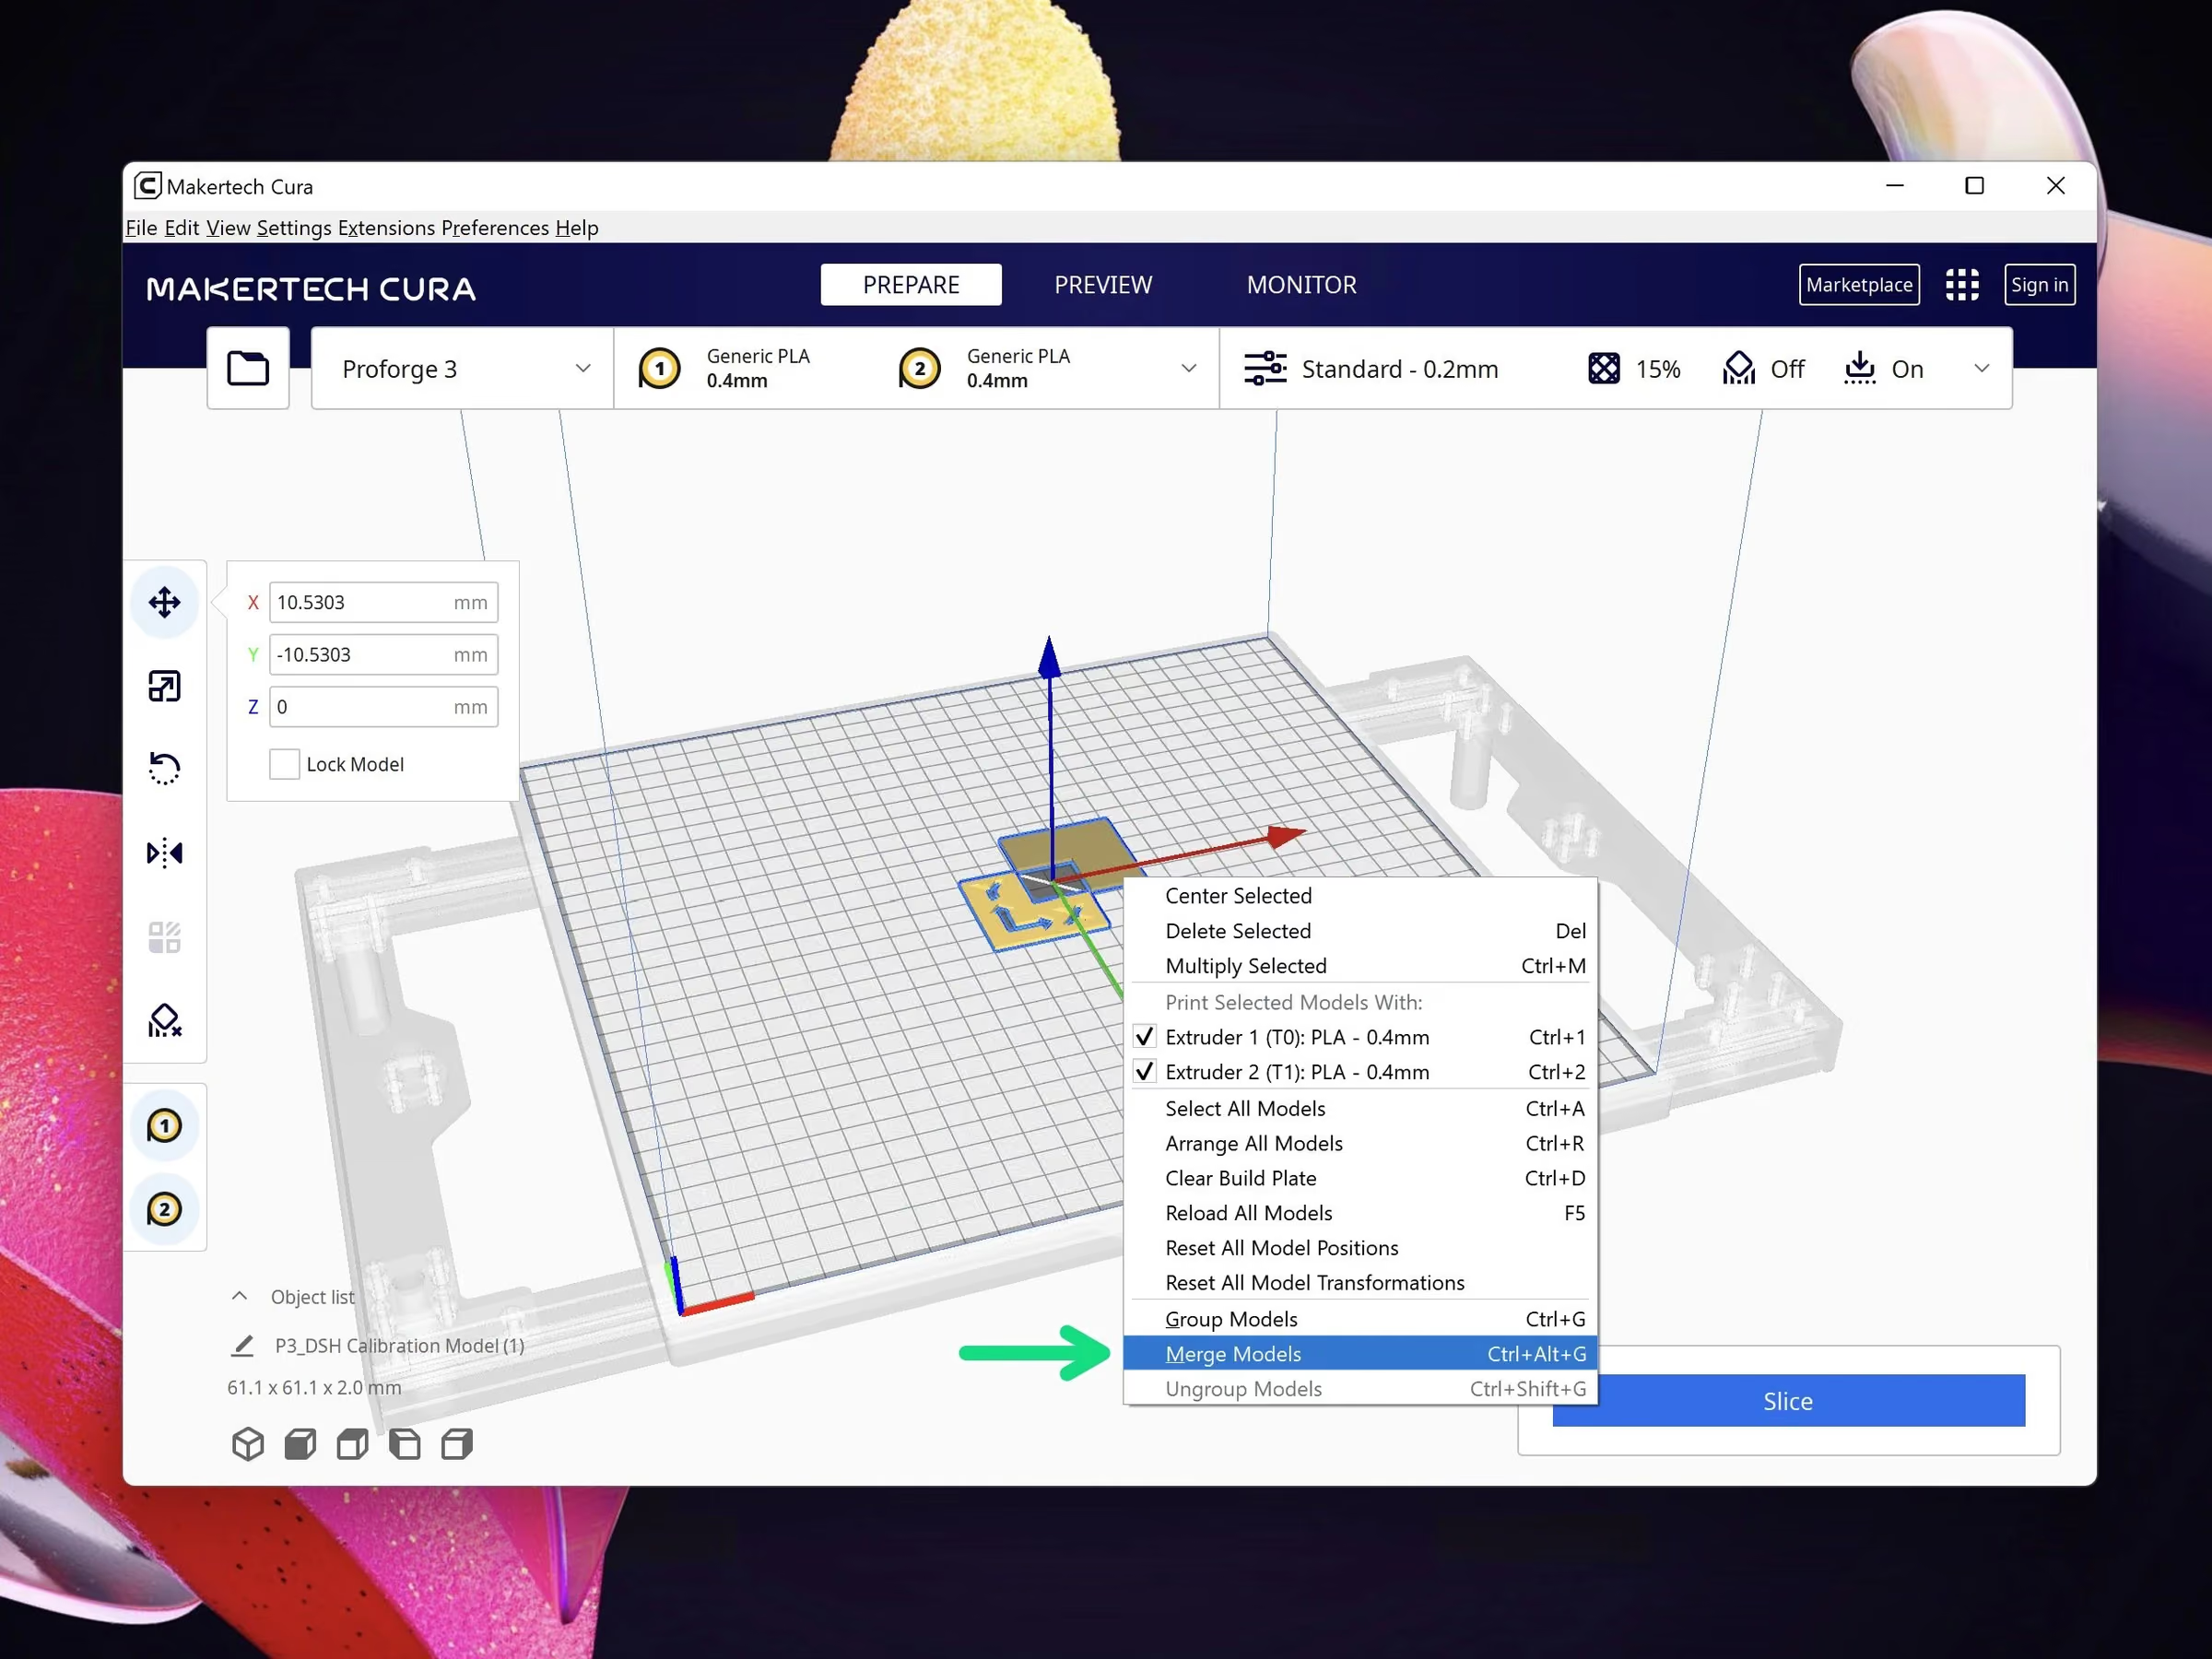
- Right click either model and hit Merge Models.
- Once merged, right click on the model and hit Centre selected Model.
Loading comments…
Step 8 Material and Nozzle Size
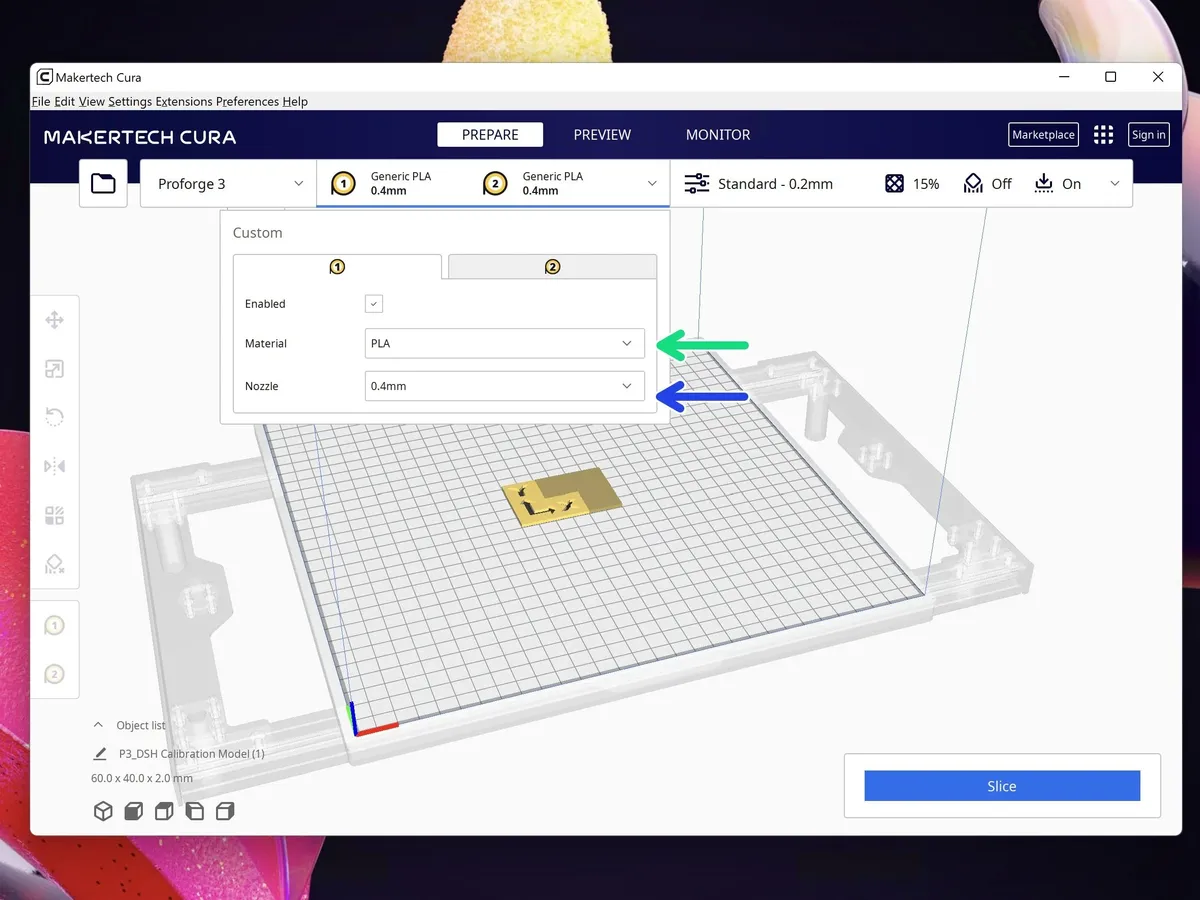
- Select the material you are using, we recommend PLA or ABS for this first print.
- Select the nozzle size you have installed.
Loading comments…
Step 9 Prime Tower
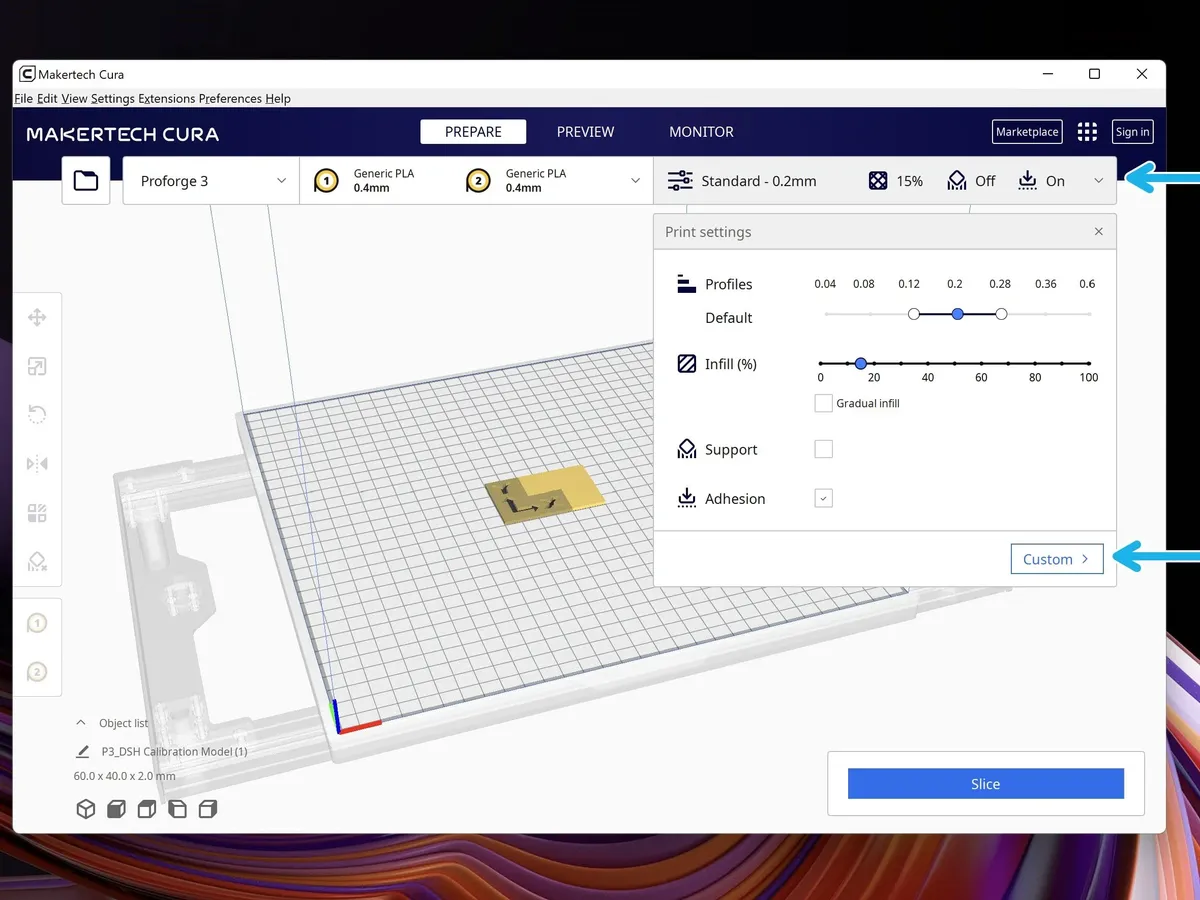
- Note: The Prime Tower is not 100% necessary, but it does improve print quality when doing a dual print.
- Go to custom settings.
- Click the menu icon and display ALL settings.
- In the Dual Extrusion menu select "Enable Prime Tower"
- Set the Prime Tower position.
- On the build platform, you should see a shadow of where it will be placed. Aim to place it behind your model.
- Caution: The prime tower should also be placed along the centre of the X-Axis, this is where switching is the most efficient. i.e. the X position should always be near 170.
- Set the nozzle switch retraction distance to 7mm.
Loading comments…
Step 10 Retraction Settings
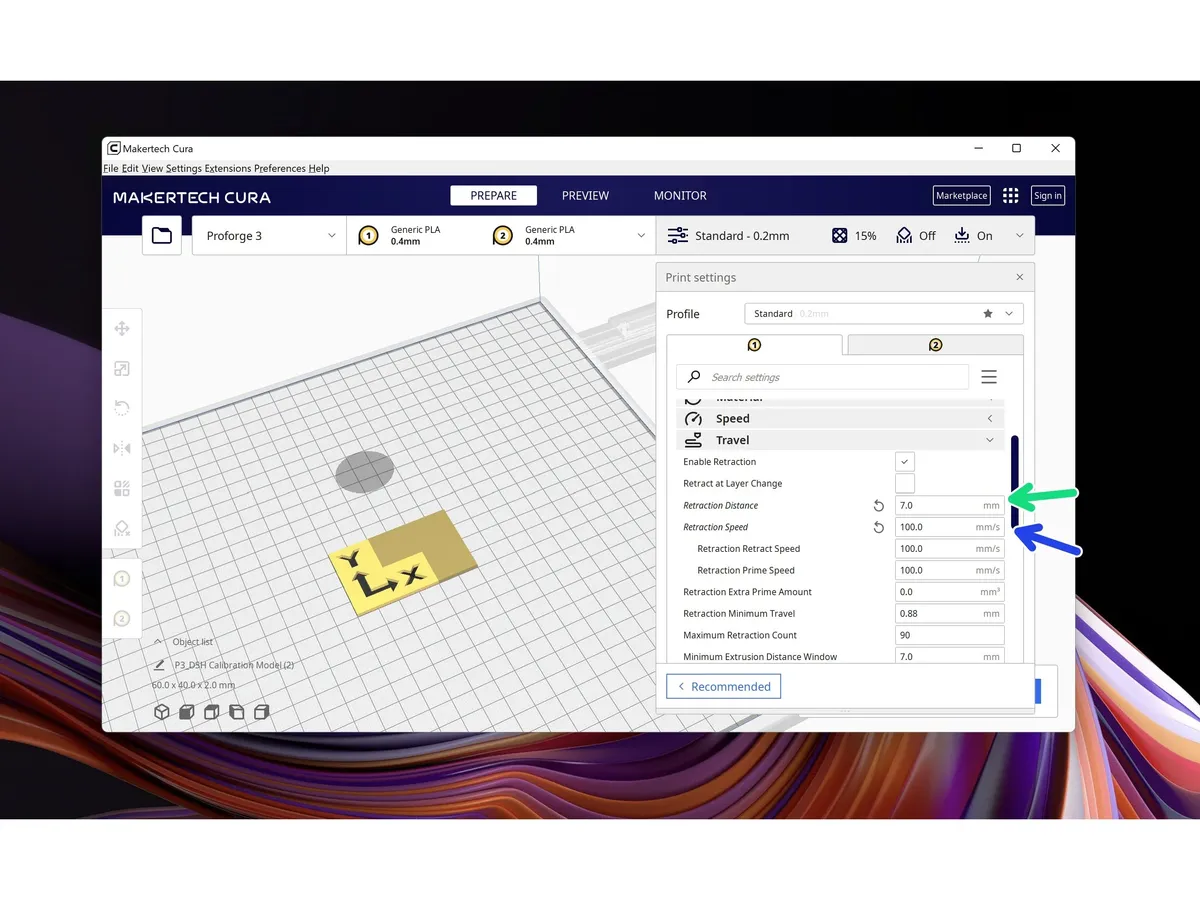
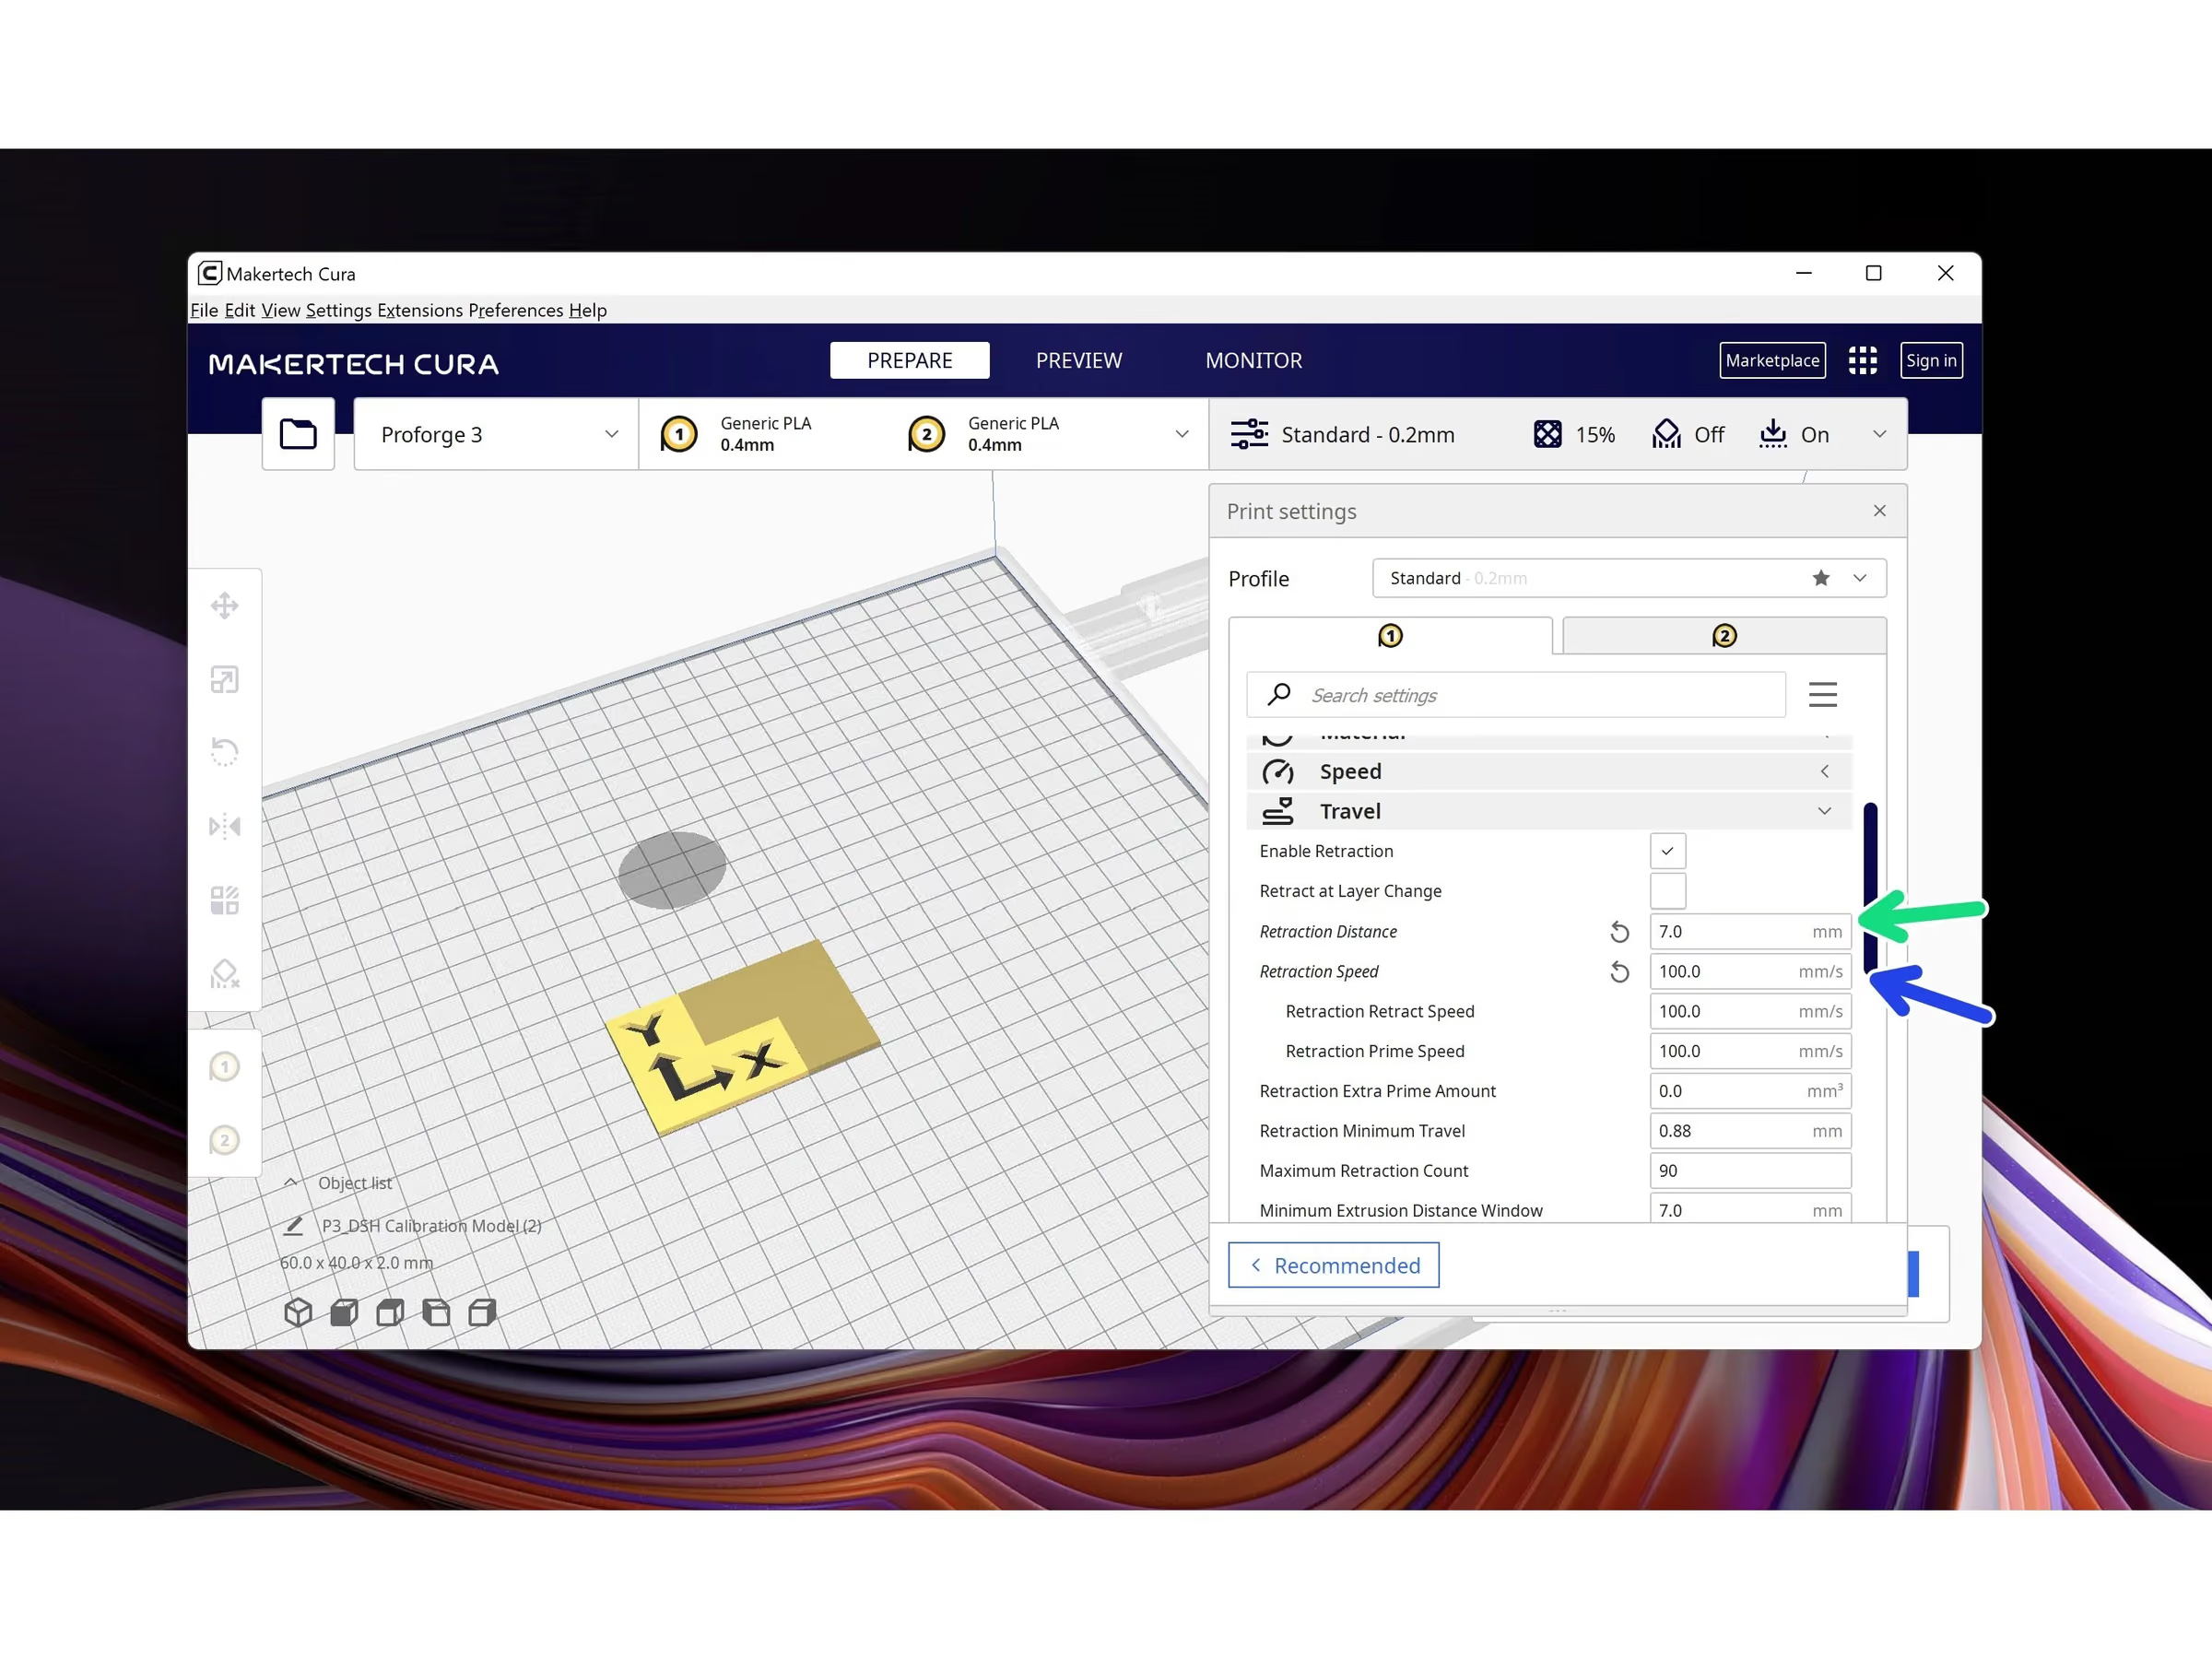
- Note: The DSH is Bowden setup, this requires more aggressive retraction.
- Set the Retraction amount to 7mm.
- Set the retraction speed to 100mm/s.
Loading comments…
Step 11 Post Processing
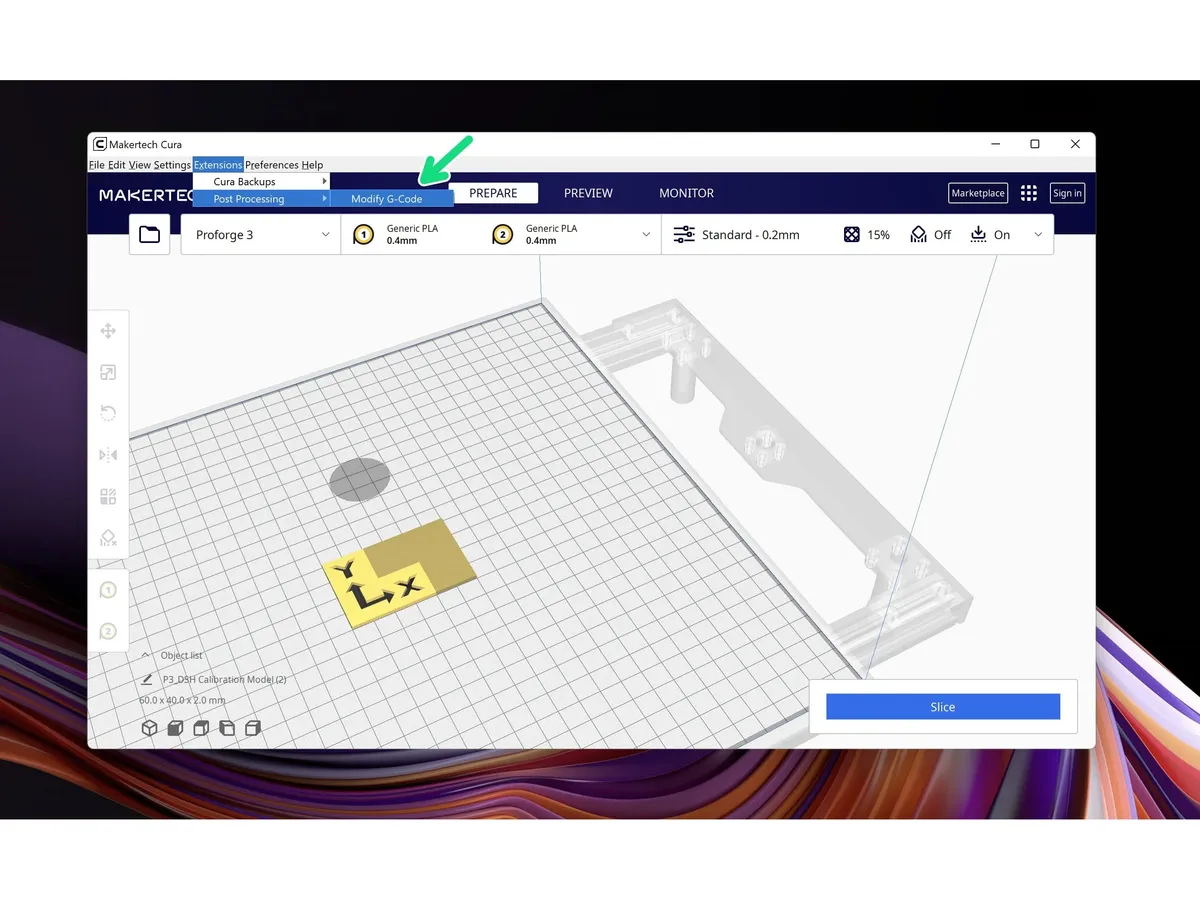
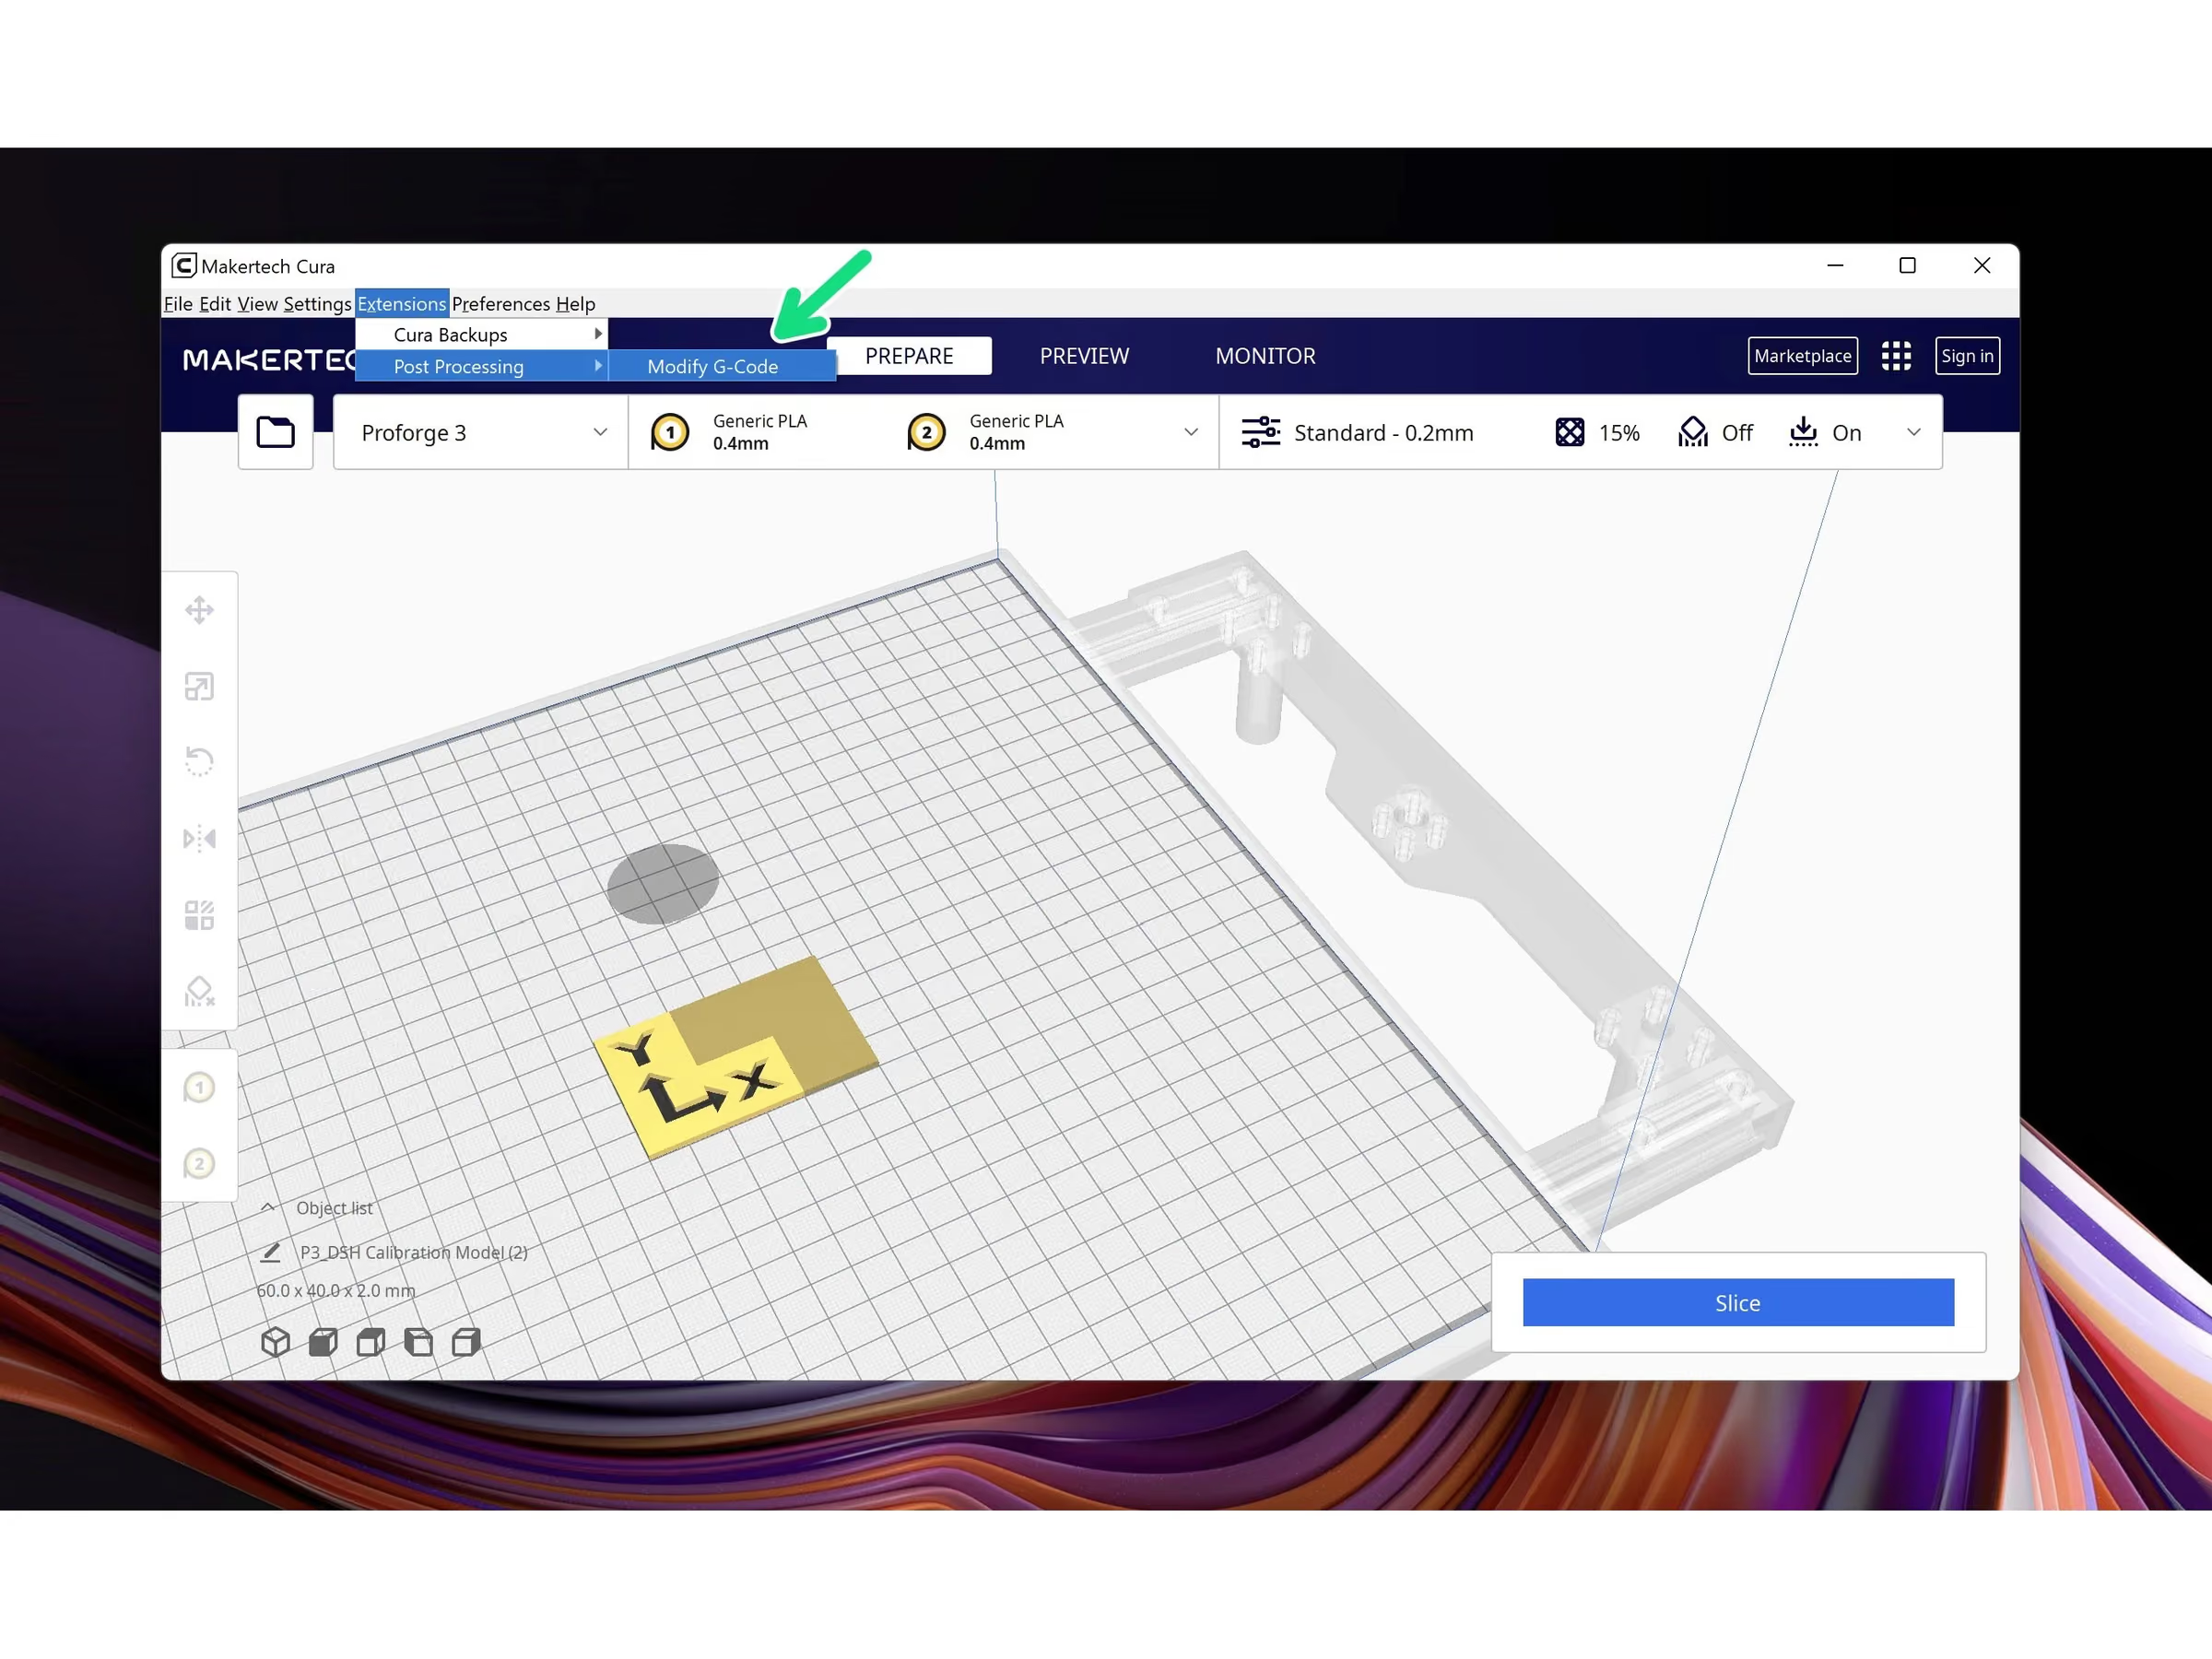
- Note: Finally, due to the way Cura creates gcode we need to add a post-processing script to our set-up.
- Note: This script replaces the wait for heat command with a simple heat command.
- In the top menu bar go to Extensions -> Post Processing -> Modify G-Code
- Go to Add a script -> Search and Replace
- Search: M109
- Replace: M104
- Hit Close when done.
Loading comments…
Step 12 Slice and Save to SD card
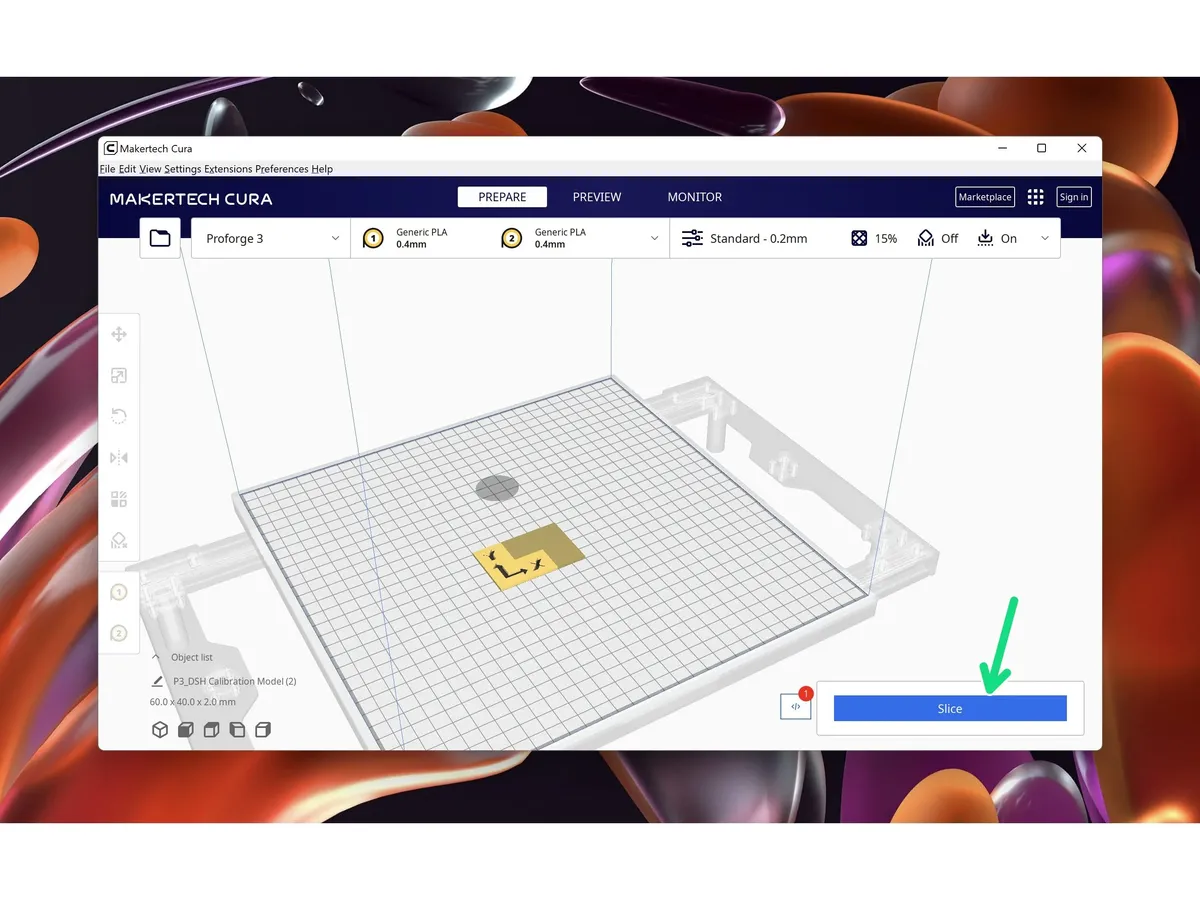
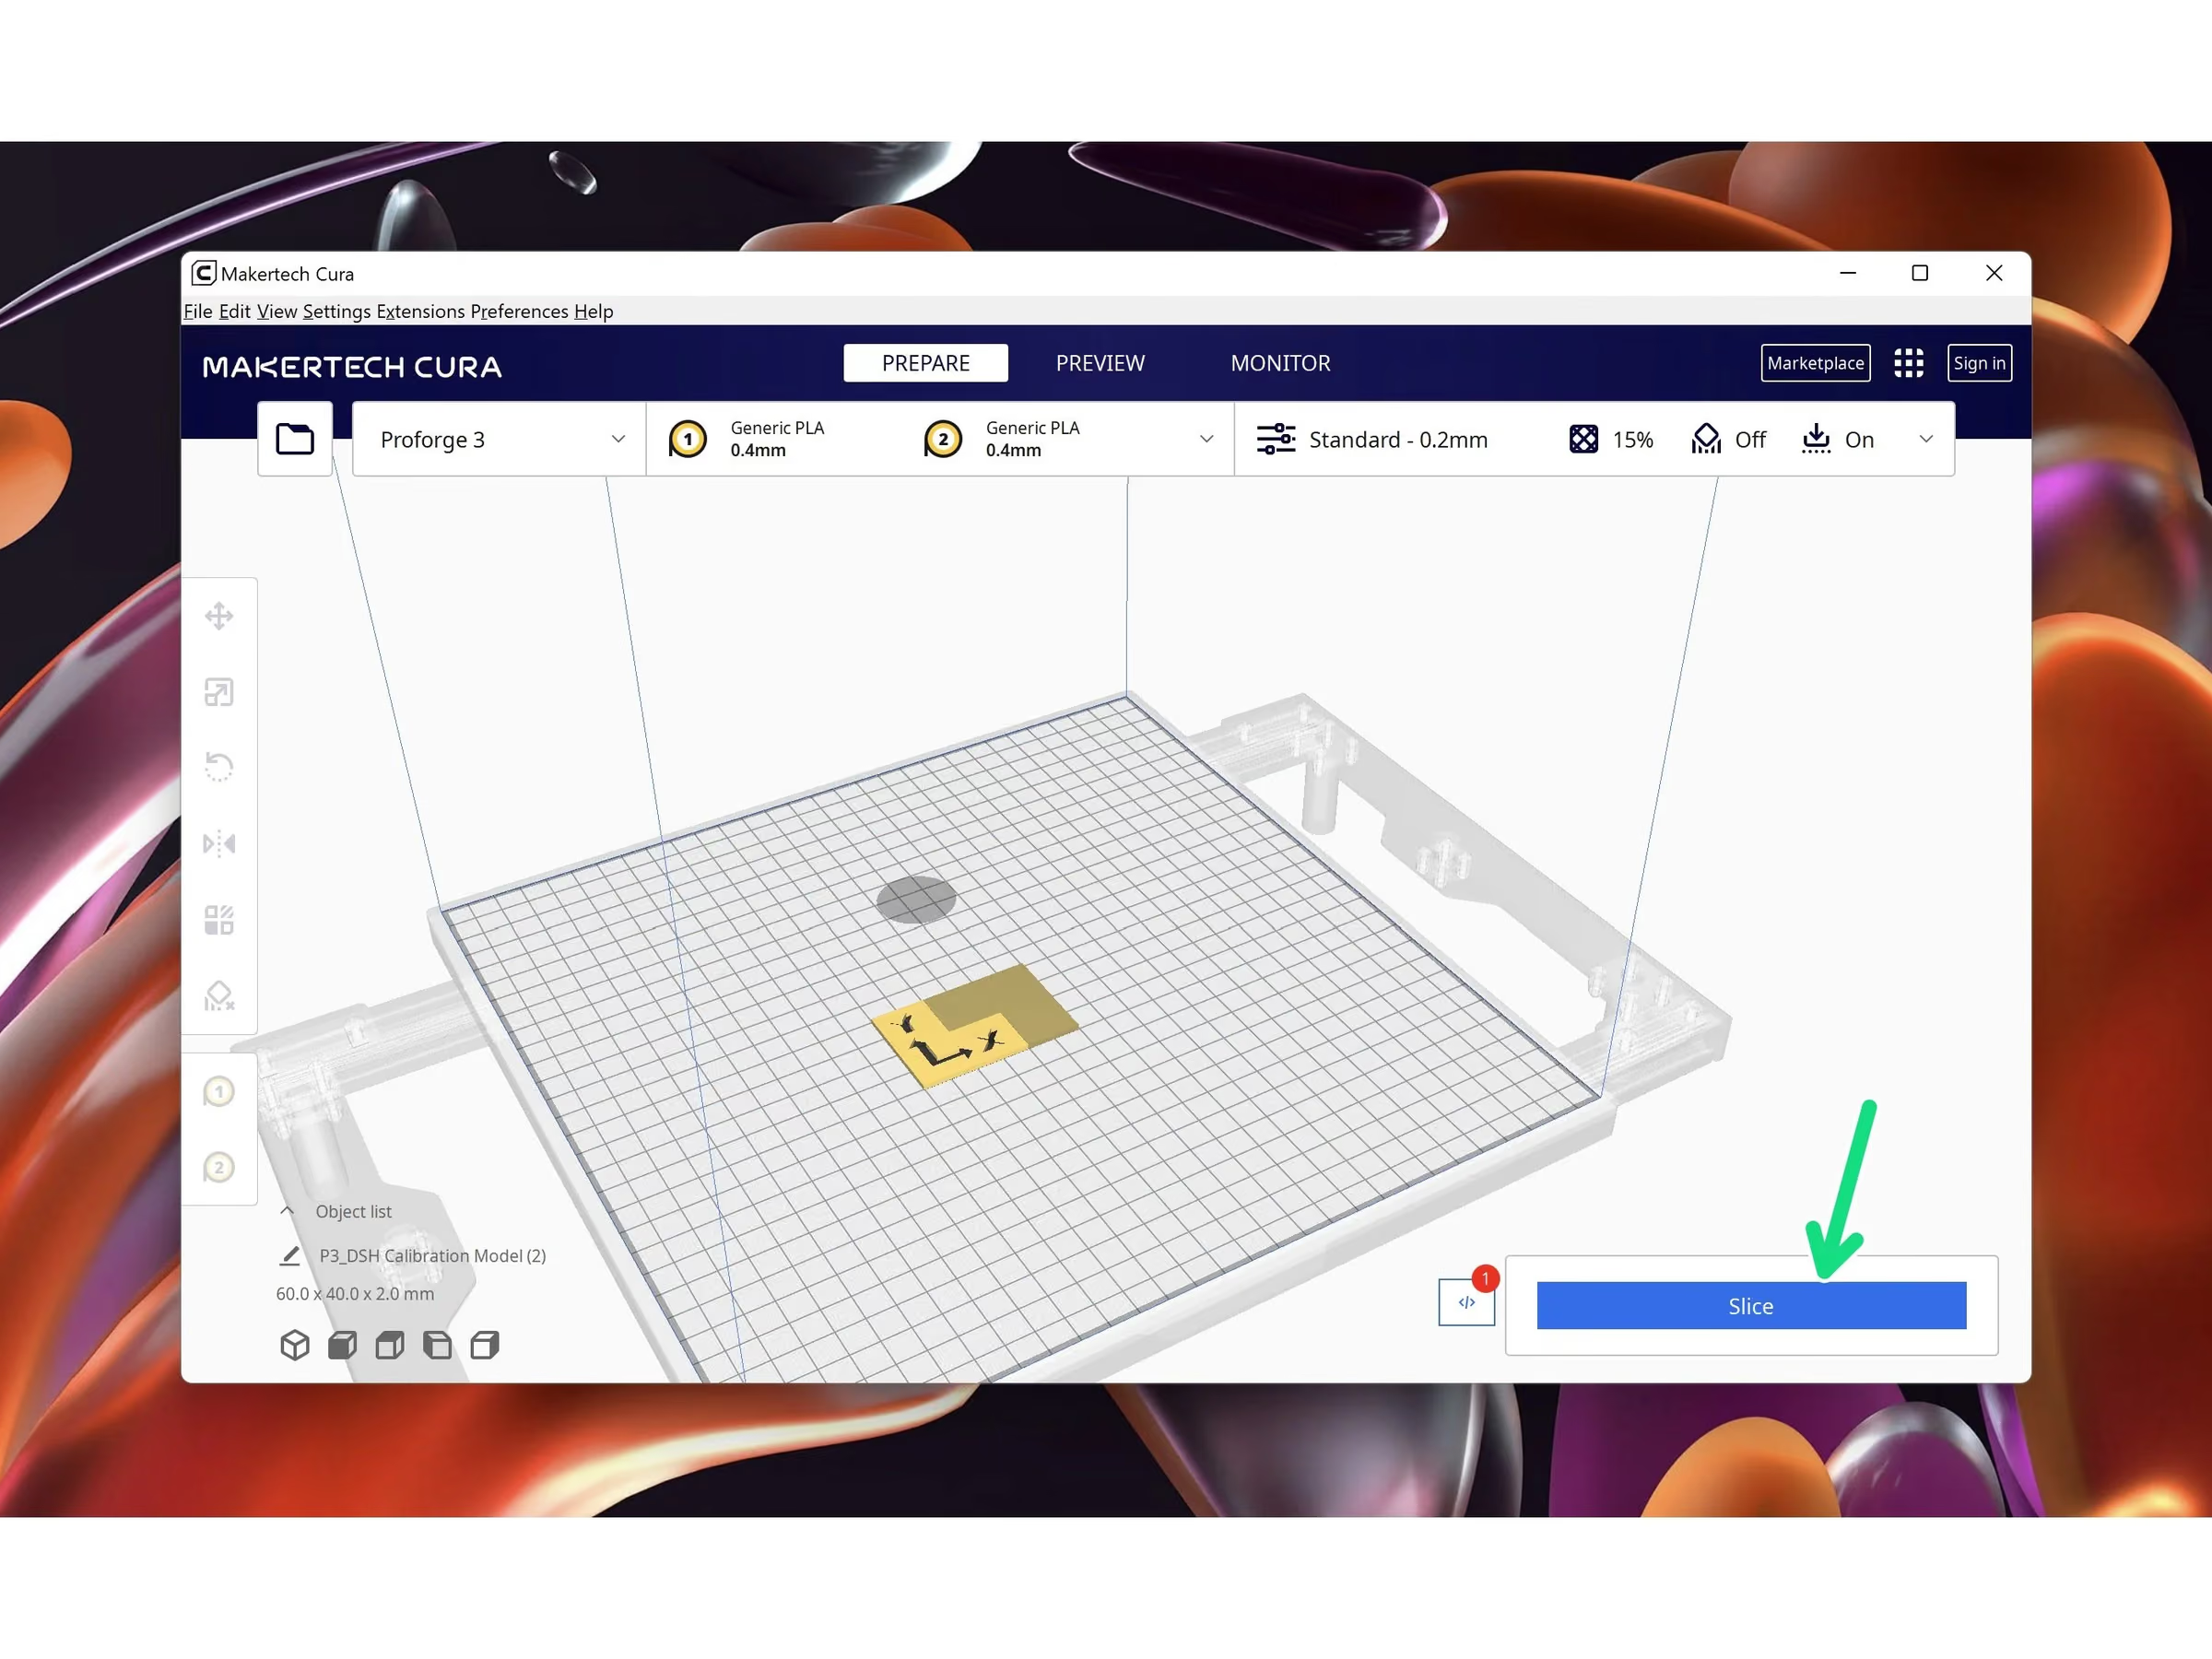
- Slice the model and save it to your SD card.
Loading comments…
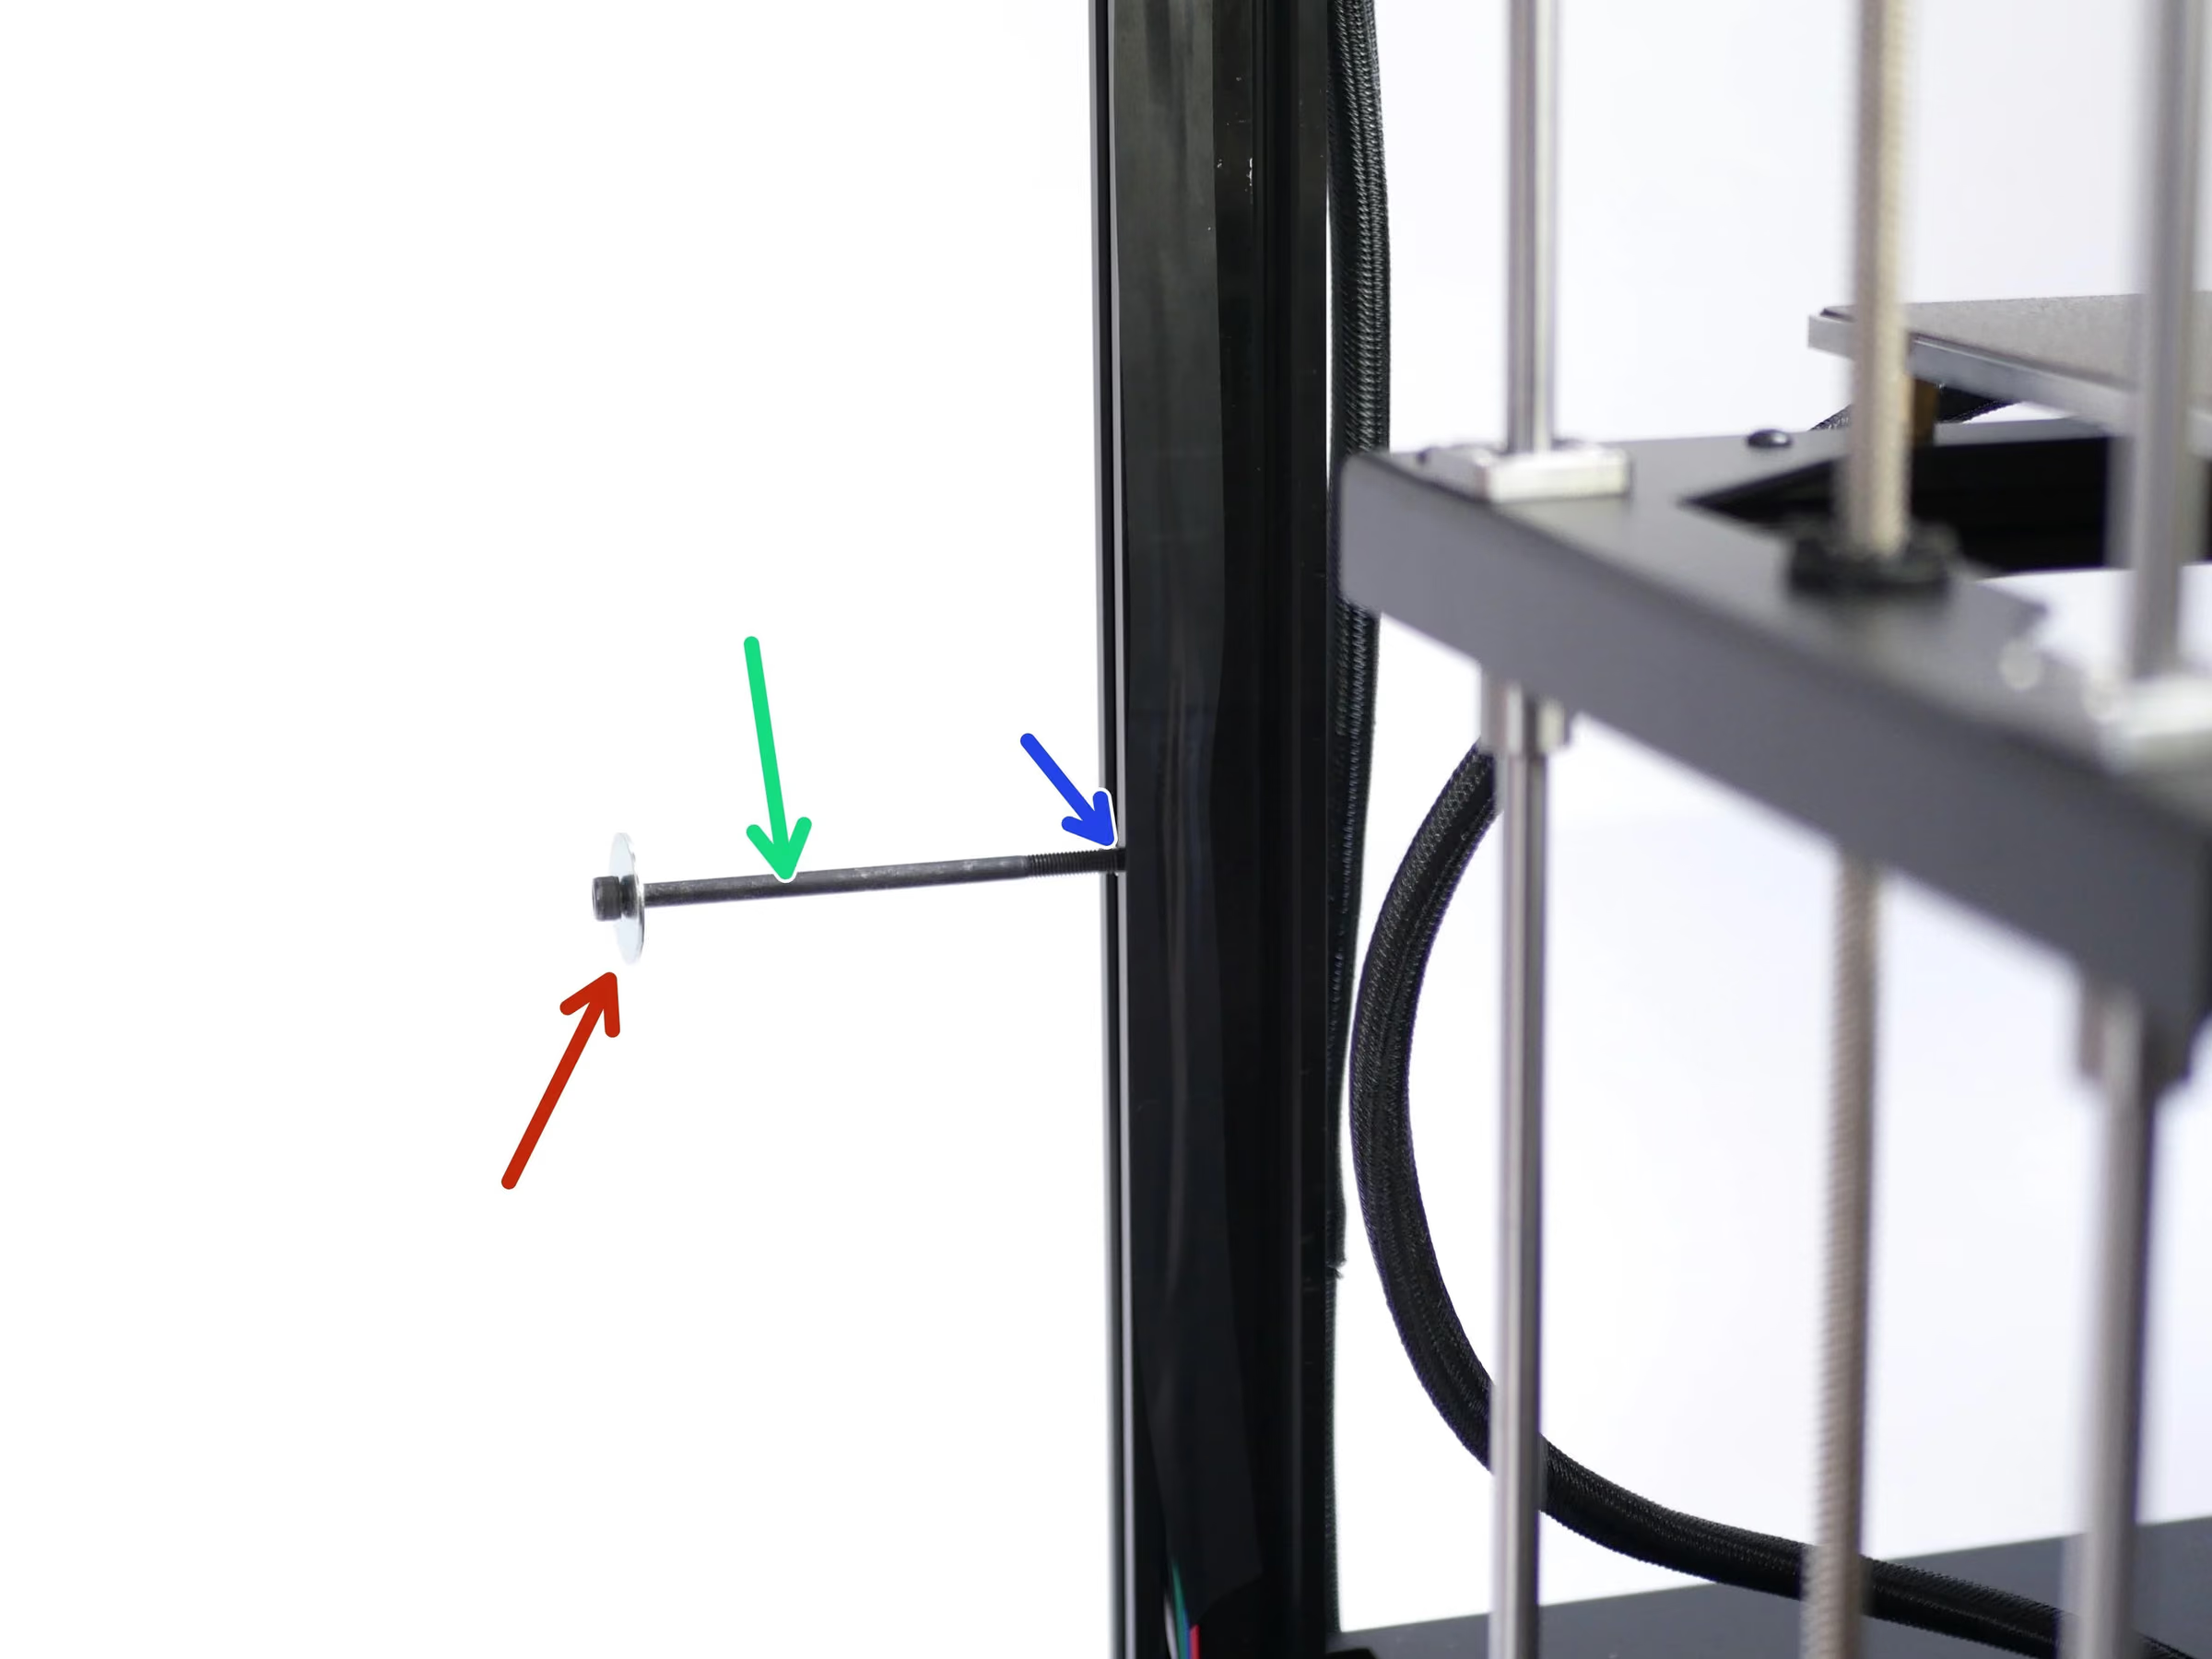
Step 13 Spool Holders
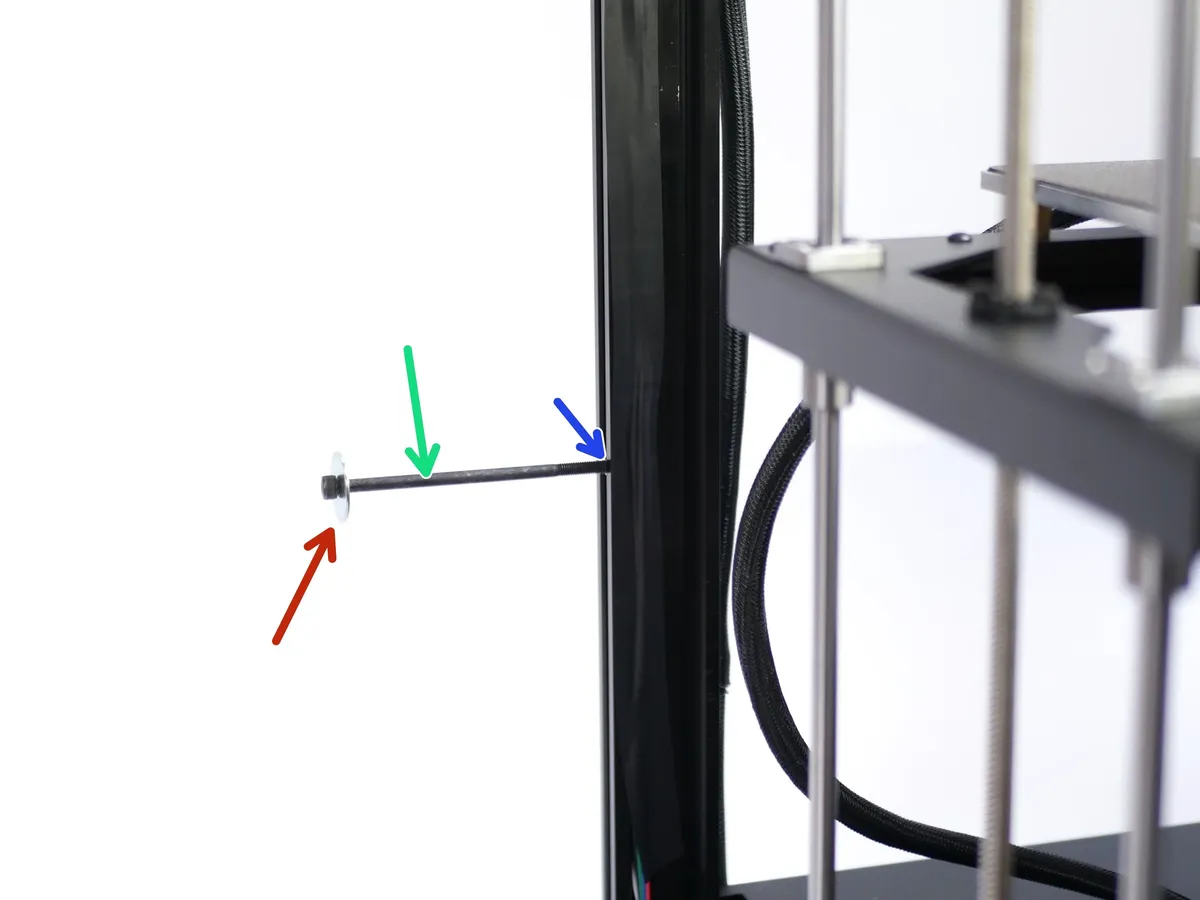
- Note: Fix the spool holders to the side of the Proforge 3 frame.
- M5 x 100mm Bolt
- M5 T-Nut
- M5 Penny Washer
Loading comments…
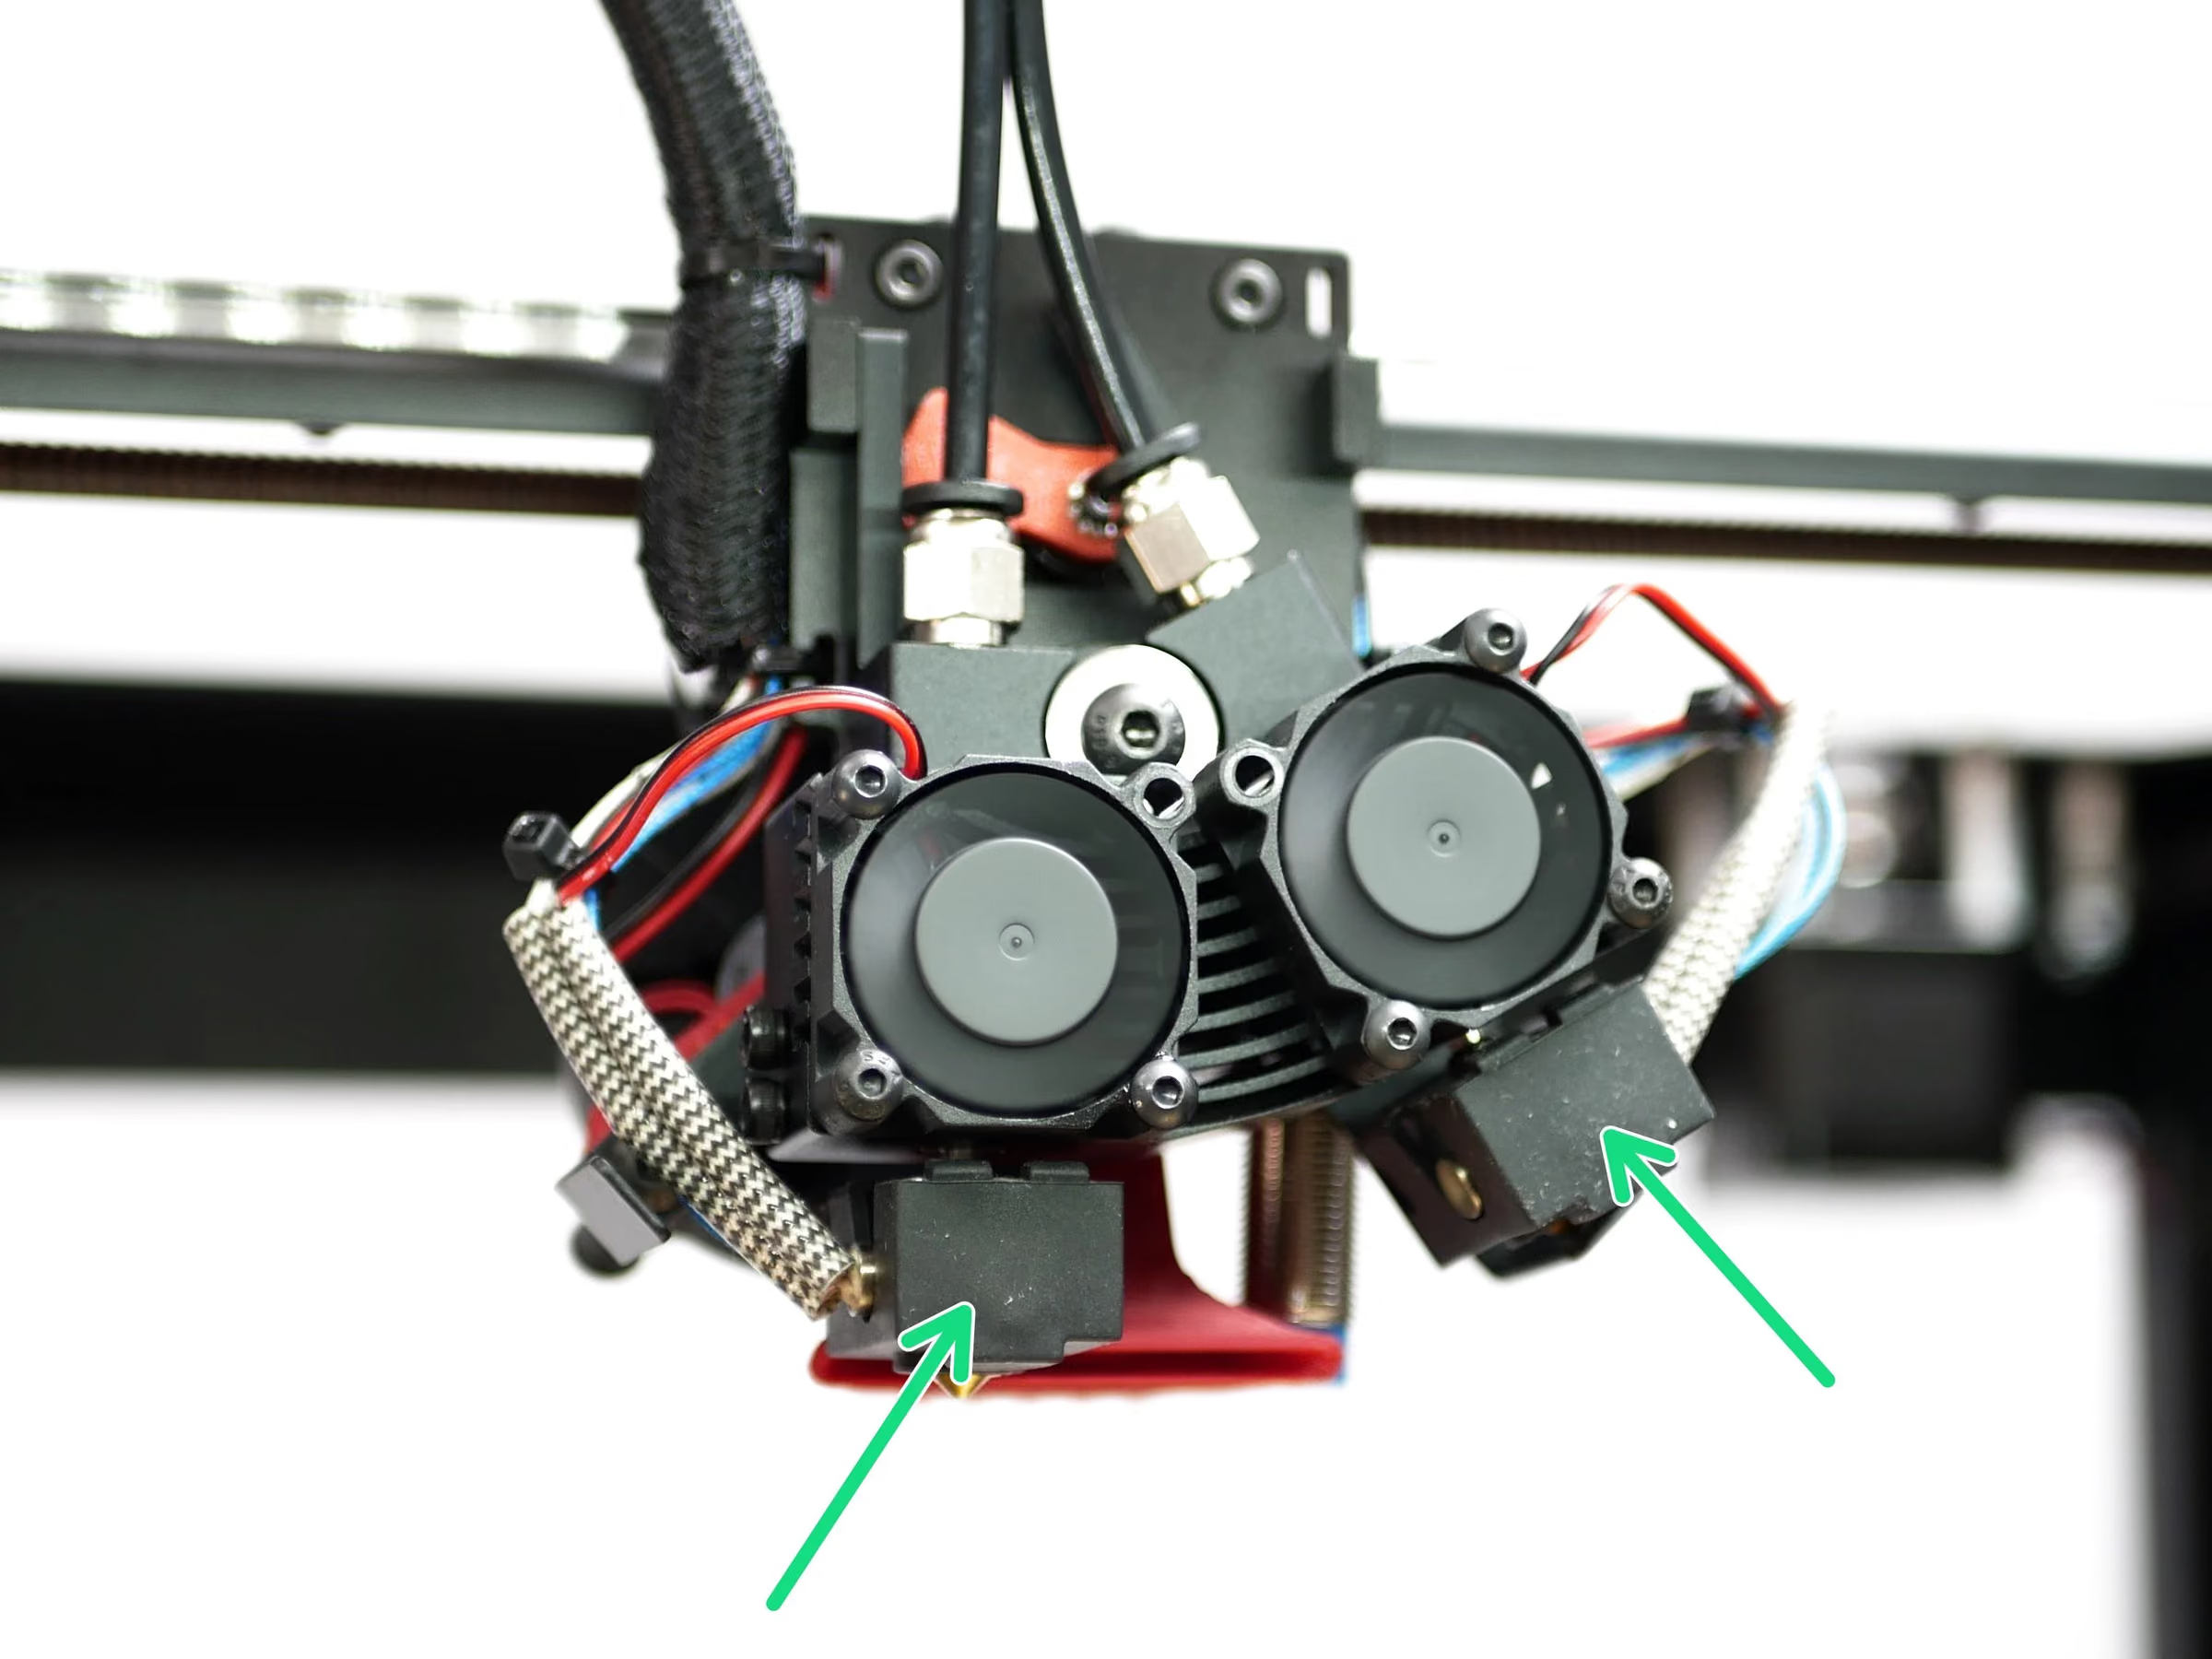
Step 14 Hotend Covers
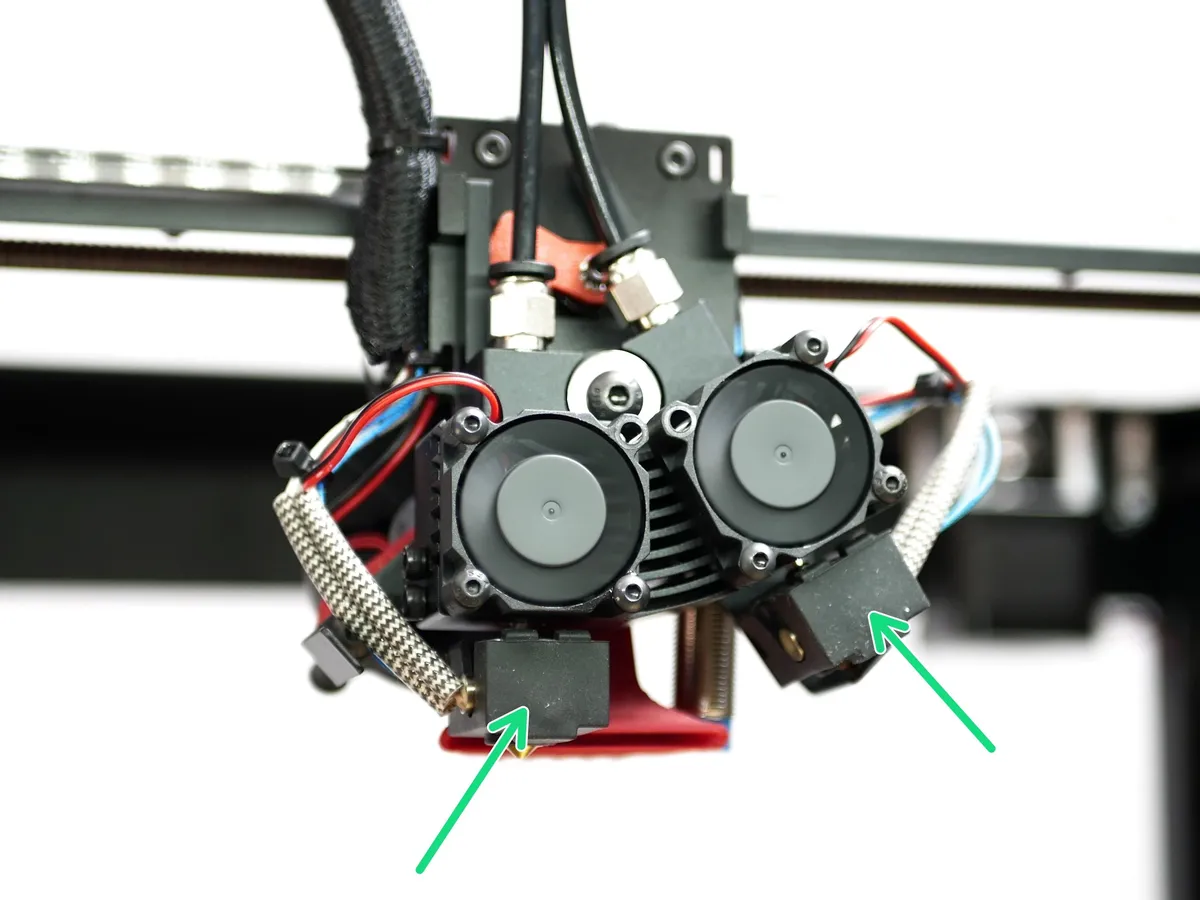
- Fix the silicone covers over the hotends.
Loading comments…
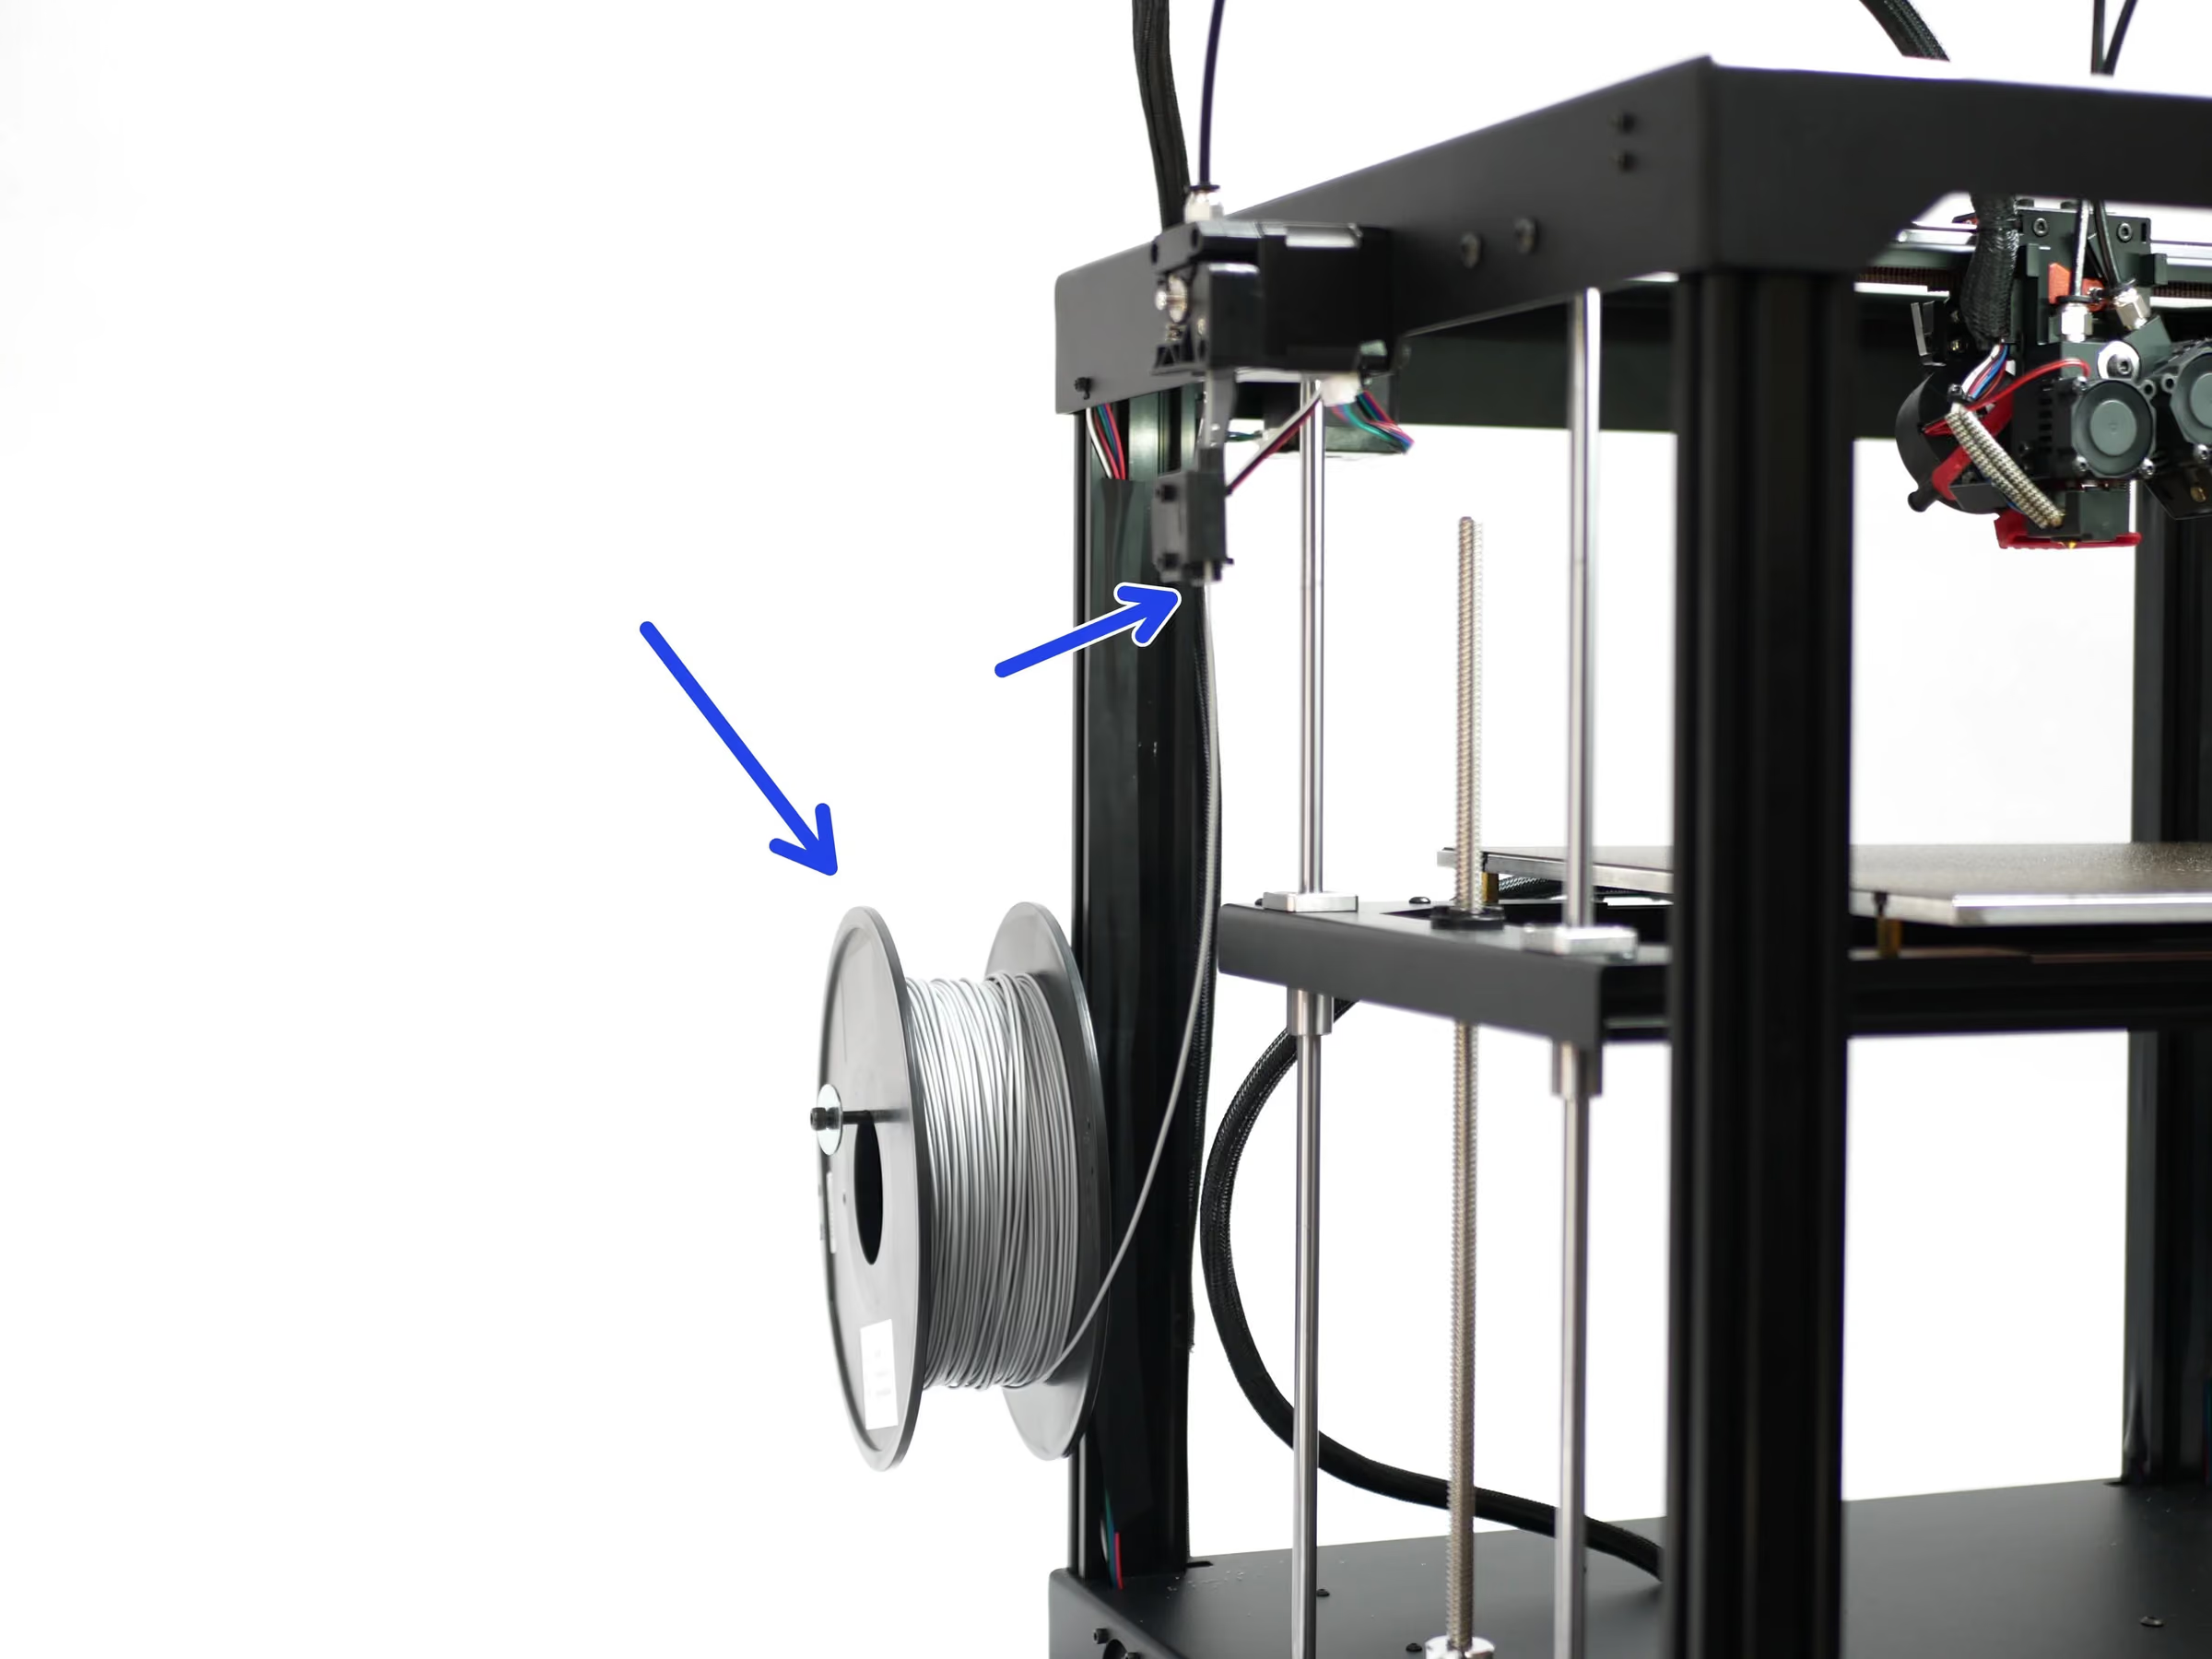
Step 15 Load Filament
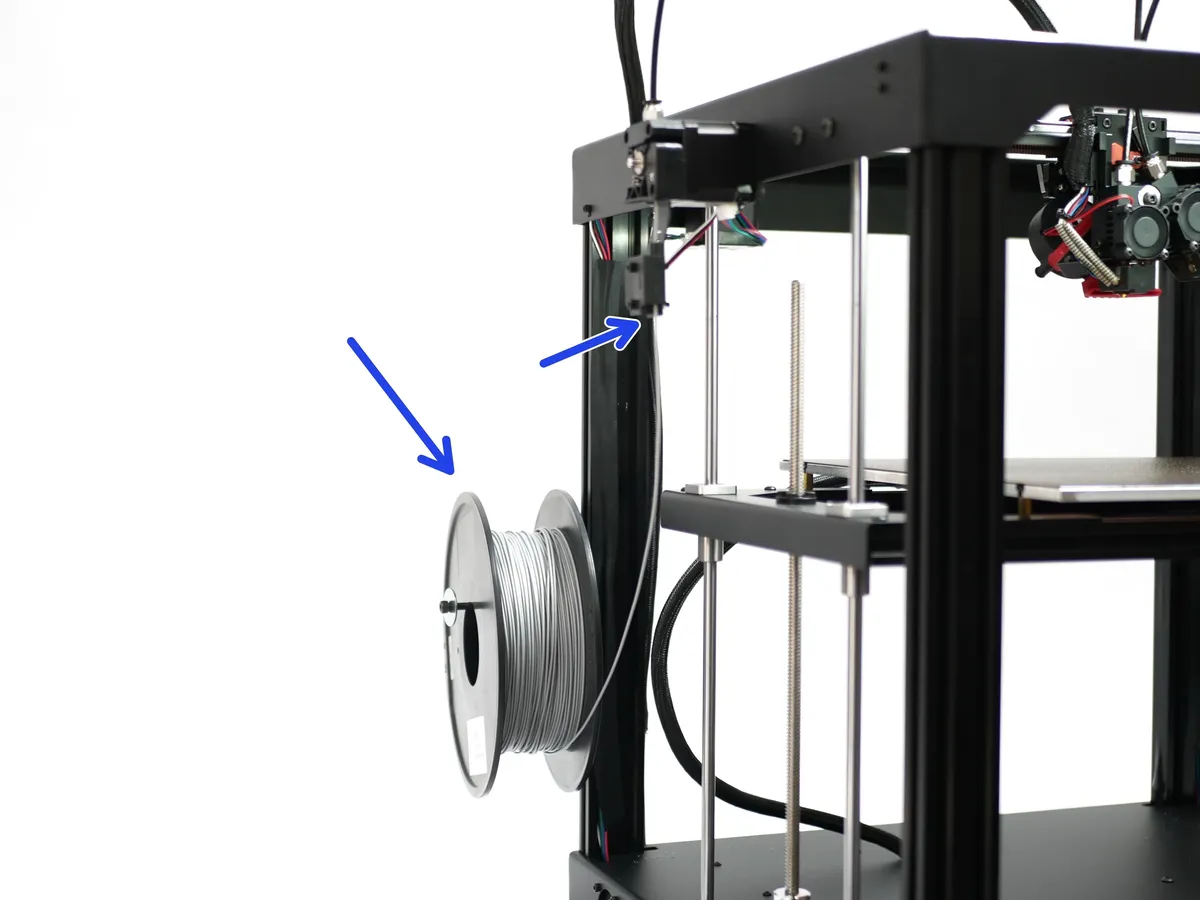
- Load your filament. We're using ESun's PLA+ here.
- Use scissors or side cutters to create a sharp point and feed it into the extruders.
Loading comments…
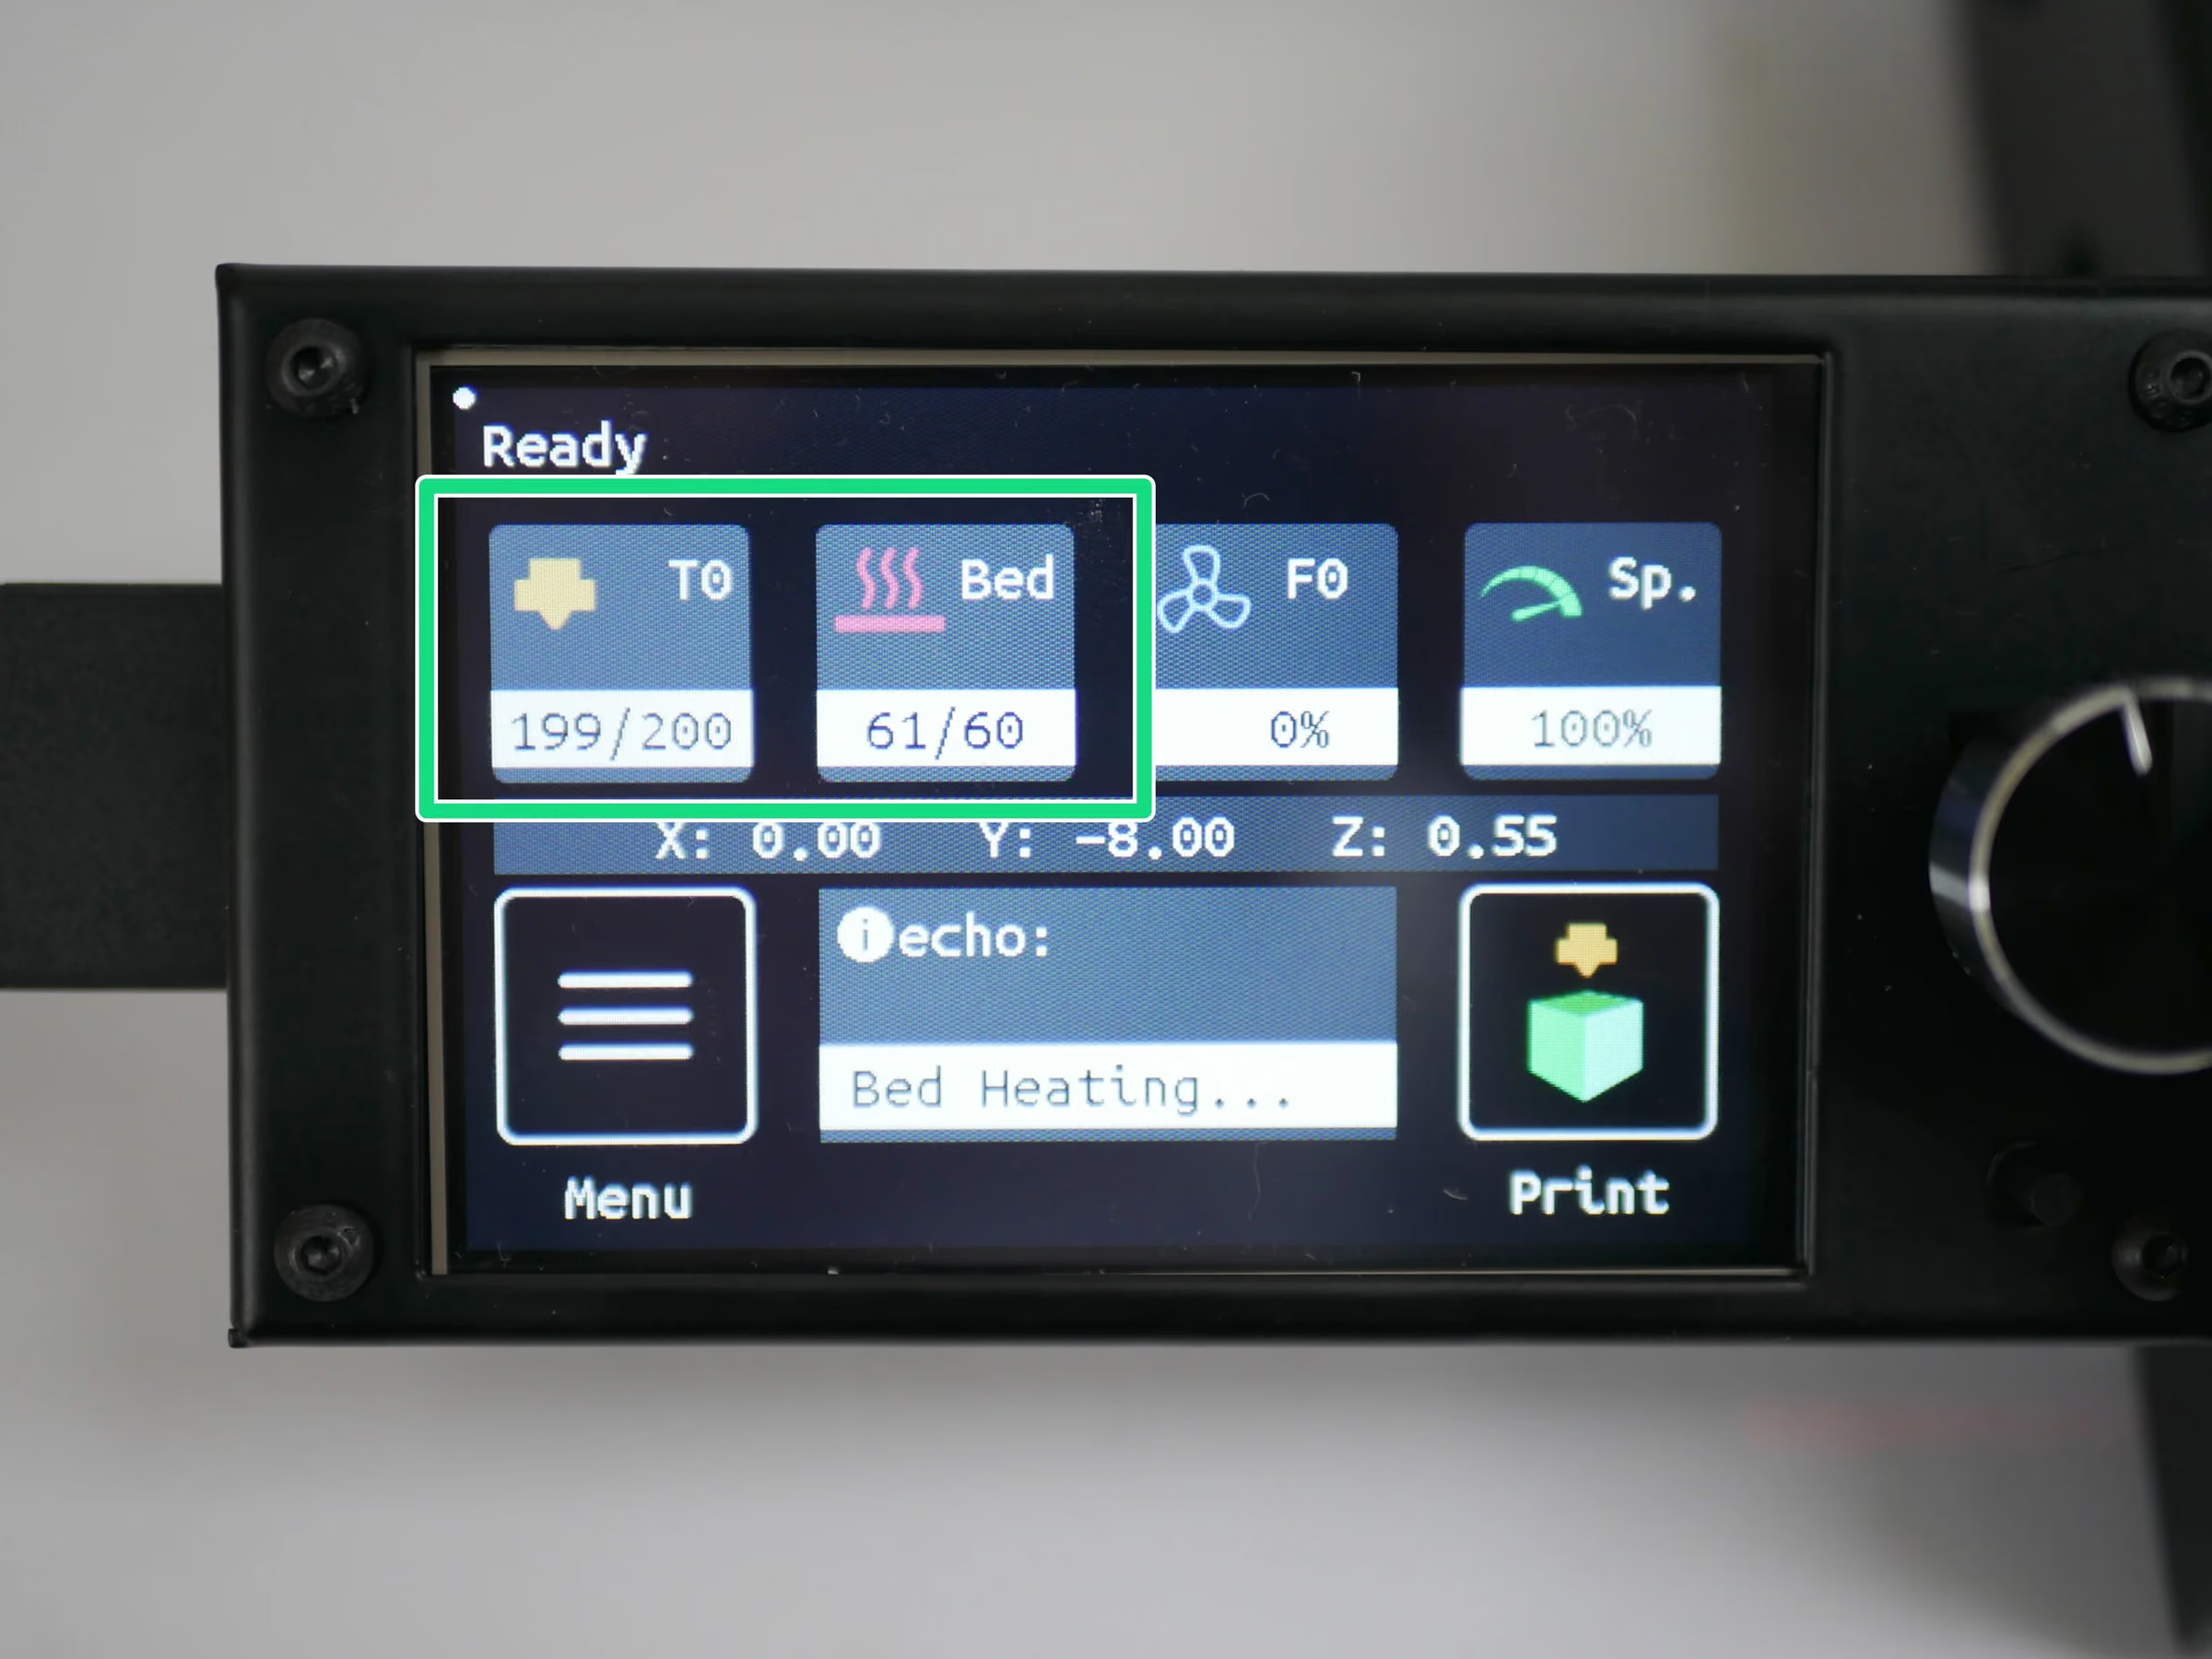
Step 16 Pre-Heating
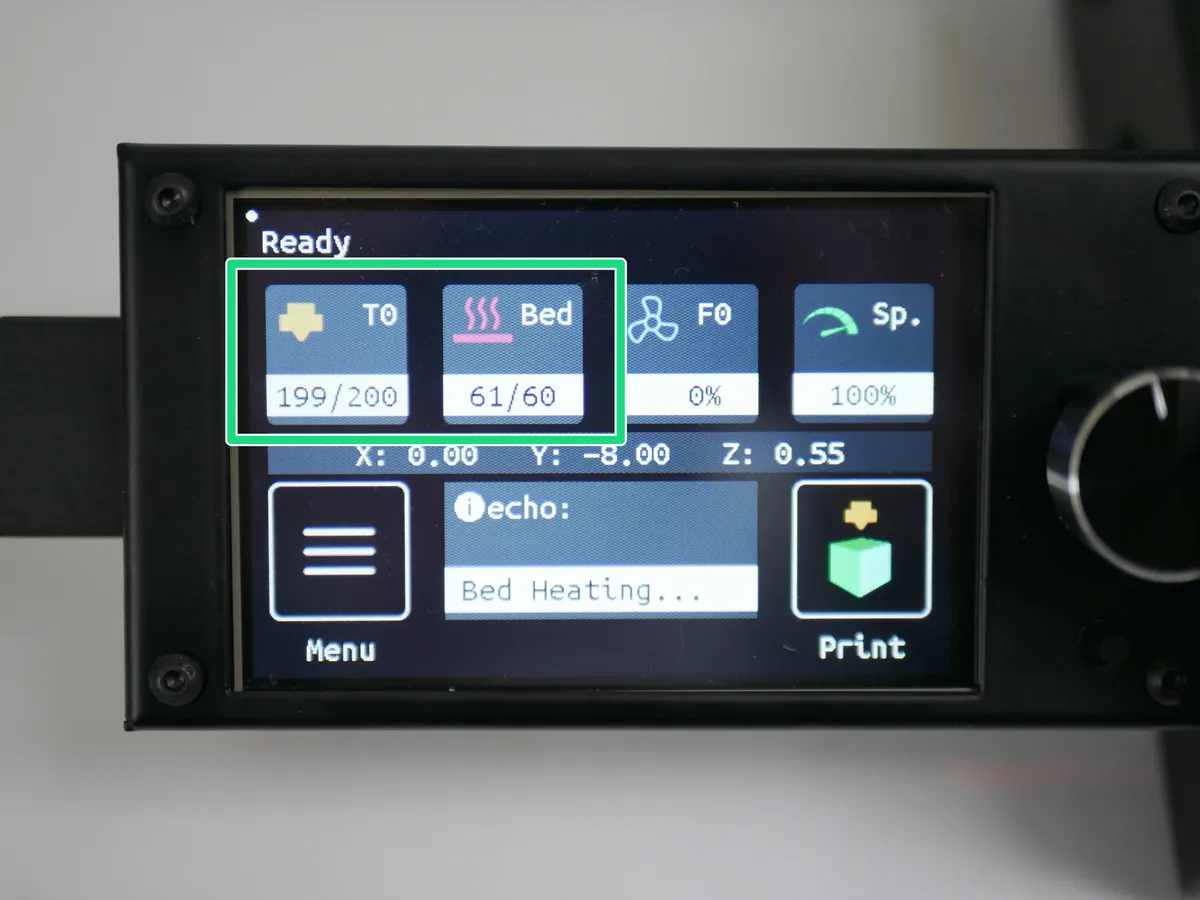
- Note: Pre-heat the hotends and bed to your printing temp.
- In our case, 200C on both hotends and 60C on the bed.
Loading comments…
Step 17 Priming Hotends
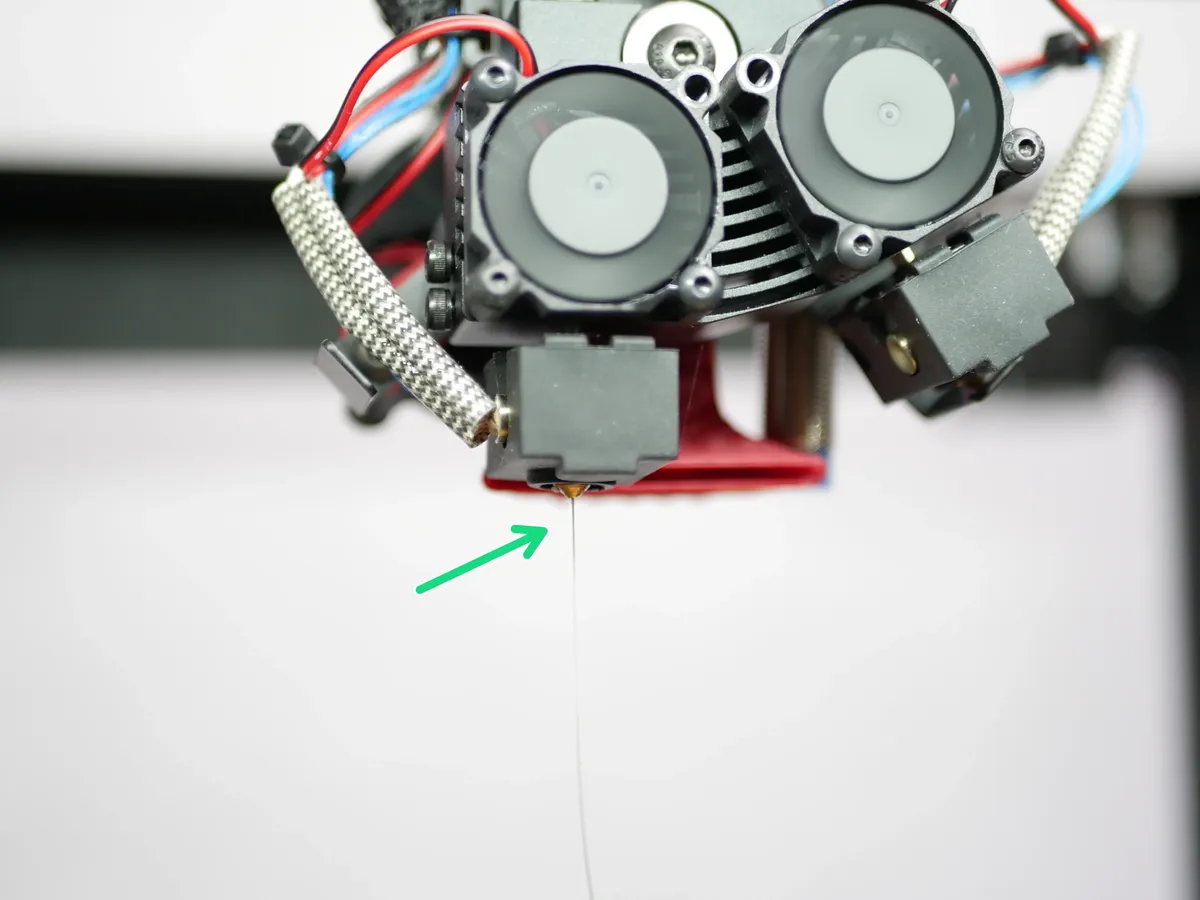
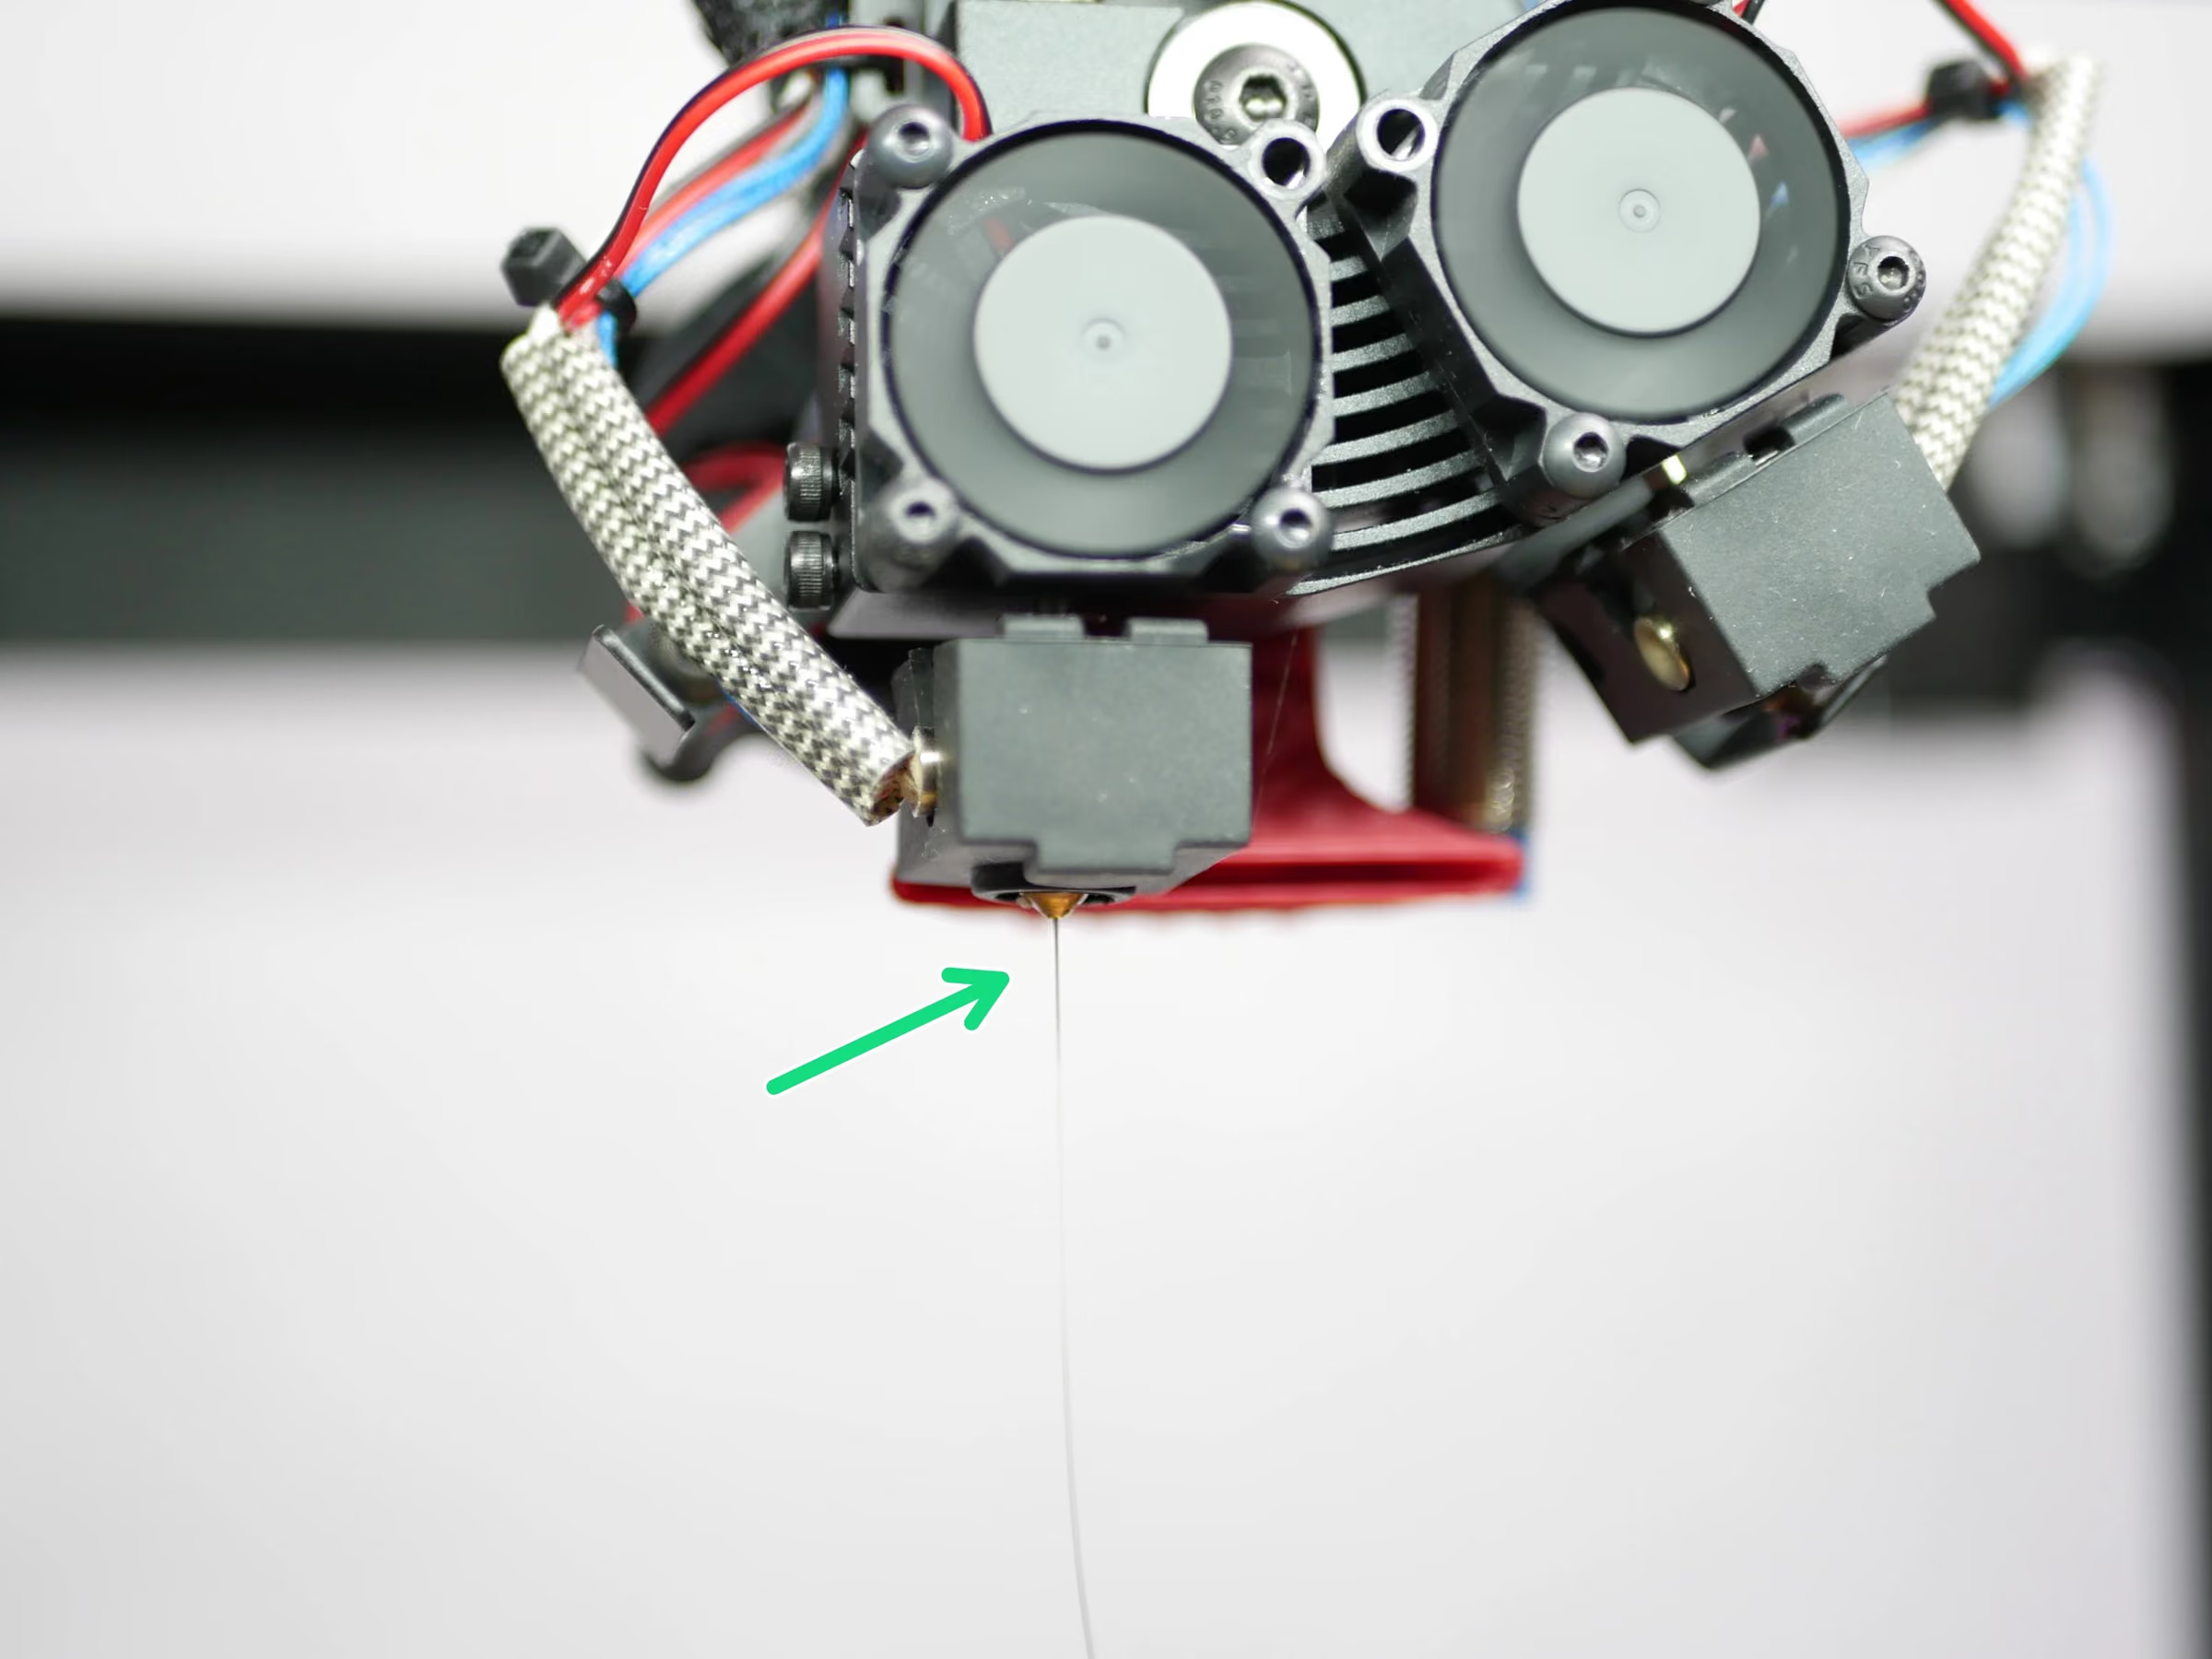
- Run some filament through the hotends to check that you are getting a smooth flow of molten filament.
Loading comments…
Step 18 Print from SD Card
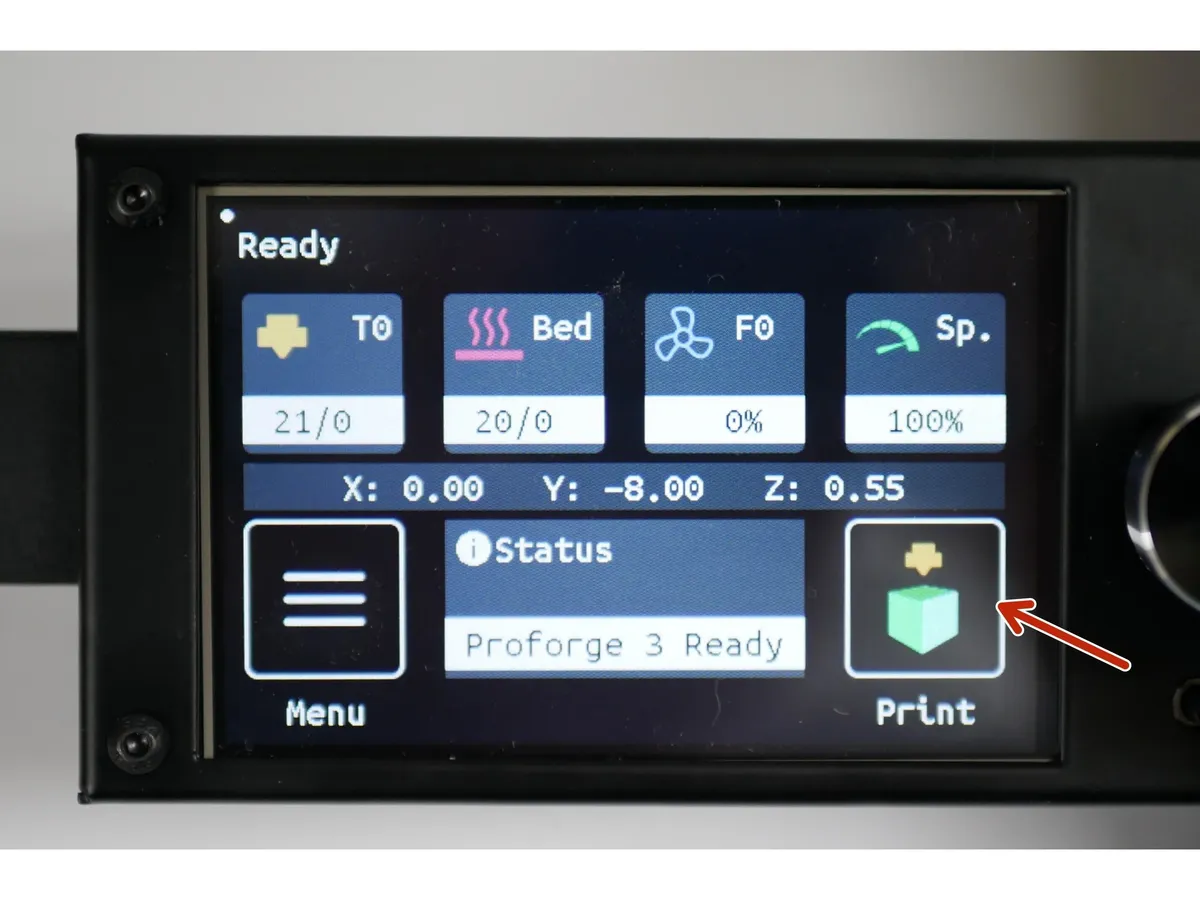
- Note: Go to:
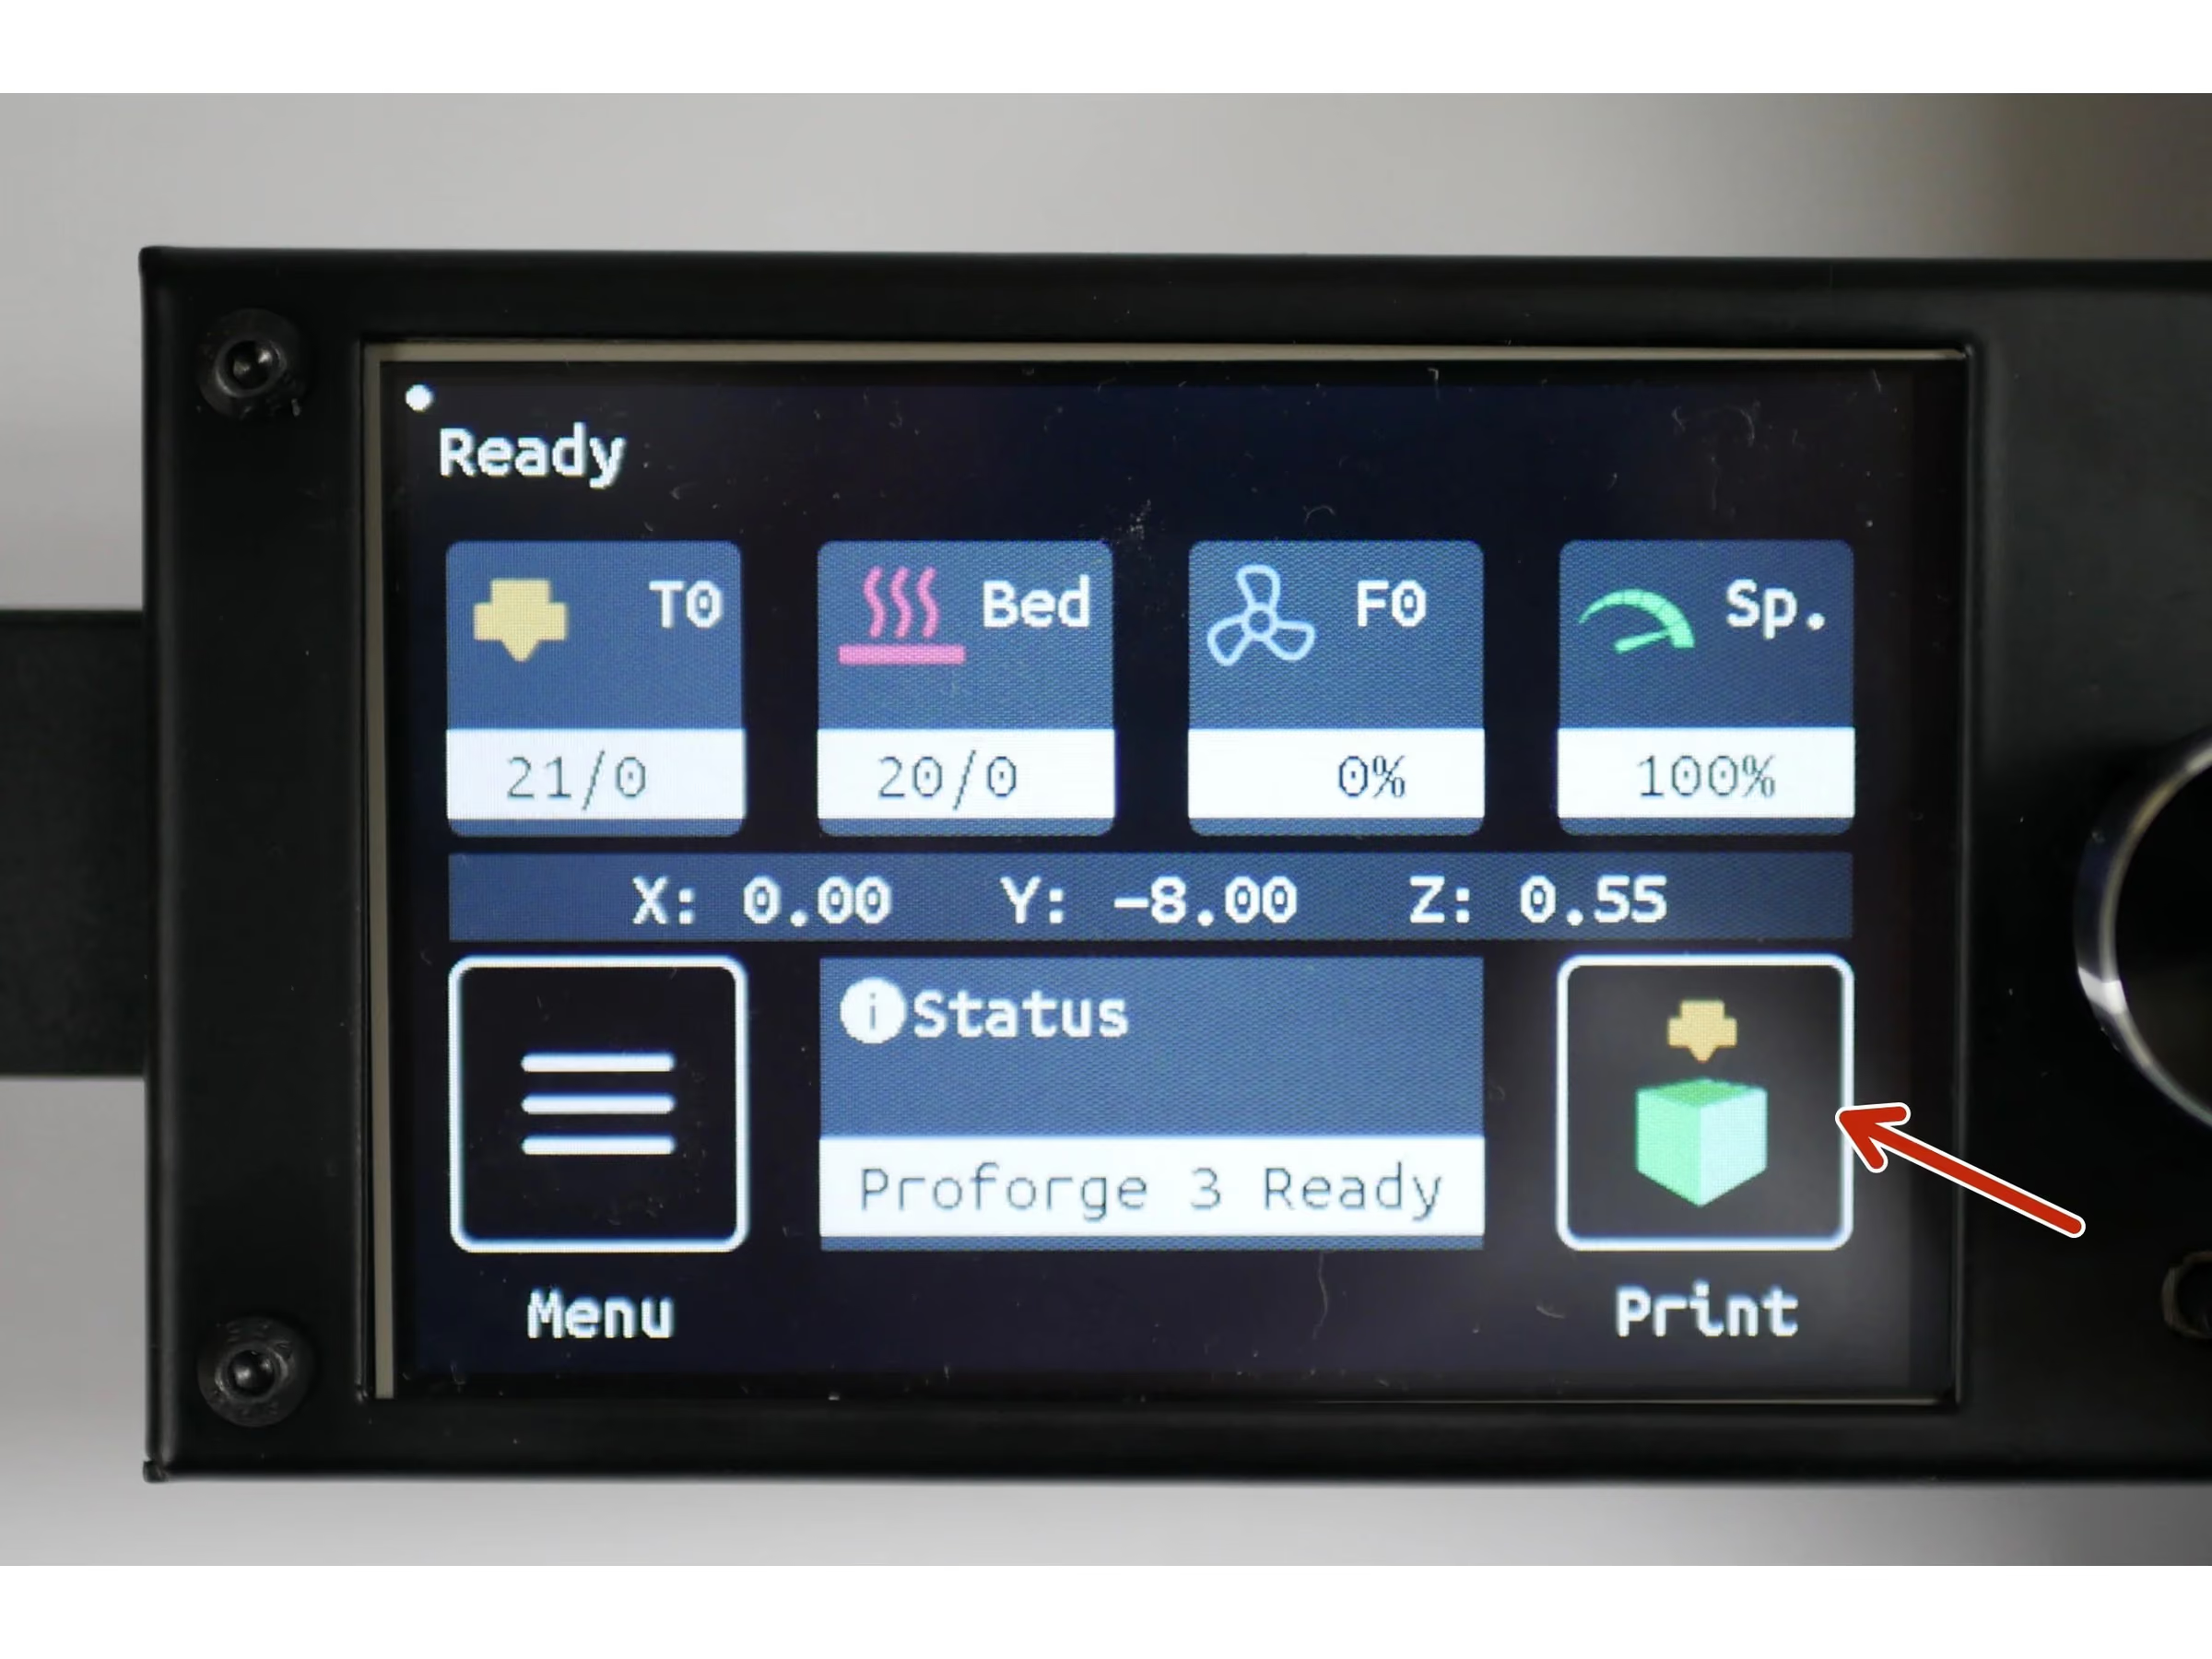
- Print
- TFT SD
- P3_DSH Calibration Model
Loading comments…
Step 19 Fist Layer Check
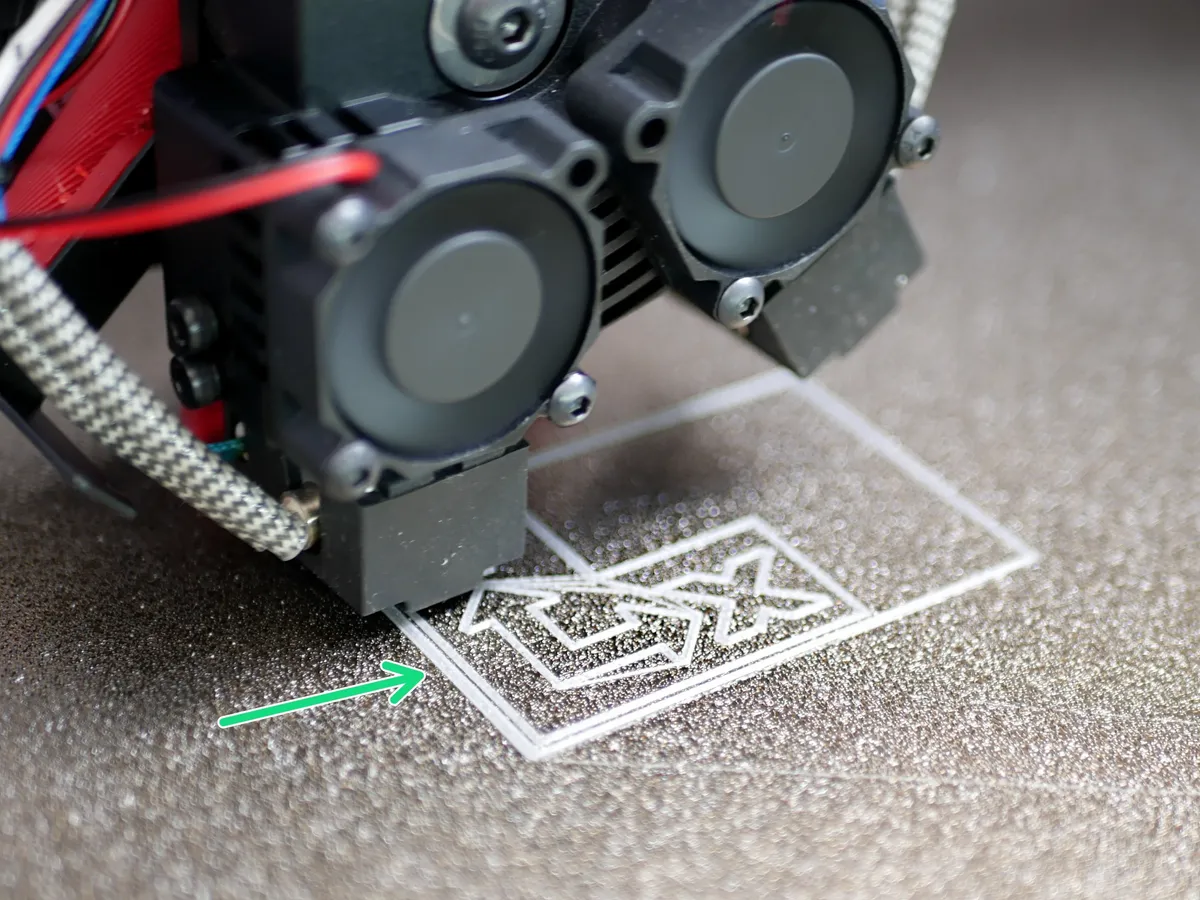
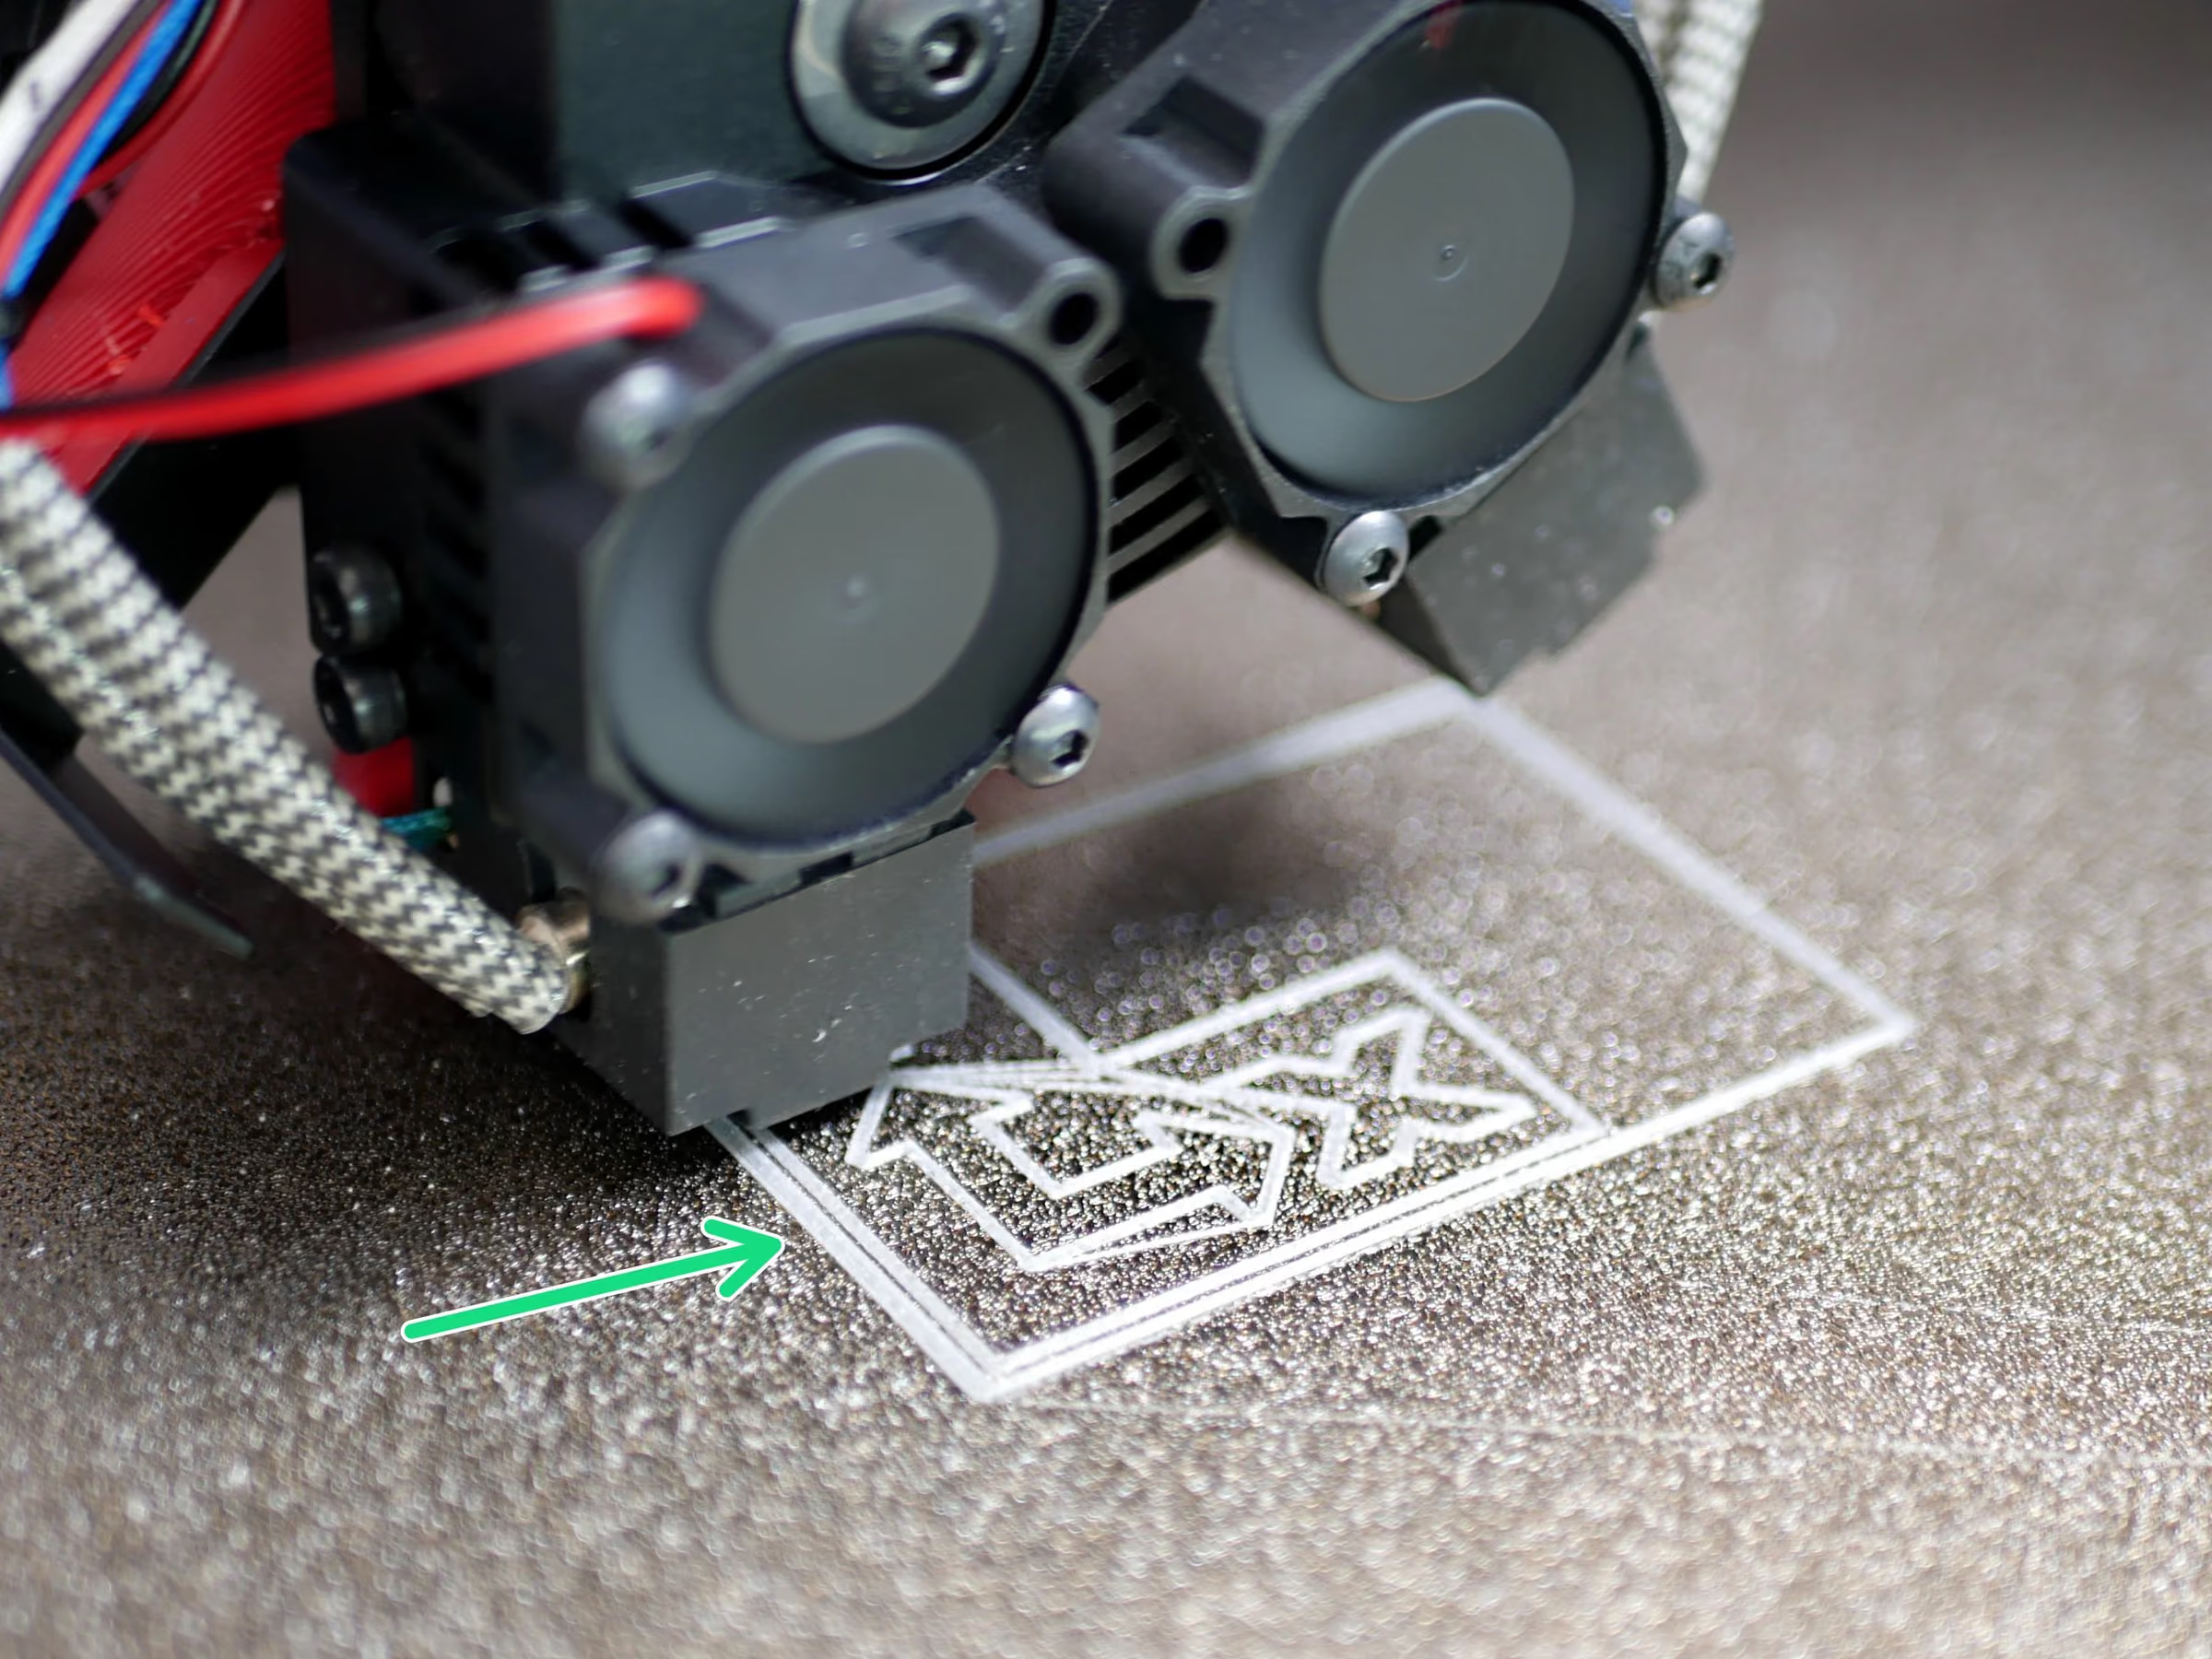
- As your print begins check that a good first layer is being layed down.
- Caution: If your nozzle is digging into the platform stop the print!
- Caution: If you find your nozzle printing too high and the first layer not adhering well enough, stop the print!
Loading comments…
Step 20 Adjusting the Offset
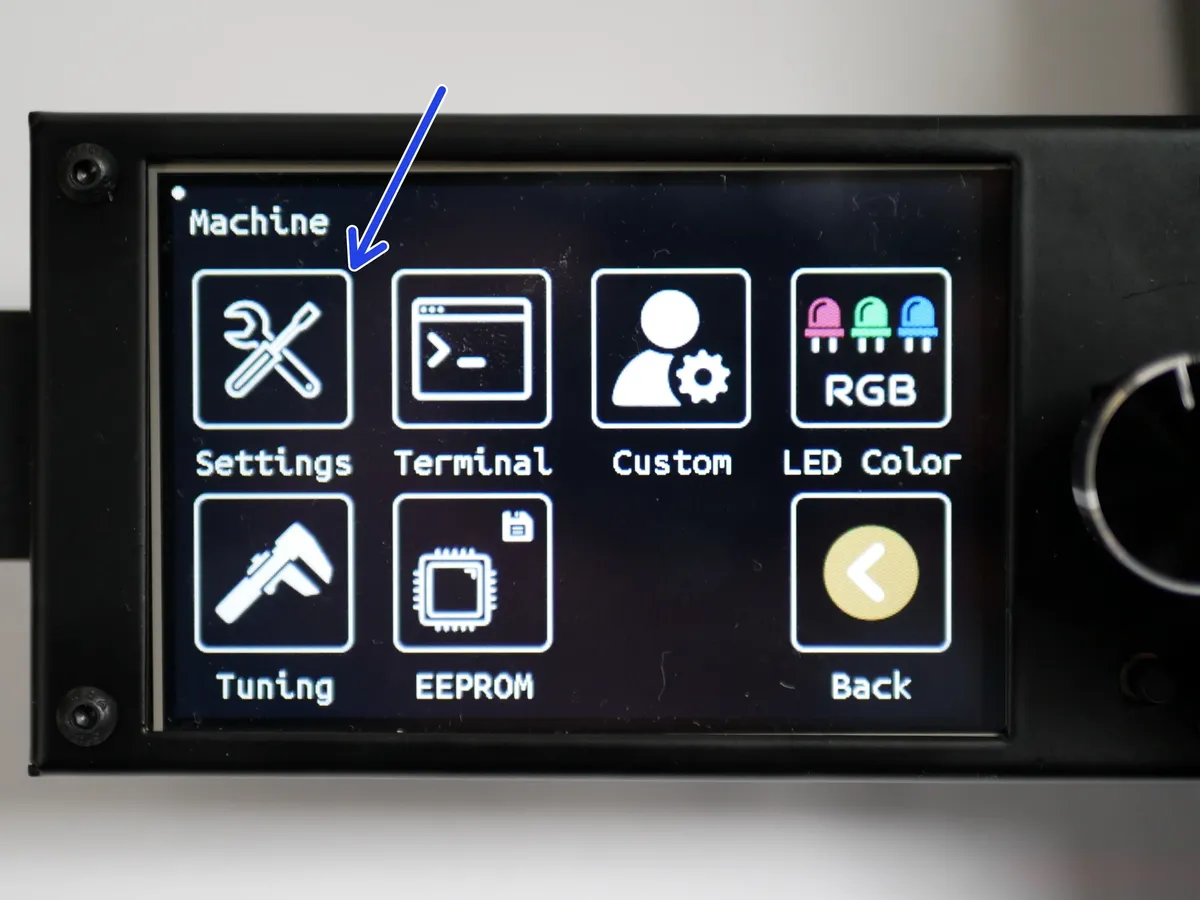
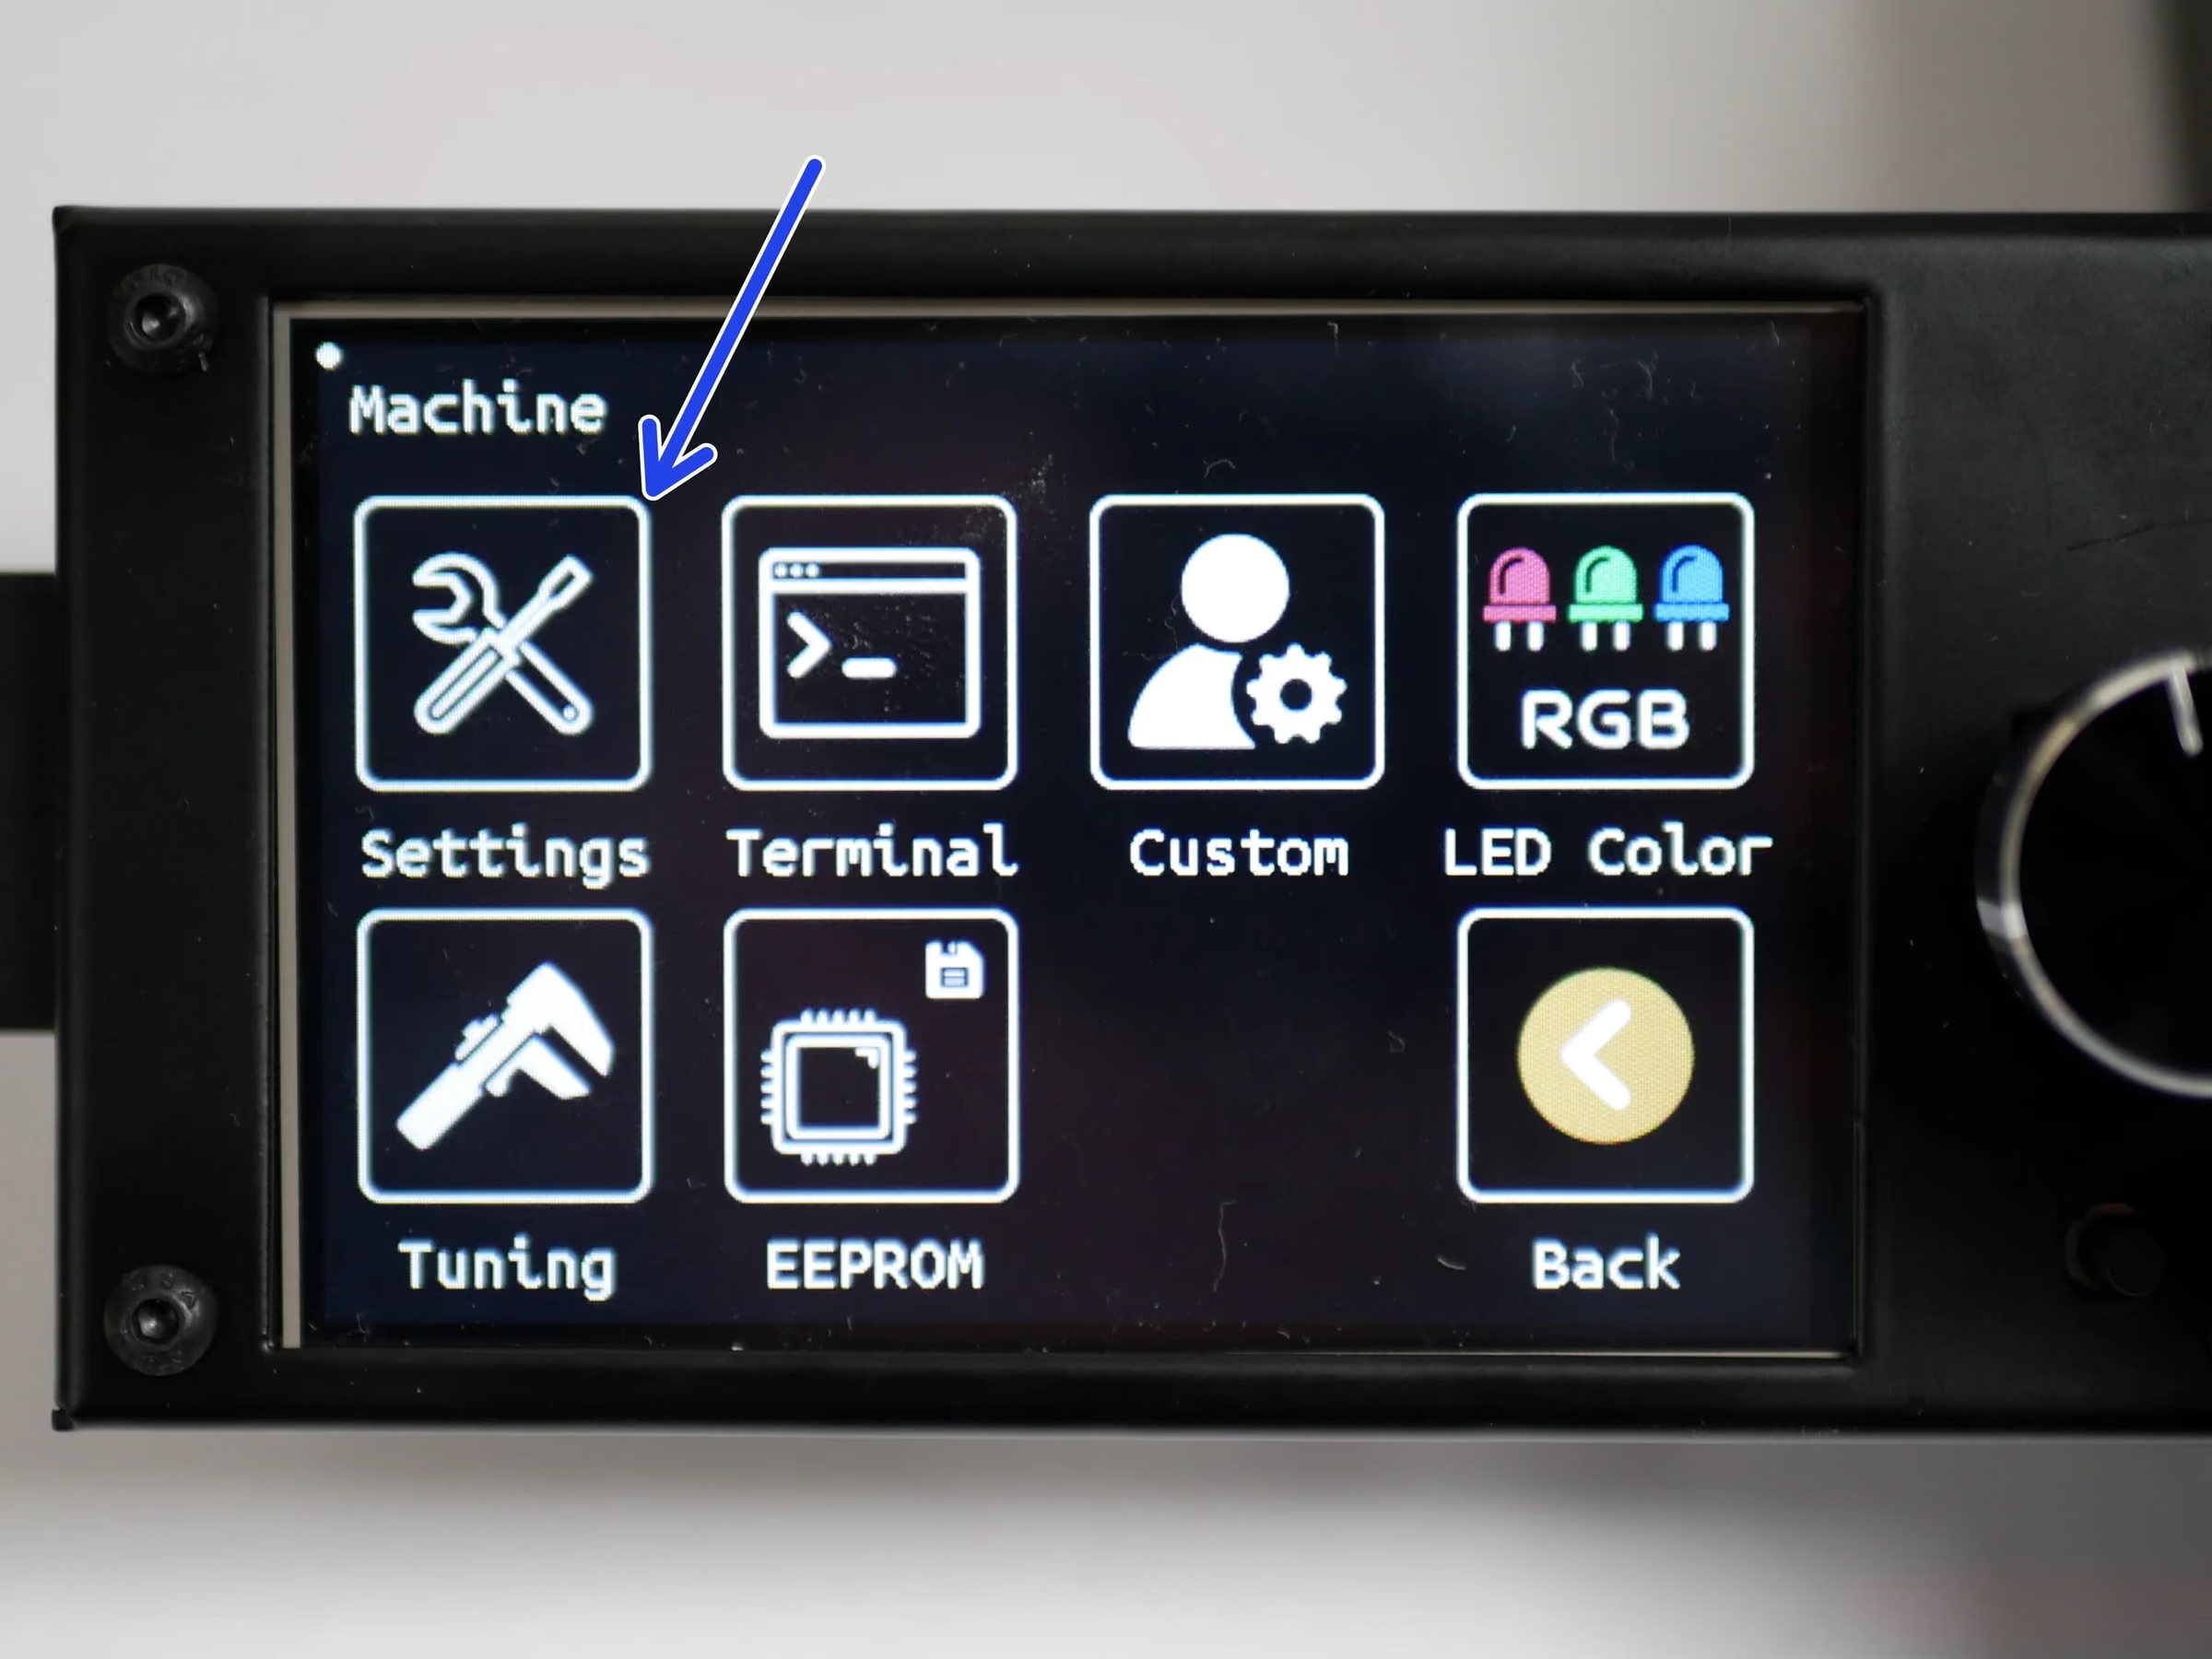
- In the menu go to Settings -> Machine -> Setting
- Scroll down to Probe Offset
- Adjust the Z-Offset
- Reminder: If the nozzle is digging into the platform, increase (+) the offset, so our initial -1.3 becomes -1.1
- Reminder: If the nozzle is too far away from the platform, decrease (-) the offset, so our initial -1.3 becomes -1.5
- Note: Save to EEPROM when done.
Loading comments…
Step 21 Calibration Print Finishes
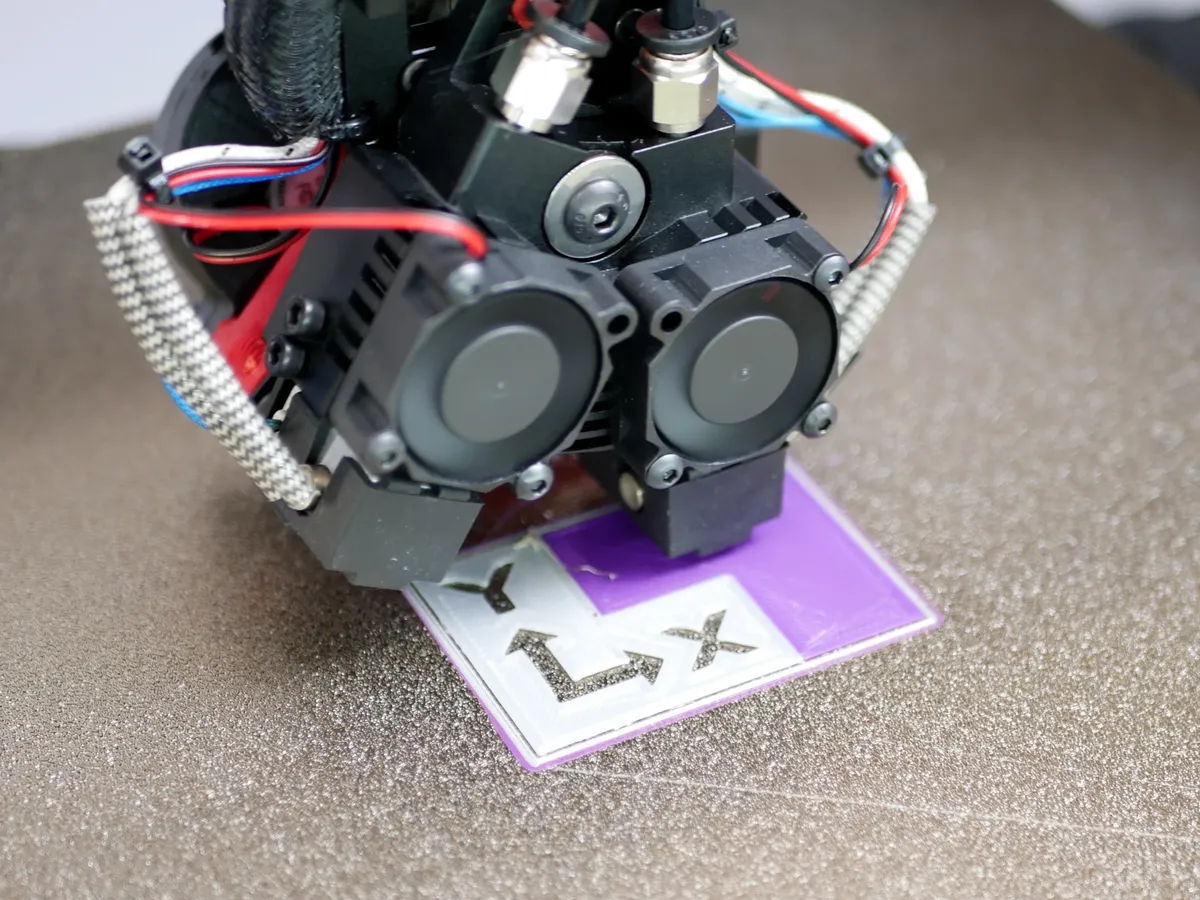
- Note: Congratulations you should have your Proforge 3 and Dual Switching Hotend all setup now!
- Reminder: If you find the two models to not be aligned perfectly, see the next few steps about calibration.
Loading comments…
Step 22 Inspecting and Calibrating the Print
- Note: The calibration print should self align. The DSH is CNC machined to a high degree of precision. If you find gaps or overlaps in your print, we recommend first investigating that everything is OK mechanically.
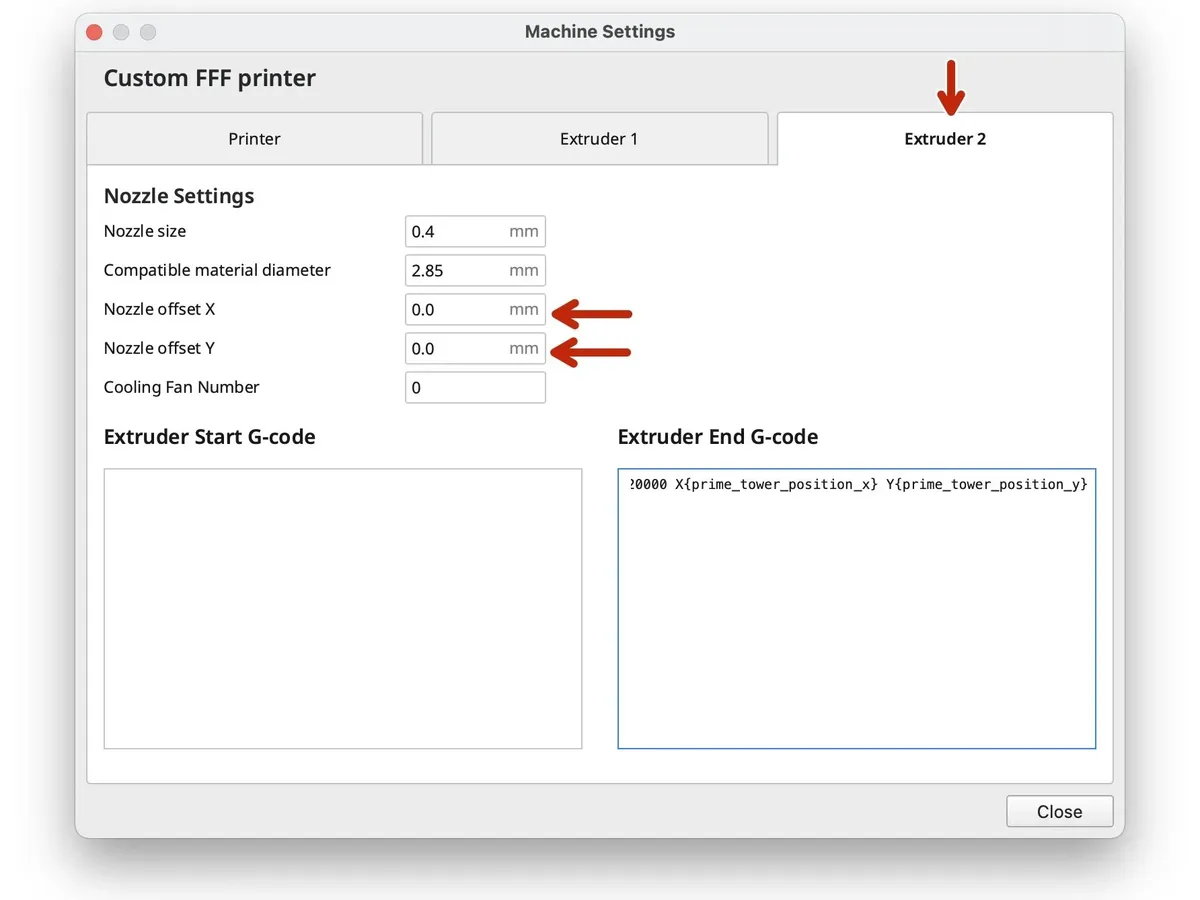
- Note: If everything is mechanically OK, then we will adjust the X/Y offsets in Cura with the aim of getting the two parts to line up.
- Offsets are entered in Machine Settings under the Hotend #2 Tab.
Loading comments…
Step 23 Deciding the X-Offset
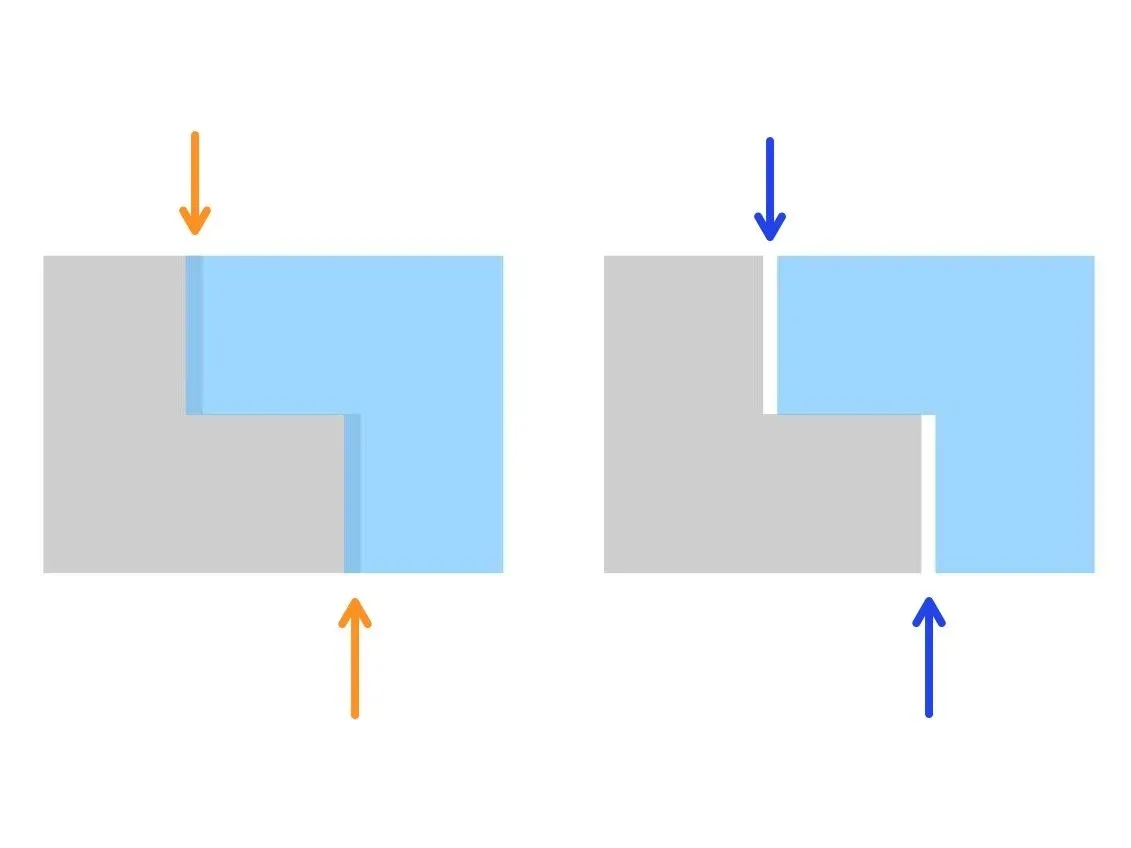
- Overlapping in X Direction:
- Note: Decrease/Negative X-Offset
- Gap in X Direction:
- Note: Increase/Positive X-Offset
- In this example case the print was fine in the X-Direction, so we left our X-offset as 0.
- Reminder: For example, if there had been a gap of 0.25mm, our offset would have been 0.25mm.
- Reminder: An overlap of 0.25mm would have meant an offset of -0.25mm.
Loading comments…
Step 24 Deciding Y-Offset Value
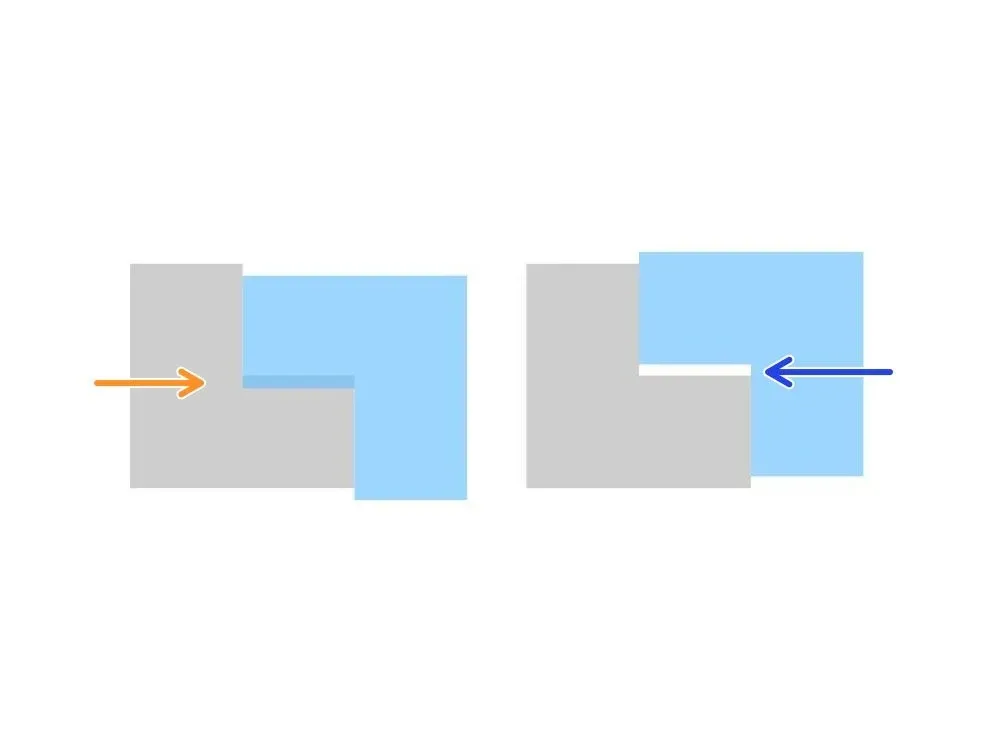
- Overlapping in Y Direction:
- Note: Decrease/Negative Y-Offset
- Gap in Y Direction:
- Note: Increase/Positive Y-Offset
- In our case the print had a gap in the Y Direction, so we set our Y-offset to 0.7mm.
- Reminder: If there had been an overlap of 0.7mm, our offset would have been -0.7mm.
Loading comments…
Step 25 2nd Calibration
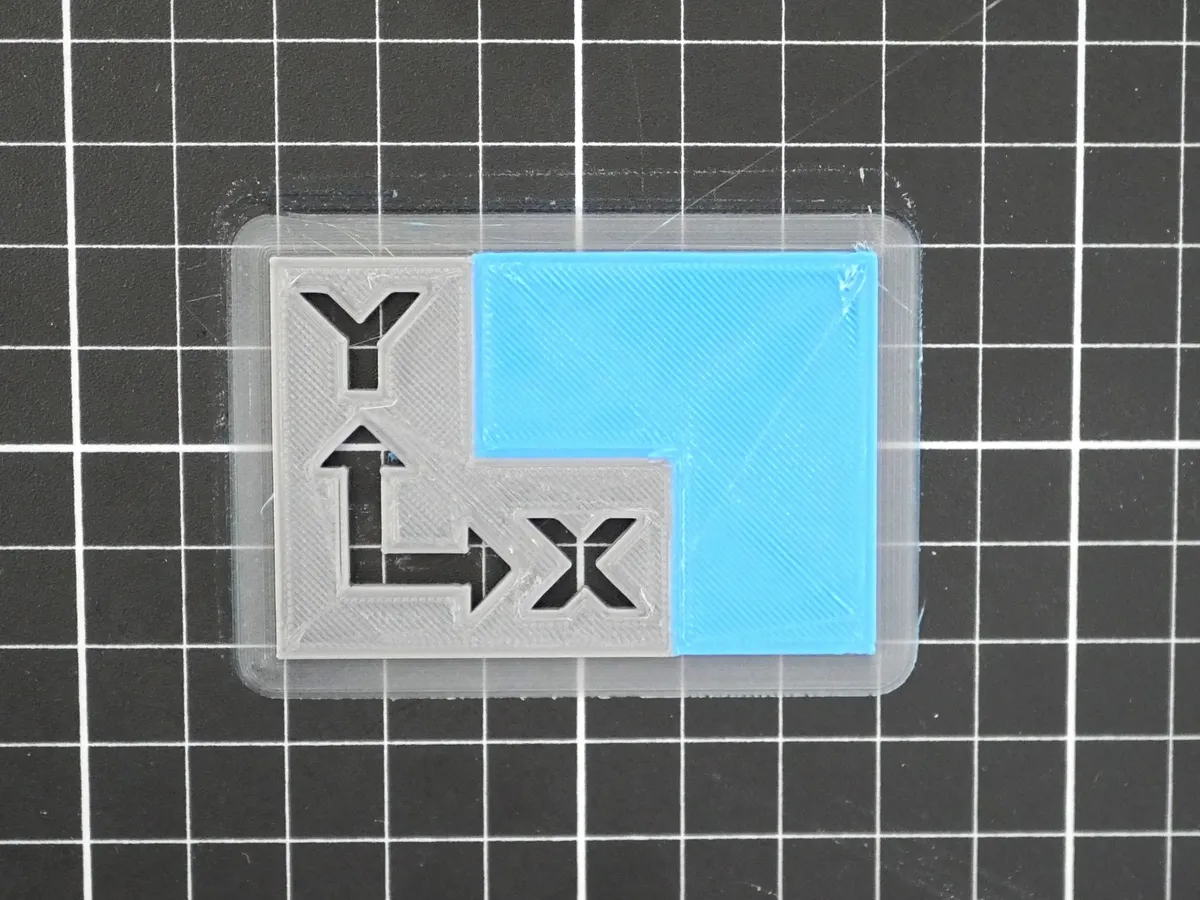
- Note: Re-slice the model in Cura and copy it onto the SD Card.
- Note: Congratulations! After printing the model again with the dialled in offsets you should have the DSH all setup.
Loading comments…